Archive for the ‘holidays’ Category

third day of advent

wreath

It’s the third day of advent and from my coloring book today you get a lovely wreath with lots of little leaves to color and a big red? purple? green? blue? bow. Click here and download it, fire up the printer and color something pretty.  As always, you can show off your mad coloring skills in the elsie marley flickr group.

And for more advent calendar lovin, check out the awesome, virtual, all tutorial, crafy advent calendar at Cut Out &Keep!

second day of advent

lights

Every day of advent I will be posting a page from my coloring book for you to download.  On the second day of advent you get a string of lights to color. Do you have lights up yet? Time to get out those crayons and pencils. Click here to download the page!

If you are extra proud of your work  feel free to show it off in the elsie marley flickr page.

advent calendar coloring book!

I am super excited to tell you about this project. After much help from my computer genius of a husband, you can now buy (for the super cheap price of $2.50) and download my Advent Calendar Coloring Book.  Then check “make advent calendar” off your list.  Done and done. All the pictures were drawn by yours truly and I had a fine time doing it. We all should draw more often. And color more often too! Because of course after making a coloring book, I had to break out the crayons and pencils and color!

My daughter, who is my little tester, has colored three whole books already and advent hasn’t even begun. And really, you could print out a coloring book a day for advent, instead of coloring one picture a day.  My kids are coloring fiends, so that much coloring wouldn’t be unheard of. And of course you don’t have to use it as an advent calendar, but just color all the christmasiness to get in a happy holiday mood.

And as a special treat, I am going to have a page to print out and color everyday for advent on my blog. So be sure to stop by tomorrow for the first one!

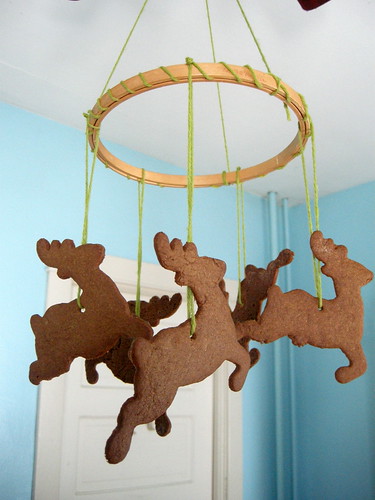
reindeer mobile

This is a Martha idea from a few years back. Super simple and it makes the whole room smell like gingerbread. My reindeer are pretty wonky (one somehow became a boy reindeer in the oven and one gained some christmas weight) Martha would not approve. If you make this, the gingerbread dough’s best quality should be sturdiness, not deliciousness.  There was an obscene amount of butter in these, so we will be eating, not decorating with, the rest. Though I’m sure these reindeer will have their feet nibbled off in no time.

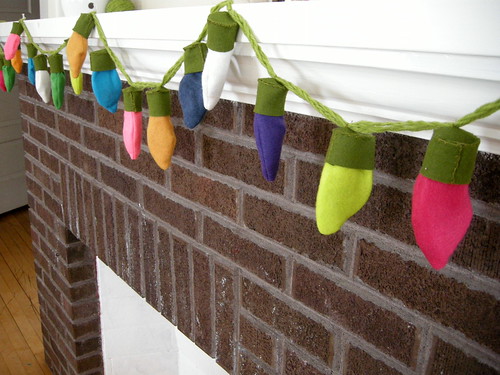
string of lights advent calendar pattern

Here it is, the string of lights advent calendar tutorial (and pattern!). I made the pdf pattern file all by myself for the first time, so if you have problems with it just email me and I’ll try to fix it. Otherwise, hurry up! because advent is almost over!
materials

green wool felt
multi-color felt scraps
60 feet green yarn
green embroidery thread
lightweight treats (gum balls, dum dums, love notes, tiny ornaments)

pattern

download here

directions

Cut the yarn into six equal pieces (10 feet each or 120 inches each or about 3 meters each). Take three pieces and braid them together. This is more difficult then it sounds, but if you roll up the slack and just work with a little yarn at a time it’s much easier. Braid the other three together the same way. Then twist the two braids together and knot the ends.  It will stay twisted when you sew the lights to it.

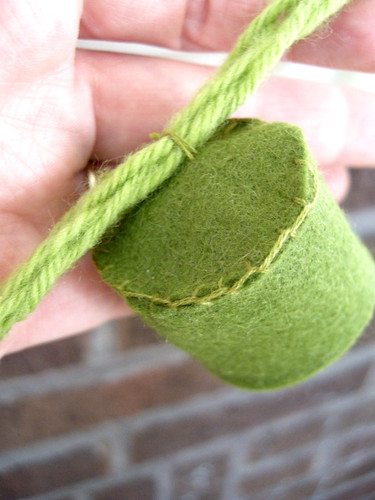
Cut out 25 (or 24 or however many lights you want) circles and rectangles. Create the socket by sewing a blanket stitch to the edge of rectangle and the circle attaching them to each other.  If the rectangle is slightly longer than the circumference of the circle clip it to fit and continue sewing the ends of the rectangle together. Sew the sockets onto the cord–one every three inches.
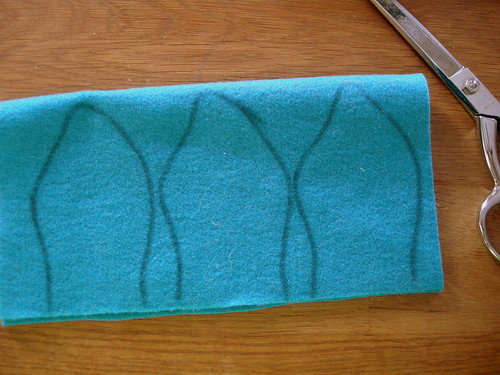
Cut out the light bulb pattern piece. To sew the lights up faster you can fold your colored felt over and simply trace the pattern onto it with a marker (permanent or not it doesn’t matter) then sew the two pieces together staying inside the lines.  To be safe test the first light to see if it fits: sew and turn out, put a treat or two inside, then fit it inside the socket and see if it stays when it’s hanging upside down. If it slips out, just make the lights slightly bigger.  If you’d rather use the lights for decoration and not for treats you can stuff the light bulbs lightly and sew them onto the socket.
I didn’t really finish the ends of the cord (I just tied a knot on both ends).  But it would be sweet to make a little plug out of felt to hide the knot. To do this cut out four extra “socket bottom” circles and two extra rectangles.  Cut a slit in the middle of one of the circles and insert your knot, then attach the rectangle, just like you did for all the sockets, and attach the other circle to the other side–making a  round (European style) plug. You can even make some prongs out of felt to complete the look.

download the pattern here.