Archive for the ‘library’ Category

sewing for boys by shelly figueroa and karen lepage

sewing for boys the book

It seems like forever that I have been waiting for a book about sewing clothes for boys and I know there are many of you out there in the same boat. The women behind the successful pattern line, Pattern for Figgy have come to the rescue! Their first book, Sewing for Boys, is full of nicely designed boy’s clothes for every season and a few accessories to boot.

raglan tee and brick bag pattern

Shelly and Karen have really thought through what boys need and want: the clothes have to be comfortable (even if they are for dressing up), durable, washable, and above all have lots of pockets! And a carrying case for legos and lego dudes is pretty awesome too.

the henry shirt

When got the book, I opened it up to the first page and fell in love with the Henry shirt. The shirt is a short sleeve, snap up, collar shirt with pockets–much like a guayabera shirt, or what we used to call “old man casual” shirts (only because my dad used to wear them). But it is just right for little boys too. And it is just right for showing off that bit of cute boy fabric you have been saving. The Henry shirt in the book is made with a beautifully subtle airplane fabric designed by Daniela Caine of Tangerine Samurai.

sleeve detail

I thought I had chosen beautiful fabrics as well: a double sided japanese fabric with checks on one side and plaid on the other; and a soft cotton in navy. Well, it turns out when you put them together it looks like my son works at a hot dog cart franchise or as a refrigerator repair man. It is a bad uniform.

the henry shirt and the wienermobile

But it is a bad uniform with a stand up collar that I made! The project was definitely above my current sewing skills (it is labeled advanced, but don’t worry there are projects for every level in the book). I was nervous going into it, especially when I didn’t see a picture for every step–I’m more of a visual learner. Turns out it was better that there were fewer diagrams because it made me read the directions more closely. And the directions in this book are clear and very succinct. They taught me how to make this shirt and I didn’t pull out one hair or have to mix up a cocktail to get through it.

the back of the henry shirt

Granted, I still managed to sew the yoke on completely upside down and had to unpick the whole thing, but cut me some slack I’ve never made a button up shirt before. Well, almost a button shirt–it doesn’t actually have buttons on it yet.  I’m trying to find some that will make it a little less bad uniform. The pattern calls for snaps, which is perfect for boys, but I think snaps will take this shirt into even worse uniform territory.

two in one jacket

The directions are good, the patterns are basic and beautiful, and the pictures are pretty cute too. So really, if you sew and you have boys you need this book.   But hoodies, tee shirts, tunics, girls wear all those things too. Even though this book says it’s for boys, whatever, let’s not get all sexist with our sewing machines now.  Next on my list is the two-in-one reversible jacket–it’s labeled intermediate, so I’m not too nervous.

boy and sewing for boy

If you would like to know more about this book or the other craft books published by Wiley, head on over to their site where they have Q & As with the authors and a few free projects too. And you can follow along on the Sewing for Boys book tour:

September 5 Made by Rae
September 6 Sew, Mama, Sew
September 7 The Southern InstituteFilm in the Fridge
September 8 Elsie Marley
September 9 NoodleheadOh, Fransson!
September 10 I Heart Linen
September 11 Anna Maria Horner
September 12 Craft Buds, Pink Chalk FabricPrudent BabySew Much Ado
September 13 Very Purple PersonQuilt StorySew Sara
September 14 The Long Thread
September 15 Susan Beal
September 16 True Up
September 17 All Buttoned UpBolt Fabric Boutique
September 18 MADEWiley Craft

sew a suit!

growing up sew liberated: crossover top

Meg from Sew Liberated asked if I would kick off the book tour for her new book, Growing Up Sew Liberated. How could I say no to a fellow Meg, especially one as talented as Meg McElwee? I loved her first book, so I knew this one, which is devoted to the littles, would be fantastic too.  And it is! Not only is it full of beautiful things to sew, but the projects are organized around a child’s day: waking up, eating, playing inside, going out to play and getting ready for bed.

crossover top from growing up sew liberated

This shirt I made from the book, the crossover top, is in the “greeting the morning” chapter. It is meant to be a simple top, but is so perfect for jammies that I couldn’t resist. I had some super soft knit squirreled away for something and this was just the something.

crossover top pattern

This is a very quick and easy project. There was one step that tripped me a up, but I still finished the whole shirt in about an hour and a half. Next time it’ll be under an hour for sure. And there will be a next time, because the boys need summer jammies too. Obviously my heart fabric makes the shirt a little girly, but the pattern itself works for boys as well. And really all the projects in the book are refreshingly unisex.

sleeping shorts

And quite simple to customize as well. Like these shorts: the pattern was for sleeping johns (what a great name!) but seeing as it’s suddenly 90 degrees here shorts were in order. I added the ribbing detail on the bottom because I had the ribbing out for the shirt–and because it’s cute. Meg has designed clothes and accessories with simple details that are lovely on their own, but also would look fabulous all embellished up!

sleeping johns pattern in growing up sew liberated

Many of the projects are just right for gifts as well. We are pretty much past the bib stage in our house, but the all-by-myself bib, which is cleverly based on an envelope style shirt (there’s a pattern for those in the book too!), looks pretty much like the perfect bib. I’m big on giving useful gifts–for babies and older kids–but I want something that is awesome as well as practical. Honestly, pretty much every project in the book fits this description. It’s nice to sew a pretty gift, but unless it’s going to get played with it, it’s not doing anyone any good. A play cape, an art satchel, a sleep sack, a cloth doll, an adjustable messenger bag, I would enjoy making all of them and I know they would all be well received and loved.

projects from growing up sew liberated

Growing up Sew Liberated is a fantastic book, simple as that. Please follow the book tour to see other sneak peeks and beautiful projects from Meg’s new book!

Growing Up Sew Liberated Blog Tour

Join Interweave Books in a celebration of the launch of Meg McElwee’s new book, Growing Up Sew Liberated. The launch kicks off with a 15-day blog tour visiting education blogs, sewing blogs, parenting blogs, personal blogs, eco-living blogs, and some that are simply a combination of all of the above.  You’ll meet some extraordinary women, see stunning photography, hear inspirational stories from Meg and many of her friends, and of course learn more about the book. Perhaps you’ll find some new favorite bloggers to follow along the way? Join us each day as we visit with:

6/6         Elsie Marley

6/7         Made By Rae

6/8         The Artful Parent

6/9         Rhythm of the Home Blog

6/10       Uncommon Grace

6/13      Simple Homeschool

6/14       Burda Style

6/15       Maya Made

6/16       Wise Craft

6/17       JC Handmade

6/20      Frontier Dreams

6/21       Made


pjs from growing up sew liberated

blog tour: crafting with kids by Jennifer Casa

Jennifer Casa, from the fabulous blog Jcasa handmade, has written a very nice kid’s craft book called Teach Yourself VISUALLY Crafting with Kids and it is jam packed with projects for all your kids. I asked my daughter to look through the book and see which project she’d like to make. The answer turned out to be every single one.

So, I sat down with her and we leafed through the book together.  When we got to the Daily Docket project, I knew this was the one. Perpetual calendars are one of my very favorite things and as an added bonus we had almost all the materials on hand to make it.

writing the months

Well, we didn’t have alphabet stamps, or rather we had L, Q, H, B and R, but we weren’t  playing Wheel of Fortune so it didn’t help us much. So instead of stamping the months and days on fabric I had my daughter write them on with a fabric pen. When she was finished we cut them out and glued them onto felt. I knew I was going to regret the glue I used and I did, because bleh, it shows through.  I should have sewed them or rustled up some fabric glue, but whatever.

putting everything together

For all the letters and numbers and clouds and things, I had my daughter draw them and then I made patterns from her drawings. This was a totally unnecessary step, but I think it made the project more hers than mine (which is was supposed to be, right?). The weather bit isn’t in the directions, but I had just seen Abby’s felt weather board and I thought it would be perfect with this project.

working together

Because there were more little bits now with the weather forecast and because my children love to organize things, I sewed four pockets instead of making one big one. O.K. maybe I should stop, because wow, Meg, you sure are taking a lot of liberties with this project. I mean this is a review of a book, right?  I did make changes here and there while we were making the calendar, but that’s what is so great about this book. There are so many simple projects in this book that you can use them as jumping off points for your children’s crazy creativity. It’s nice to have tutorials and books that teach us to make something just so, but it’s also lovely to have open ended projects that your kids can enjoy over and over again, each time in a new way.

calendar detail

I made one more little change to Jennifer’s awesome project, one that I was kinda sad about. I used a stick (straight from the yard) to hang the calendar instead of grommets. The grommets are one of the coolest bits of this project, but sadly,  I am not cool enough to own a grommet setter. So a stick and some loops and ta da! a fantastically homemade perpetual calendar. So many good things rolled up into one!

felt calendar

Thank you Jennifer, for including me on your blog tour for your wonderful book! Would you like to own your very own copy? Jennifer has kindly offered a signed copy shipped to the door to one of my dear readers. Leave a comment on this post and I’ll pick a winner on Wednesday! Good Luck!

There are a few more stops on the bloggy book tour and some more chances to win a copy too:

THE GIVEAWAY IS CLOSED! KRISTA, #7 WON! YAY KRISTA!

interview with Abby Glassenberg

cover of the artful bird by abby glassenberg

Fighting one illness after another postponed my stop on the Artful Bird‘s blog tour, we’re finally better and I’m so excited to share my interview with Abby with you. Abby is not only a talented plush artist, but a generous artist as well: she often shares her sketches and mistakes and let’s us in on her creative process on her fantastic blog, While She Naps. Recently, she has been teaching her readers how to think and sew three dimensionally in a series of posts on sewing soft toys.  Abby is a wonderful teacher and makes beautiful soft sculptures, which makes for a pretty fantastic author of a pretty fantastic book.

crow by abby glassenberg

What made you want to make soft sculpture and toys?

I love thinking in three-dimensions.  The challenge of making my sketch come to life as a stuffed fabric toy or sculpture is something I can’t resist.  There are so many options, so many beautiful materials and interesting techniques that make it all come together.  It just makes me happy to sit down and try.  And when it works…man, that’s thrilling.  I feel like I could explore softie making forever and never be done.

How do you choose what kind of birds to make?

Each bird came about in its own unique way.  For instance, I was out on a walk with my kids in this little nature preserve behind our house and found a piece of tree bark. It was a good-sized piece and was totally intact except for a round hole that had clearly been pecked by a woodpecker. I brought the bark home and made a woodpecker to perch on it.

The flamingo was a dare. Could I balance a bird that was leaning over?  Yep.  Fun!

The chick was all about the materials. I thought it would be cool to sew a  bird from fluffy terry cloth.

So each bird has a story to tell about how it came to be.  I just try to be open-minded and not be afraid to accept a challenge.

flamingo from the artful bird

What roll do mistakes play in your process?

Mistakes are part of each and every sewing project and they are hugely important, no matter how aggravating they can be at times.  Each bird pattern started as a prototype.  I drafted the pattern, sewed it up in muslin and then stuffed it to see how it looked.  Then there’s an editing and redrawing process to fix the mistakes in the prototype.  Sometimes the second draft doesn’t quite work either and more editing and redrawing is needed.  I try to constantly remind myself that even if something ends up in the garbage, it is not a waste of time.  I may not be able to totally fix it now, but in a few days or weeks or years the solution will come to me and I’ll try again.

And hey, sometimes I make beautiful mistakes!  The head on the raptor started life as a doll’s head.  I had it all sewn up and stuffed on my desk, but the doll’s body just never materialized.  So I sewed a bird body instead, attached the doll’s head, and voila!  A new bird was born.  And I rather like him, too!

raptor by abby glassenberg

I love how you often use contrasting thread to make your birds. Was that an accident or a conscious design decision?

I think it was an accident the first time it happened, or rather laziness on my part.  My machine is nearly 20 years old. It is a Bernette 330 and the Bernina dealer is really far away from  my house.  As a result, I was lacking in basic supplies for many years. For instance, I only had one bobbin. What a huge pain! One day I had a dark thread wound around it and didn’t want to unwind it to switch threads for a white bird because that would have been a big waste of thread.  I just threw caution to the wind and decided to sew the bird in dark thread. When I had it turned and stuffed I really liked that each seam was visible. I like that you can see the maker’s hand in the finished piece.  After that, contrasting thread became a regular design element in my work.

Do you feel like you’ve given away all your secrets in your book? Or do you have plans for more books?

I had no problem giving away a bunch of my secrets in The Artful Bird.  It is amazing to see people making their own birds now, and I’m thrilled that my techniques can be used and adapted by anyone interested in fabric bird making.  I do have a plan for one more book. It is actually an idea that pre-dates the idea for The Artful Bird.  Let’s keep our fingers crossed.

gallery of bird makers in the artful bird

The profiles of other bird makers at the end of the book is such a lovely and generous thing to do. How did it come about?

I have been inspired for years by the four other fabric bird makers that I feature in the book and I really wanted to include their work so that readers could share in that inspiration.  I was so excited when all four of them agreed to participate. Having a conversation with each of them about their processes for making fabric birds was amazing for me.  It really was a highlight of the eight months that I worked on the manuscript and projects for the book.  I owe each of them a sincere thank you.

*************************************************************************

Thank you so much Abby!

tin foil noodles

The other day we wrapped some tin foil in noodles. I thought they made for a pretty stylish necklace.

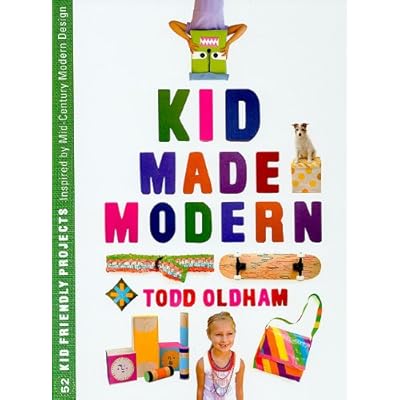
The project came from Todd Oldham’s awesome book Kid Made Modern. His first book, Handmade Made Modern, was decent, but this one is super fantstic. I think it’s aimed at kids around the ages 7-12, but there are some projects little ones can do and I would have loved it as a teenager–really even if you don’t have kids there are some super styish ideas you can steal.

In the book, Oldham takes mid century designers–Isamu Noguchi, Marimekko, Alexander Calder, Paul Rand, Charles and Rae Eames and so many more–tells you a little about them and their art and then presents a couple projects inspired by their work. The projects are organized by material–many of them recycled–or technique.   The printing, cardboard, tape and dye sections are some of my favorites, but I was taken by most of the projects.

I  didn’t mean for this to become a full on book review (I was just going to tell you about the noodles) but I think this is a fantastic craft book that is well put together and well thought out. And definitely not only for kids. If you feel like wrapping noodles in tin foil–you really don’t need the book for this project– but I would dab a little bit of glue on the noodle before you roll it up. We didn’t and I kept finding bits of tin foil around the house for the rest of the week.

Oh and look there is a kid made modern website with some extra projects and little videos, check it out!