Archive for the ‘tutorials’ Category

guest post on grosgrain

I don’t know if you’ve seen what is going on at Grosgrain this month, but it’s pretty amazing. Kathleen has asked bloggers from all over (me included!) to draw up a sewing pattern, so everyday until June you get a fabulous free pattern! All of this is working up to a new blog for Grosgrain and more free patterns–hers! If you haven’t seen the amazing dresses she’s made you are in for a treat and you will be just as excited as I am about making them.

see what I mean? and her kid’s clothes? even better:

You can see all of her creations here. And you can check out my pattern for Knot Shorts while you are at it. Maybe even make some or at least put them on your list for KCWC. Do you have a list yet?


the awesome bag

This bag is truly awesome. It’s a messenger bag, a shoulder bag, a completely reversible bag…it’s so many different bags in one you have to make one just so you can discover how awesome it really is. And you can! Because I wrote an awesome pattern for it.

Shannon from luvinthemommyhood is encouraging the sewers and the knitters to duke it out finally and see who is left standing. So this is my little one-two for the sewing side.  No, it’s not foxy boxing, but it is one month full of super fantastic knitting and sewing tutorials with some friendly competition thrown in for good measure.  Sounds awesome, right? Head over to her blog for The Awesome Bag tutorial!

Once more for no good reason: awesome.

balance board tutorial

This tutorial is for the fantastic Celebrate the Boy series by Dana and Rae, because what could be more boy then standing up and falling down over and over again.

balance board

A balance board is an incredibly simple toy. You put a board on top of a cylinder, stand on it, then try not to biff it. It is really a fantastic toy for all ages (though my toddler is a wee bit too small). I’ve even found myself fighting for a turn.

For the balance board itself I don’t have a list of materials or even measurements for you. The directions are basically, go look in the basement or the garage and see what you got.  The longer the board the easier it will be to balance. The width doesn’t matter so much, but your kids should be able to fit their feet on it.  As for the cylinder, I started with a piece of PVC pipe, but it was just too high for my kids (perfect for me though!) so I used an 1 1/2 dowel cut down to the width of my board. I couldn’t actually find the dowel when I was decorating the board and taking pictures, so what you see above is a block from my kid’s toys. What I’m trying to say is, you can make this toy with what you have, all I’m going to show you how to do is pretty it up.

I wanted something on top of the wood to protect my kids’ feet and make it easier to grip. Duct tape to the rescue!  You could easily just do stripes, but I thought why not make something super stylish instead. To make the chevron pattern, first you have to rip the duct tape into strips.  Cutting the tape is almost impossible, so just clip a bit at the end of the tape and then rip it into strips while it’s still on the roll. I ripped my tape in thirds, but ended up only using the right and left sides–the edges on the one in the middle were just too raggity to use. So I would suggest just ripping the tape in half. You will waste less (though my son did have a hey day with the extra tape), but the chevron stripes will be much thicker.

The length of your tape strips will depend on how wide you board is. Play around a bit to see how you can make a few zigzags  fit just right. For the first chevron stripe, start in the middle and make a V with two pieces of tape, making sure the point of the V is in the center of the board. Now that you’ve zigged, just zag out to each side.

For all the other stripes, start from the right and work your way across. Put one tape strip down, then overlap the end of that piece with your next  piece, as you can see above. Use the manufactured edge–because it’s super straight–to overlap a little bit the stripe that came before. Then trim the ends flush with the sides of your board. That’s it. Just keep going until you’ve filled the whole board. This project is a little fiddly at first, but don’t worry after 3 or 4 stripes it picks up speed and you’ll be wiping out before you know it.

You can decorate the dowel with all the leftover bits of tape. It’s not necessary, but it does make the dowel much easier to find. :)

The more I play with this toy, the more I like it. It works inside and outside, it’s a good gift to give kids, and it’s endlessly customizable. I made another one painted it with a little leftover paint mixed with sand (so it’s non-slip) and I have ideas for lots more. So if you know me, you children will probably be getting a balance board for their next birthday. Or I might just keep them all for myself.

from the north country: fox and owl

It’s been so fun to read these wintry posts.  I like winter for many of the same reasons as my fellow guest bloggers but  I think mostly  I like it out of necessity…otherwise I’d be crabby straight through from October to May.  Getting outside even just for a bit is a high priority for our family but there are some days (like today) up here in Minnesota where it’s just too cold to have much fun outside.  On these days crafts and art projects are in order, so here is a fun sewing project for grown-ups and young sewers alike:

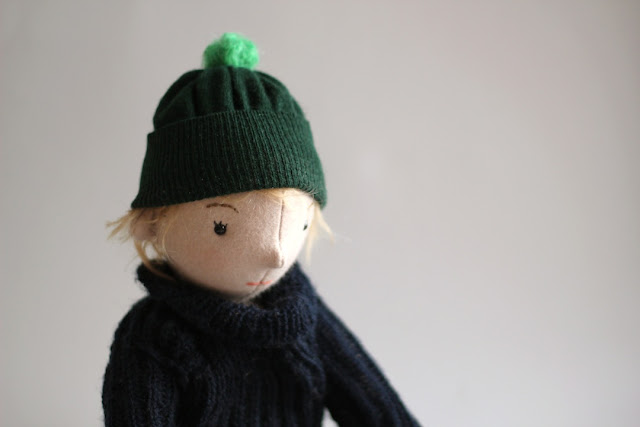
A Stocking Cap for a Small Friend (my first tutorial!)

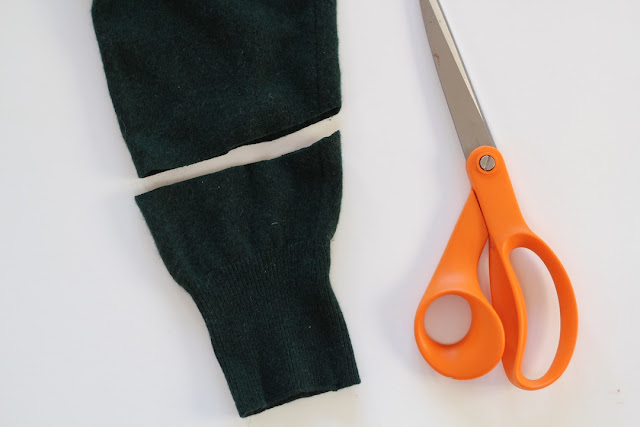
Cut off the cuff and a couple of inches of sleeve from an old sweater.  A sock would work very well too.


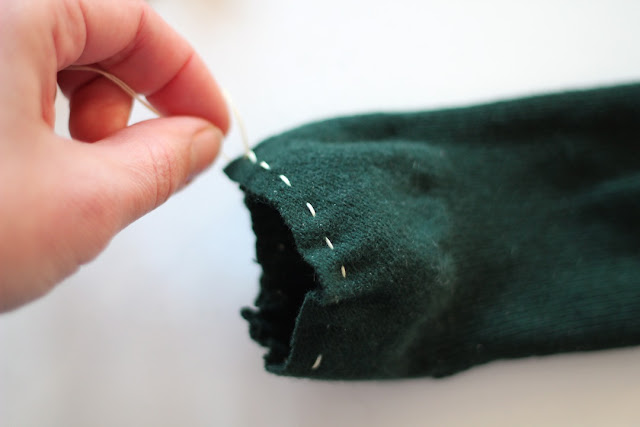
Turn the piece inside-out and do a running stitch about 1/4″ from the cut edge with strong thread all the way around the top.  Pull tight and secure with a knot.

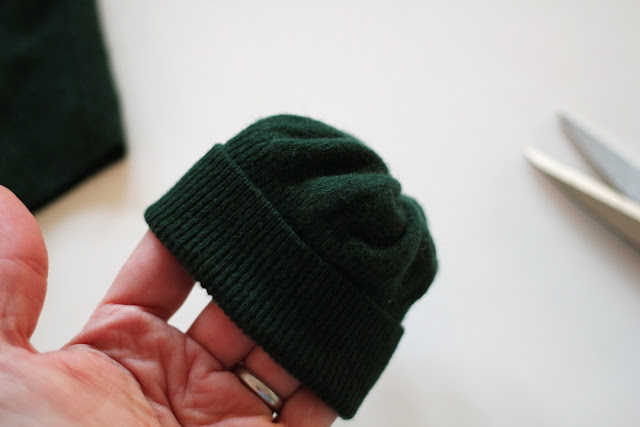
Turn it right side out and fold up the cuff a bit…hey look, it’s already so hat-like!

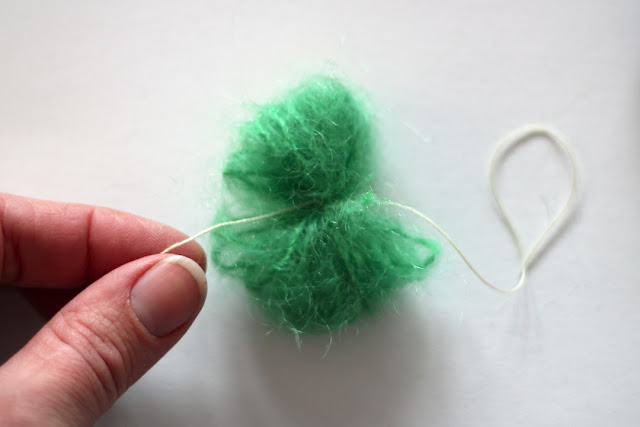
Now make a little pom pom.  There are lots of places to lean how if you have never made one before…like here.

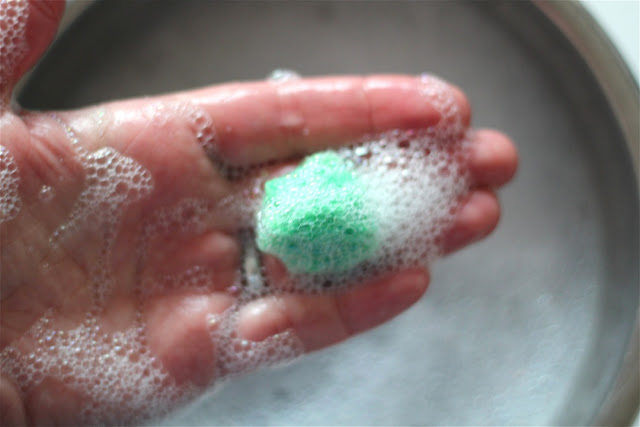
I like to felt my pom poms a bit by rubbing them between my hands in warm soapy water.  This step is not necessary but I think it looks super cute and helps scale down your pom pom.  The yarn must be wool in order to do this step.

Now stitch the pom pom to the top of the hat.

finis

<<<<<<<<<<<<<<<<<<<<<<<<<<<<<<<<<<<<>>>>>>>>>>>>>>>>>>>>>>>>>>>>>>>

I’m Erika from Fox and Owl.  I make dolls and animals and drawings and have a little blog where I talk about art and craft and show lots of gratuitous pictures of my adorable children.  Come visit me there sometime!

Thank you Meg for letting me be a guest on your excellent blog!

From the North Country: Beeper Bebe

I’m with Rae (see previous post).  I too get a little crazy this time of year when I am cooped up inside for too many days with my kid.  When I find my son is doing dismounts from the back of the sofa, the living room looks like  the aftermath of small cyclone, and I am contemplating a glass of scotch even though it is barely noon, well, I know it is time to put on our boots and find some distraction outside the house.

This is where living in a city comes in handy .  Aside from the library, one of our favorite places to visit is the Minneapolis Institute of Art.  My boy has been really, really into drawing lately and has been interested in the work of other artists, so on our most recent visit we took along a sketch book and some colored pencils.  I told him that when he saw something he really liked, we could grab a seat and he could do some drawings of that piece of art.  Now, I admit, I thought he might balk at the notion of slowing our pace through the gallery (because when you are 6 and a boy, it is all about moving at roughly the speed of sound–and maybe throwing a couple of karate kicks in there), but he was actually really excited by this idea.  So off we went and you can see some of the resulting sketches.

Which brings us to this little tutorial I have for you–it is a scenic patchwork sketch book.  And what the heck is that, you ask?  Well, just a Moleskine cahier notebook (I used the x-large plain version–they come 3 to a pack)  customized with a nice little patchwork of fabrics that together form a scenic sort of design.  So the world is your oyster in terms of what you work out for your design here–you can see I did woodland and city themed notebooks below–but it could be anything from outer space to the circus to school…or whatever.

Oh, and I also thought I would share the photos of these sketchbooks I made last Christmas as gifts for a few of the kiddies in my life–just because having some options is always nice.  They use the same essential technique but are monogrammed with the first letter of the child’s name.  Simple.

Want to make some for yourself?  You can download the instructions for the scenic patchwork sketch books here:

DOWNLOAD SCENIC SKETCH BOOK INSTRUCTIONS

And just remember, if the sketchbook fails to provide enough distraction when you start to get cabin fever and your kids are bouncing off the furniture, there is always scotch (no further commentary necessary, Meg–or Rae).

———————————————————————————————————————

Outfitted with sketchy knowledge of toy design at best and a hand-me-down sewing machine, I began designing plushies back in 2005, naming my little company Beeper Bébé.  Today, I design all manner of toys and other things, usually incorporating recycled stuff, and love to share tutorials on my blog.  I live in Minneapolis.  Future goals of mine include moving to France with my family, becoming a cowgirl, finishing that novel I started writing 15 years ago, learning to quilt, redesigning Little People for Fisher Price so that can be as cool again as they once were, and drinking scotch on my back step—not necessarily in that order though. You can find more of me at: http://chezbeeperbebe.blogspot.com/ and buy the stuff I make at http://www.etsy.com/shop/beeperbebe.  Hope to see you around some time.