Sorry, I was going to post this on Tuesday but the week just got away from me. This week’s things on the internet that are awesome aren’t things, but a few site that I’ve found to be particularly fantastic.

The first is a fairly new site devoted to talking about creativity called Make and Meaning. A lot of craft is done in public way now, thanks to the international stitch and bitch that the internet created, and there are a lot of new issues to talk about. Some of my favorites so far are the article on crafting and irony and blogging and mediocrity. This site is run by a fantastic group of people (futurgirl, sister diane, dudecraft, to name a few) so I’m sure we are in for many long and lively discussions.

One of the things I miss most about my life before children is reading the New York Times, Sunday especially, but really any day will do. Now I’m lucky to read one article online. But the one I did stumble upon this week led me to this blog about creating zero waste. Granted the author of the blog is a little on the crazy side (all white house!) but she presents her way of living in a compelling way. In a letter to whole foods she asks them to “give [us] credit for [bringing] home jars and bags…not just grocery bags: some of us have graduated from the grocery bag level.” I think it’s time we all graduated from the grocery bag level.
The last site is a blog run by my friend MaryJo. She is an amazing seamstress, knitter, crocheter, mother, canner, farmer, business woman, and about a thousand other things. She has spent this last week on her blog talking about the tools of the (sewing) trade. And they are awesome. I bet you don’t know what this is:

but you always needed it. Go see find out what it is here and see other three here: pattern weights, from the doctor’s bag, bias tape makers.
Posted in inspiration. 5 Comments »

Your stories kept me laughing all weekend long, thank you! If you haven’t read the comments go check them out–there are some crazy boy antics in there. Now for the winners:
- ~Heather Says:
February 19th, 2010 at 8:10 am e
When my sons were in utero my cat used to sleep next to my belly and when she purred my little guys would move around in response to her deep, lulling sounds!
I think the plaid belt would be great for any season, on winter jeans or summer shorts! ~H
So Allison gets the wood grain belt and Heather gets the plaid one. I’ll email you to get your addresses. I hope they fit your boys!
Thanks to everyone who subscribed (or followed or whatever). And while we are talking about RSS feeds, let me put a plug in for google reader. It really is a fantastic way to read all the blogs you follow. Pip had a post a while back (edit-sorry I forgot the link!)about all the cool stuff you can do with google reader and it’s very good so just go read it, so I don’t have to say it all. There is also a “share” feature there that I’m curious about: You can share posts (from other blogs) that you find interesting with all who are on your sharing list. Does anyone use it? I have some sites I’d like to share with all of you (google reader users or not) but I’ll save that for tomorrow.
Posted in misc. 2 Comments »
Wow! There has been such an amazing response to the boy belt tutorial! I think there must be a lot of boys out there running around with their pants falling down–no more!

To thank you for all your kind words and links I thought I’d giveaway a few of the belts I made, because as you can see they are not keeping any pants up around here. The skinny plaid one and the wider wood grain belt are up for grabs (for a better picture look here). If you’d like to enter tell me a funny story about a little boy you know–a brother, a son, the crazy little boy down the street. There is always one who tried to fly from on top of the refrigerator or covered himself in crisco or skiied down the basement stairs. If you can’t think of a story, just tell me which one you’d like. And if you’d like to be entered twice you can subscribe to my blog (and tell me in your comment) or link to the belt tutorial on your blog or tweet it. Or all three if you’d like, but I’ll only love you more–just 2 entries max per person! I will pick two winners (pick a winner!) on Monday morning, February 22 CST. Good luck!
Posted in misc. 155 Comments »
My middle son is jumpy and crazy and skinny and tall–all of which make his pants fall down quite often (if he is wearing pants that is), so I thought I’d make a belt for him. In honor of Celebrate the Boy month at Made and Made by Rae I drew up a pattern to share with all of you.

The finished belt is 1 1/2 inches wide and adjusts to fit waist sizes of about 20 inches to 24 inches. To make a different size take the waist measurement you want to use then add 8 inches: the main fabric will be (waist size + 8)inches by 3 1/2 inches and the lining fabric will be one inch shorter.
Materials:

- one piece of fabric cut 30 inches long and 4 inches wide, preferablly cut parallel to the selvege, but as long as it’s not cut on the bias it will work out just fine.
- one strip of canvas or denim (or something that is a similar weight) 29 inches long and just shy of 1 1/2 inches wide.
- three snaps and snap setting tool
- one 1 1/4 inch D-ring
- scissors, pins, iron, sewing machine
Steps:
- Fold your strip of fabric in half the long way (wrong sides together) and press.
- Open the fabric back up and with the right side down, fold the top edge down 1/2 inch and iron, then fold the bottom edge up 1/2 inch and iron.
- Set your strip of canvas or denim on the bottom half and fold both short ends over it and press
- Miter your corners: fold the corner diagonally, so it makes a right triangle where the middle of the longest side (the hypotenuse if you paid attention in geometry) of the triangle lies on the point where the folds of the short end and the long side meet. This makes much more sense if you just look at the picture. And this is just how I do mitered corners, of course you can do it any way you know how.

- Sew all around the belt anywhere from 1/8 inch to a 1/4 inch from the edge–whatever looks best to you.
- Pick one side of the belt to be the right side (the one that will face out) and put that side down. Slide the D-ring onto the left end of the belt, fold the end over it one inch and sew down. Sew back and forth a few times to make sure it’s secure.
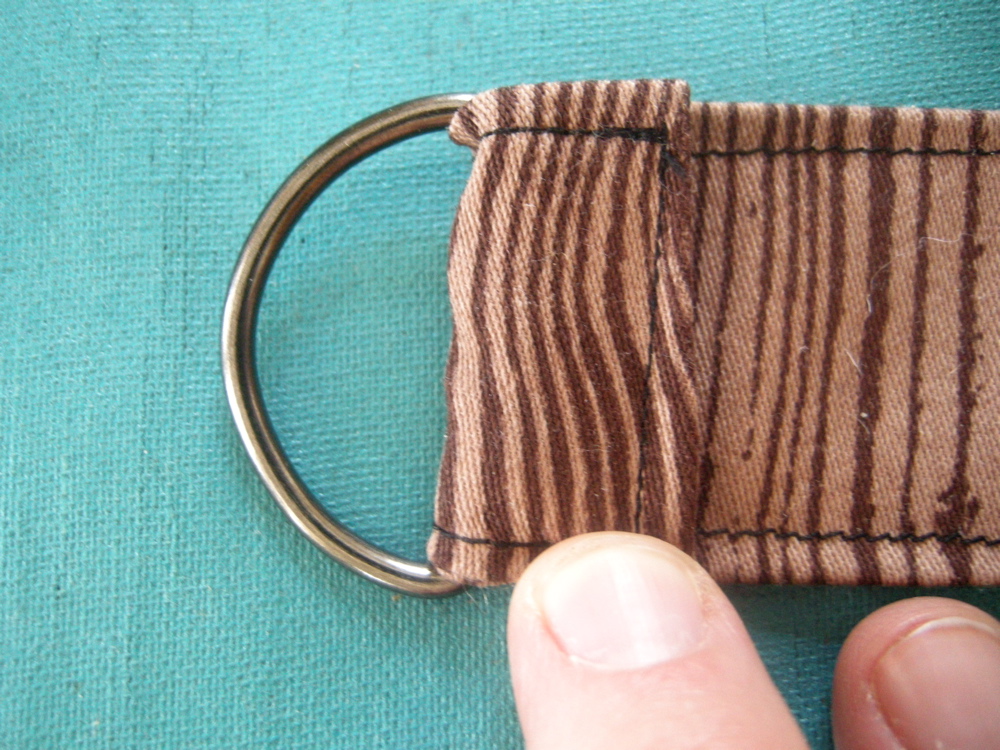
- Now for the snaps (I used heavy duty snaps for the wood grain belt, but there are a lot of options out there). With the right side down again and the D-ring to the left, attach the top part of three snaps: the decorative part on top and the male part (for lack of a better term) of the snap on the right side of the belt. The snaps should start about 1/2 from the end and be about an inch or so apart.

- 6 inches to the left of the last snap attach the bottom part of the snap: the female part of the snap should go on the right side of the belt and the very bottom piece of the snap should go on the wrong side (the side that will face in). This seems wrong, but it’s not. The belt will go through the D-ring and then fold back on itself and snap.

- Find some pants with belt loops and try that sucker out! Look at you, you just made a belt!
Variations:
- To make a skinnier belt, your fabric strip should measure 30 x 2 1/2 inches and the lining should be 29 x 3/4 of an inch. Then just follow the directions for the wider belt.
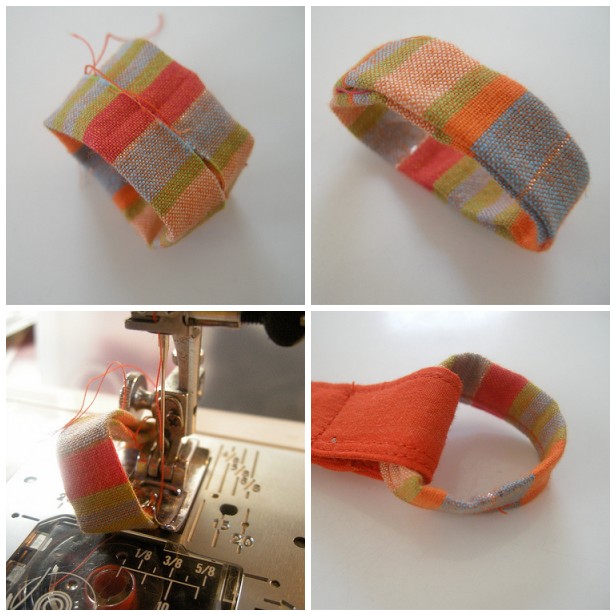
- I thought it would be nice to have a fabric buckle for baby belts (yes, it’s ridiculous I know, but so are baby sneakers and I bet you have some of those) so the metal doesn’t jab their pudgy tummies, or if you don’t have a d-ring around, or if you’d just like to make a cool fabric buckle, whatever, this is how you do it:
Cut a piece of fabric that is 6 x 2 inches (for the skinnier belt, cut 4 x 2). With right sides facing sew the ends together, so you have a small fabric ring, then fold both the edges in (wrong sides together) to meet each other in the middle. Fold in half again and sew. It’s easiest to sew with the loop going up over your presser foot than the other way around. Attach the fabric buckle just like you would the D-ring, making sure the seam is hidden under the fold and the nice side is facing out.
- Buttons! Sew button holes where the snaps would go and then sew some buttons on.
There are so many other things that can be done with this belt: topstitching, grommets, snaps all around, a matching mama belt! If you make one from this tutorial (or any other tutorial of mine) remember to add it to the elsie marley flickr group. And please add a photo or two to the Celebrate the Boy group on flickr too!
Go Boys!
Posted in tutorials. 44 Comments »
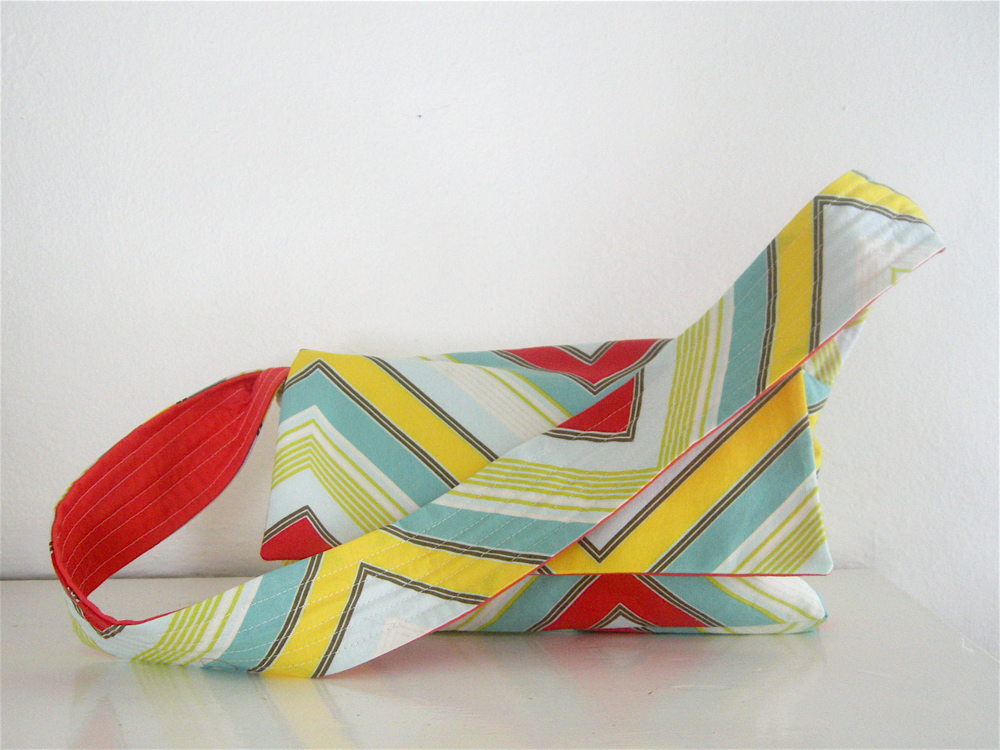
I put some new kiddy messenger bags in my etsy shop today. I am working on a pattern for this bag, but since this third baby came a long things seem to be taking three times as long, so you’ll just have to be patient. My daughter started insisting none of her drawings be folded, which they have to be in order to fit in her bag, so she’s asked (demanded really) a new, bigger back pack. I might just have to draw up another pattern while I’m in the pattern making mood.
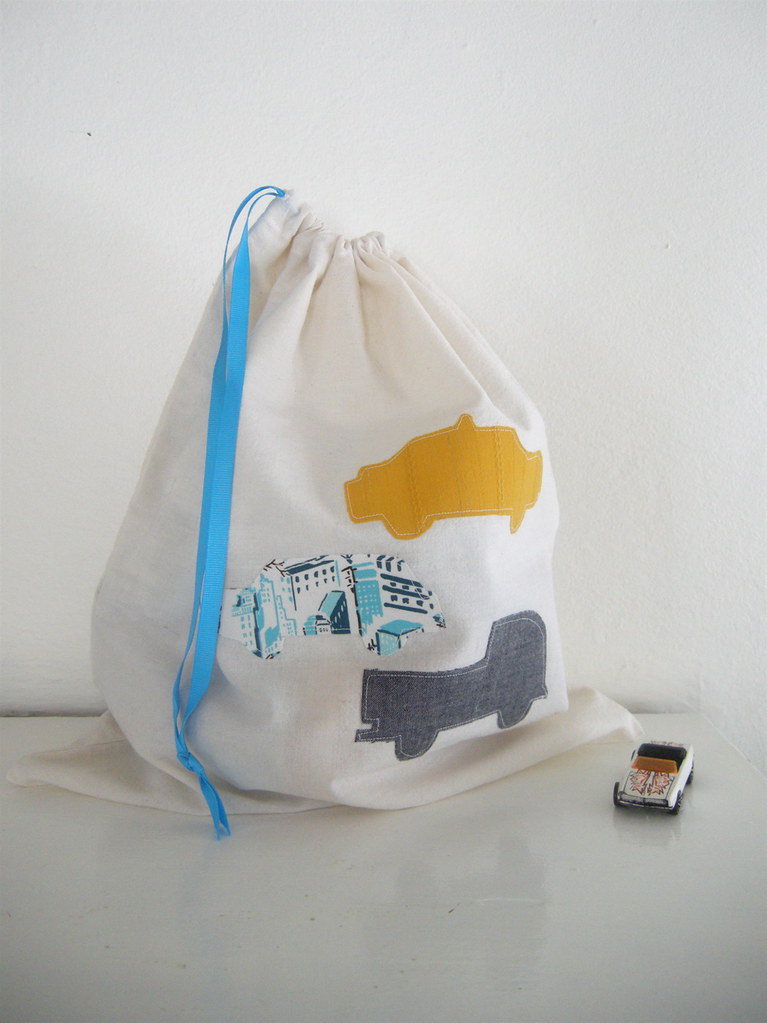
I also put a couple new toy bags in the shop: one little people bag and one with a new car design. And while I was working in my studio I found a lonely little bear in a pile of fabric waiting to be loved. Her name is Lucy and she’s made from a vintage sheet and cashmere and stuffed with wool, so she’s soft and super huggable.
If you are here from design*sponge, welcome! Take some time and have a look around. I hope you all have a good valentine’s day weekend! See you next week.
Posted in sewing. 6 Comments »


