from the north country: mine creations
January 28th, 2011
In the winter, we tend to hibernate a little. Between snow days from school and work, and days when it’s just too cold to even think about leaving the house. Days when the bite of cold air from opening the door just to let the dog in and out chill you right to the bone. On those days, you cozy up in flannel pjs, wool slippers and sweaters and putter around the house.
I’ve found that the kitchen really is the best place to cozy up on these bitter cold winter days. The warmth of the oven and hot tea help you forget the howling wind outside your walls. Winter citrus (especially when they are meyer lemons personally delivered to you from a friend in Madison who brought them from her mom’s tree in California) transport you to a warmer, sunnier time.

And warm chocolate chip cookies, straight out of the oven, well, those remedy just about any ailment. Here in Minnesota, we weather these winter months by gathering around the hearth, around the food that sustains us, warms us, and nourishes us through the struggle of the cold. And out of the warm glow of the kitchen, comes love and strength.
Chocolate Chip Cookies:
1 cup non dairy margarine
1 cup brown sugar
1 tsp. vanilla extract
2 tbl ground flax mixed with 6 tbl water
1 1/4 cups all-purpose flour
1 tsp. cinnamon
1 cup semi-sweet chocolate chips
Preheat oven to 375. In a small bowl, mix ground flax and water, set aside. In a large mixing bowl, cream margarine and brown sugar. Beat in vanilla and flax/water mixture. Add in flours, baking soda, and cinnamon. Mix well. Stir in chocolate chips and nuts (if desired). Bake for 8-10 minutes on a lined baking sheet.
————————————–
minecreations is the blog of julia davidson, a transport to minneapolis from new york city and berkeley. join julia for her adventures in crafting and living, where she babbles on about film cameras, knitting, sewing, baking, urban gardening, and the rest of the life that she shares with her adorable puppy and soon-to-be husband over at the minecreations blog.
from the north country: Five Green Acres
January 26th, 2011
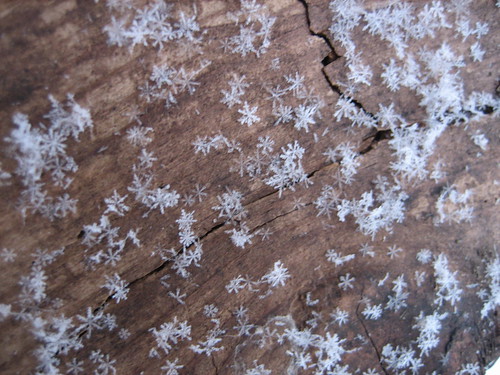
The snow fell off our windows and into the air.
I almost remember the first time I witnessed snowflakes like this, witnessed for the first time the pointy hex-sided flakes that perfectly resembled the shapes we cut from white circles in school. Up to that very moment, I had thought the real flakes were too small to see with my own eyes, had thought that only a microscope would reveal the magnificent crystalline forms. How wonderful to find I was wrong.
Today’s snow is just a dusting, a light cleansing snow to softly cover up the stale, dirty snow beneath and give a fresh start to the winter-in-progress. It’s a whisper, and a lovely one at that, reminding us that we’re here in Wisconsin and not, in fact, in Hawaii. I hadn’t forgotten.
********************************************
Five Green Acres is the homestead of Mary Jo, her family, and a revolving cast of chickens, sheep, and various other riffraff. You’ll find her there reporting live on their adventures – crafty, agricultural, or otherwise. Stop in for a visit: FiveGreenAcres.wordpress.com
from the north country: noodlehead
January 24th, 2011
Hi there! It’s me, Anna from noodlehead. If you have some time to kill today, feel free to stop by and say hi or check out my tutorials and patterns. I also want to say a huge thanks to Meg for having me over. I’ve been a long time admirer of Elsie Marley and am super honored that Meg asked me to stop by with a fun little project!
It’s a sweet and simple project you can create in time for valentines day. This would even be a great project for a beginner or for a child who’s fairly comfortable using a sewing machine.
Materials:
- 1/2 yard linen or base fabric for making the pillow cover
- 1 vintage hankie (wash, iron, starch)
- 1/2 yard heat n bond lite (available at Joanns, even pre-packaged at walmart)
- thread, sewing machine, pins, etc.
Cutting the pieces:
- top: 16″ x 16″
- for envelope back: cut one piece 16″ tall by 14″ wide, and another 16″ tall by 11″ wide
beach bracelet
January 20th, 2011
We are headed to the beach tomorrow: the real beach, the ocean beach, the hawaiian beach. I was planning on making this rope bracelet for the trip, but then I spotted this broomstick lace cuff on pintrest and changed my plans. Kirsty made a nice little tutorial for this beautiful cuff. Mine is pretty sloppy (late night crocheting) and made out of string, but hers looks lovely in a warm gray yarn.
The blog will go on while I’m gone! I’ve got some stellar guest bloggers lined up for you and I can’t wait for you to meet them all. They will be writting little bits about winter, because I do love winter and will miss it. The wisconsin winter will still be here when I get back, but it probably won’t recognize me with a tan.


