Today’s tutorial comes from an amazing Australian seamstress, Sophie from Cirque du bebe. Sophie is new to sewing, though you would never believe it looking at the clothes she makes. They are always super hip and beautifully finished: like this hoodie and this outfit and this stylish number.  She can pick a bold print and make it look so effortless, so right. For example she pairs a crazy-glasses-wearing-man print with stripes, pastel blue, and safety orange and it’s awesome! So I knew whatever she was going to come up with for a tutorial was going to be good, but I didn’t know it was going to be this good…

** * * * * * * * * * * * * * * * * * * * * * * * * * * * * * * * * * * * * *
Hello, Sophie here from Cirque Du Bebe. Today we are going to take an ordinary kiddie shirt and transform it into ‘lift-the-flap’ clothing. Because, lets face it, those books are more fun! You will learn how to make a simple ‘stuffie’ (completely removable for washing) and watch your kids turn it into an interactive prop for creative play. You could even make a few and rotate them.


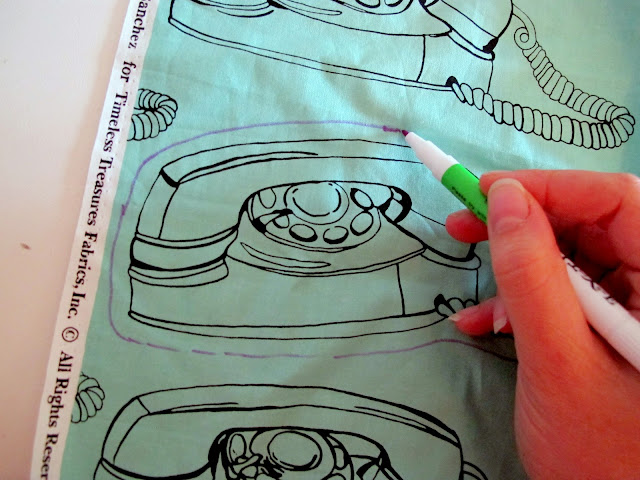
1. Get inspired. What do you think would make a fun prop? A moustache? An ice-cream? An envelope with a felt letter? Your fabric stash can be a good place to draw inspiration…do you have some stripes that scream villain or conveniently, a fabric with a ready made prop lurking in the print (see telephone). You could put something noisy inside; crinkly plastic, a bell. The cord can become part of the game too! You guys are the creatives. Go wild.

2. Gather materials, including some stuffing to fill the shape with.

3. Cut the cord and attach velcro. The cord should be long enough to reach where the prop will be used (but not long enough to go around a neck) plus an extra inch that will be fixed inside the stuffie. Cut a narrow strip of velcro (about an inch) and secure it to one end of the cord with a zig-zag stitch, going up and back several times.

4. Draw the sewing line. This will be the perimeter of your stuffie when it is poofed up. This line should be just out from the edge of the image so you don’t lose any of it when you sew.

5. Cut the shape just outside the sewing line this time. This will become the seam allowance.

6. Flip over and re-draw your sewing line on the wrong side.

7. Cut the felt backing. Pin the fabric to your felt and cut around the shape.

8. Attach velcro to felt backing and to shirt. Sew a couple of strips of velcro to the back of the felt backing. Cover a generous area…the stuffie needs to be easy to slap on in a hurry (when you have to hang that telephone up fast). Now for the shirt. When considering where to place the complimentary velcro strips see if there is somewhere in the fabric design to disguise black or white velcro, like in stripes as above. This just makes for a slightly neater look but its not a biggie if its not possible. Pin and sew the velcro on, making sure the stuffie has plenty of area to stick to.

9. Attach cord and sew stuffie. With your fabric right side to right side (velcro facing outside), sandwich the cord between the two layers and pin in place, leaving an inch hanging outside and the rest on the inside. Shut the lid and pin around the remainder of the shape. Sew your Stuffie following the line you drew earlier, making sure the cord is still tucked inside. Leave a gap in the stitching large enough to turn stuffie back the right way.

10. Now stuff it. Stuff it real good.

11. Close the opening with small neat hand-stitching, using co-ordinating thread.

12. To add a little extra tactile goodness and give the stuffie a quilted effect, pick a couple of lines to emphasize and sew along them.

Congratulations…if you made it this far you didn’t stuff up. Sorry. Now stick that stuffie on and enjoy the entertainment.

I’m very happy to have Sascha from Piccoli Piselli (it means little peas!) here today to tell us a bit about pintucks. Sascha is a very talented sewer who cranks out fantastic clothes for all three of her kids. She is a wiz with knits and totally hilarious to boot!

* * * * * * * * * * * * * * * * * * * * * * * * * * * * * * *

Hi there! Sascha here from Piccoli Piselli. I thought I’d show you some creative ways to use pintucks and pleats in children’s clothing.

A few years ago I made this top with freestyle pintucks on the bottom of the sleeves.

ever since then I’ve been meaning to experiment a little more with pintucks. Generally pintucks are sewn with a special pintuck presser foot and a double needle.

I’ve never gotten around to buying one that fits my machine and then I’d be limited to the fine, evenly spaced pintucks (which are beautiful and can be used in children’s wear in so many ways, especially heirloom garments).

So here’s some ideas for adding pintucks and pleats to your sewing:

I know it’s difficult to see from this photo, but I added pleats to the A-line dress as well as the pocket. For the dress I decided that re-drafting the front to accommodate the pleats would require too much math, so I stitched pleats to a piece of fabric that would roughly cover the size of the front panel of the dress.

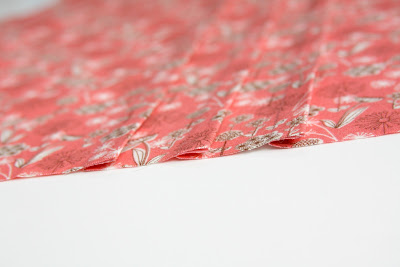
Here’s a better picture of the pleats. What you do to create the pintucks or pleats is really pretty simple:

  • First you press down the length of the fabric where your first fold will be (wrong sides together).
  • Then choose the size you want you pintuck/pleat to be. On the dress above I made them about 3/8″ wide.
  • Stitch down the length of your fabric.
  • After stitching one row, take the fabric over to your iron and press fabric open.
  • Next you want to determine how far apart each pleat will be. Again, I’m no fan of math so I kind of just picked where it looked nice.
  • Fold your fabric again (wrong sides together) and press.
  • Continue with the stitches until you’ve created the amount of tucks you need.

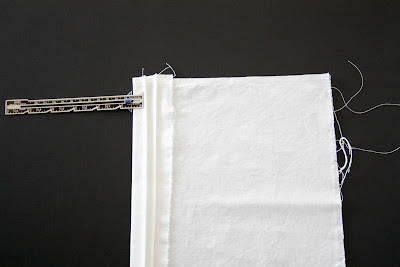
Here is a photo of some smaller pintucks I made for the pocket on the dress (I ended up making another set for the pocket with wider pleats to match the dress). I used this little measuring tool during pressing which really helped. I have no idea what it’s called, but I use it a lot in sewing.

When making small pintucks it can be a little difficult to keep the fine lines parallel. I guess the smaller pintucks would be better off sewn with a pintuck presser foot, but honestly the set I made above turned out pretty nice and I didn’t end up pulling out too much of my hair.

Here’s what I call “freestyle pintucks”. I wanted to go for a more wavy look (better luck next time) but I like the different widths I created here. I stitched the tucks across the grain of the corduroy. I think this is a great way to embellish boys clothing. Kristin from Skirt As Top did a great tutorial for how to make elbow patches yesterday. Just use her tute to add the patches to the knees of the pants.

Here is another pleat variation. Again, I made the pleats on fabric and then laid my pattern piece on the fabric and cut as usual. Can you see something odd in the left photo? Yup, I forgot that corduroy has a nap like velvet. It’s not too bad in person and as you can see by the photo on the far right, Vinny is happily wearing the pants. This is the best only photo I could take of him wearing any of the clothes I created for this post. He’s gotten very camera shy these days.

I saved my favorite for last…

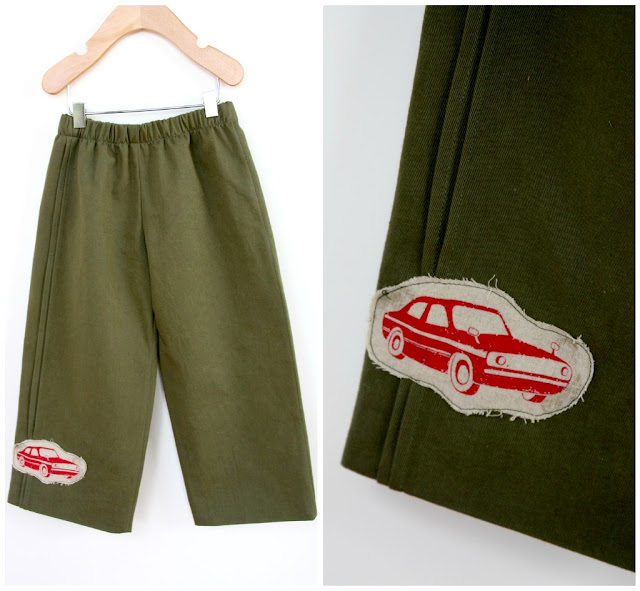
For this pair of pants I actually did not stitch the tucks before laying/cutting the pattern piece. What I did was add the amount I guestimated I would use in the tucks onto the side seam of one of the pant front legs. This doesn’t always work because of the way patterns are drafted. Most of the time the subtle curves of a pattern will be compromised by adding width nilly willy like I did. This definitely would not have worked for the A line dress above. Especially when you have a pattern with facings that need to fit perfectly. I’ve worked with these pants so much I was comfortable making the changes. Before stitching my pant leg closed I attached the car patch. I was too lazy to get out my fusible web so I used fabric glue instead. Mistake. It bled through and now shows permanently on the finished patch. Lesson learned. Hey, that’s what I’m here for. At least you learned today that fusible web is better than fabric glue for applique and corduroy has nap. Yourwelcomeverymuch.

Thanks for having me Meg!

I only recently discovered Kristin’s blog, skirt as top,  but was hooked right away. I think I found it first because of this beautiful top she made for herself. Turns out she makes cute kids clothes like crazy! I’m happy to have her here today to share her awesome tutorial for elbow patches.

* * * * * * * * * * * * * * * * * * * * * *

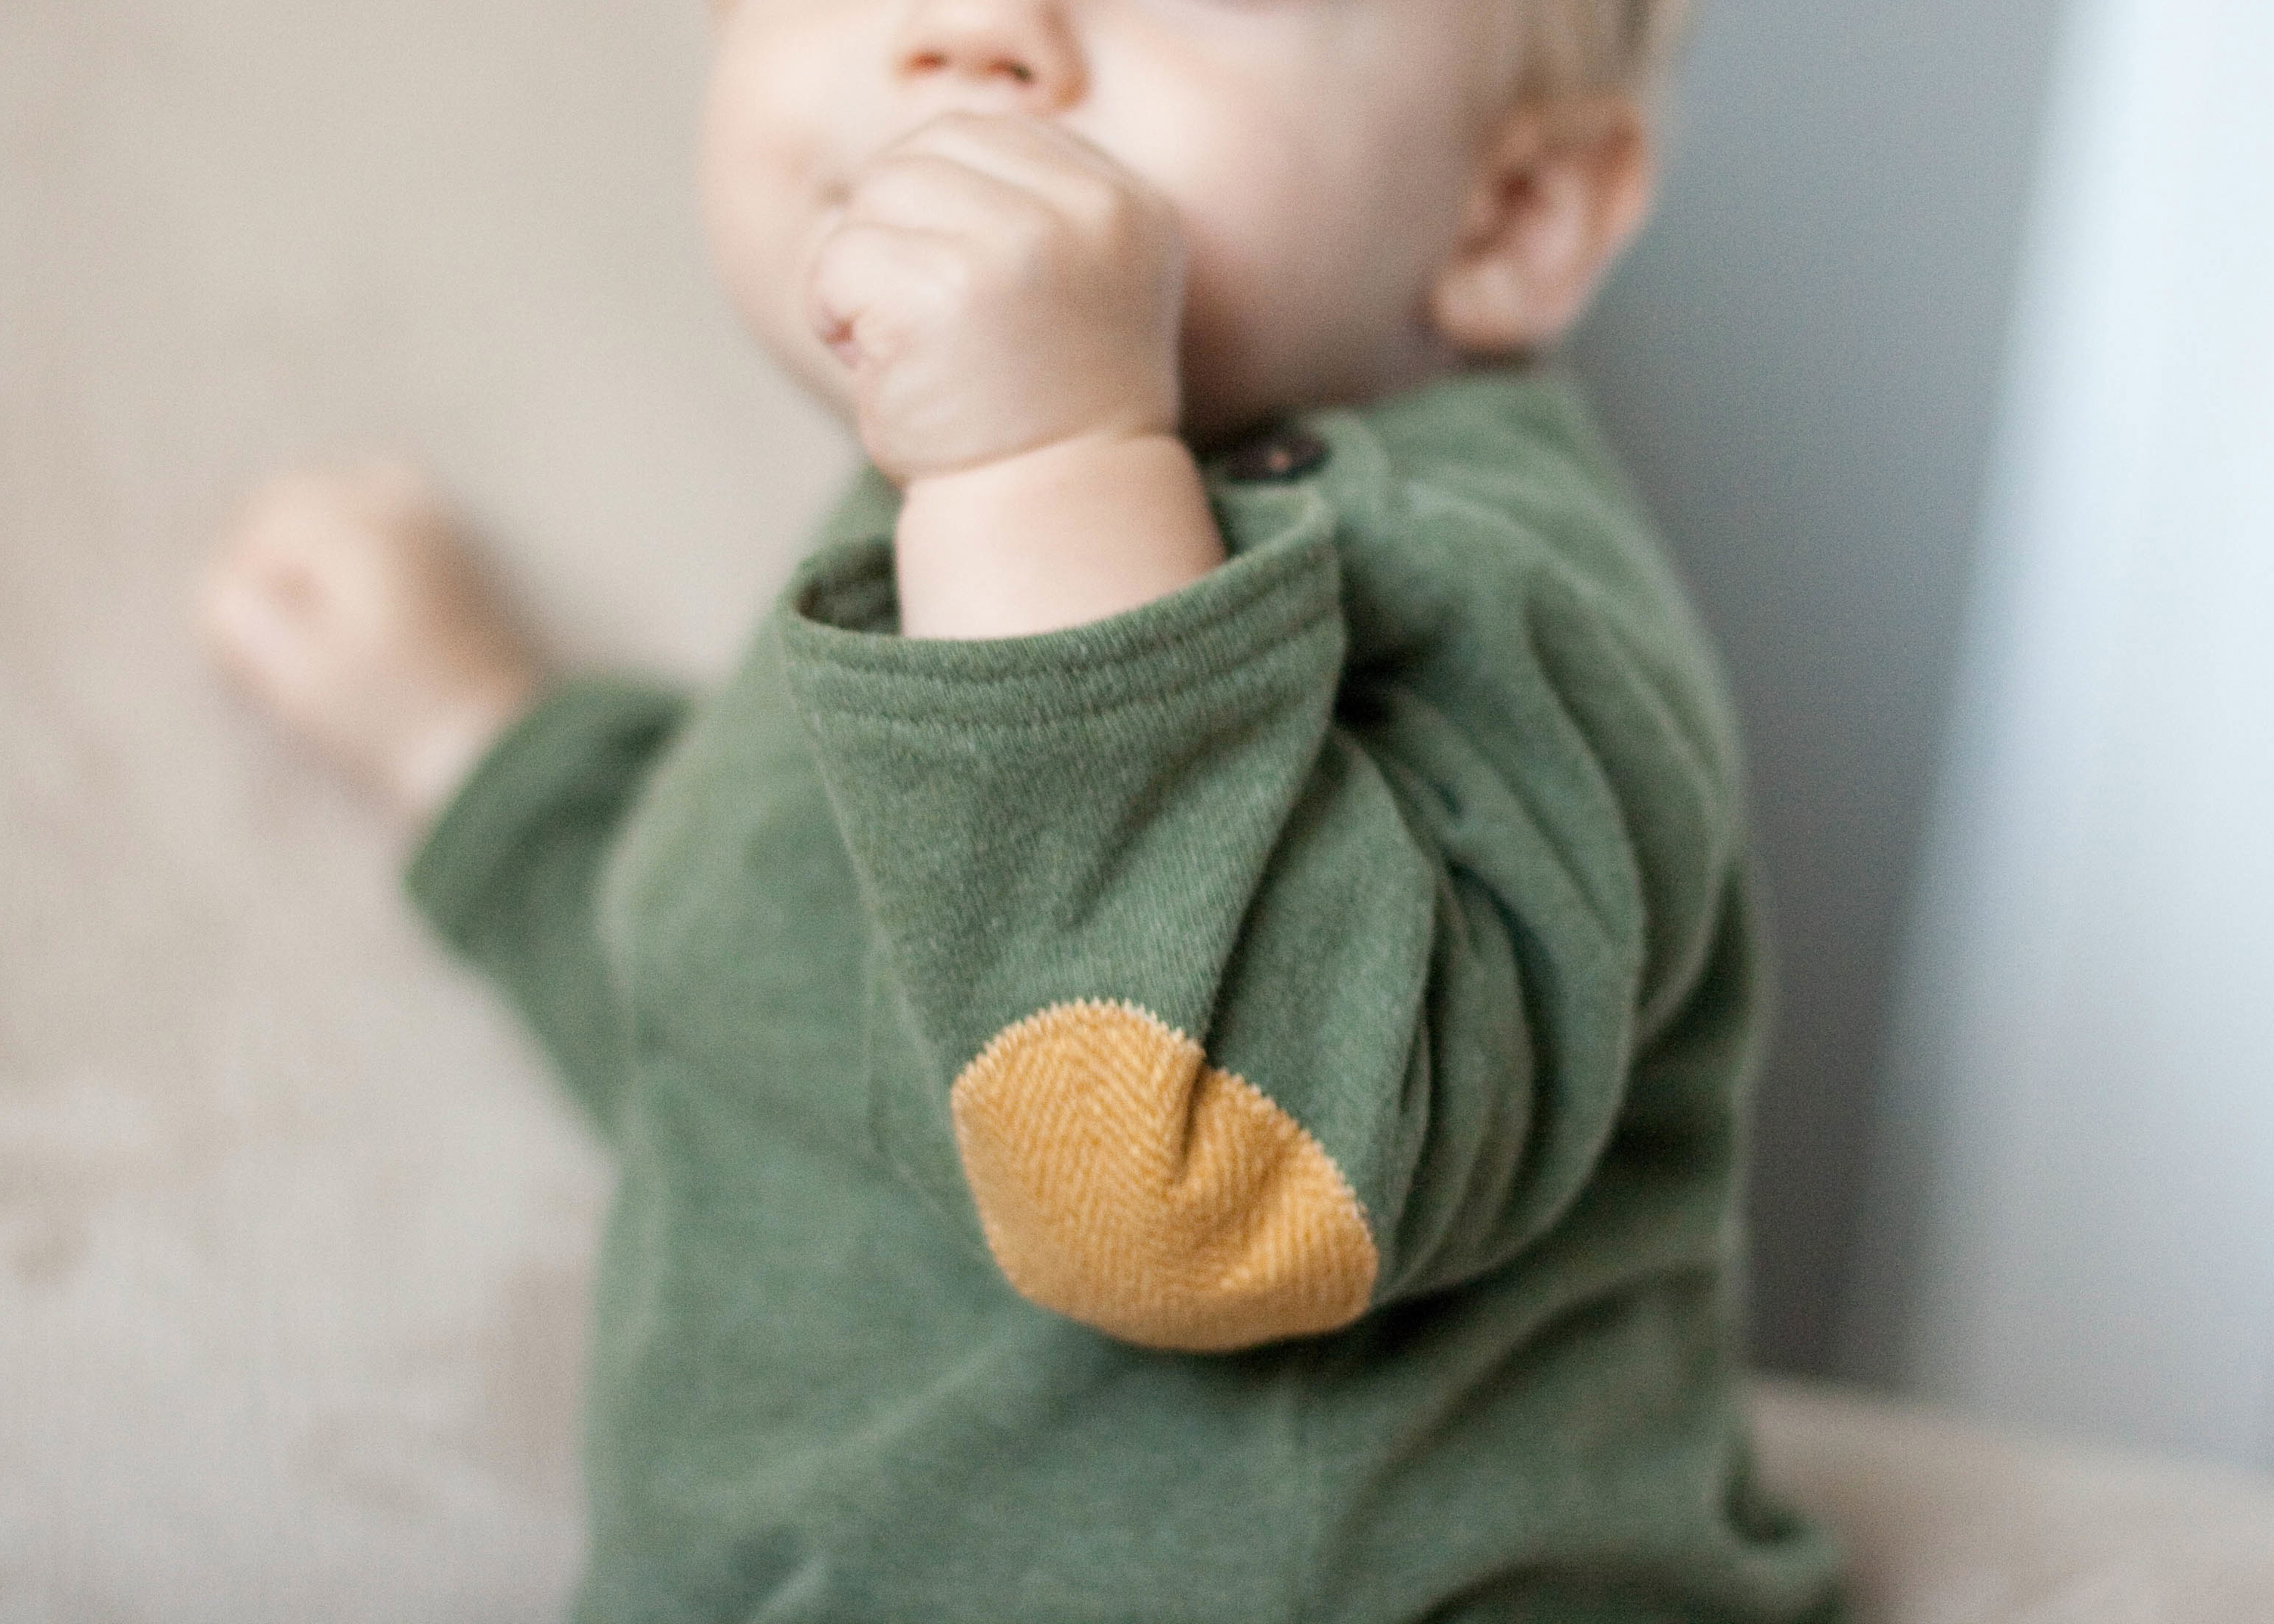
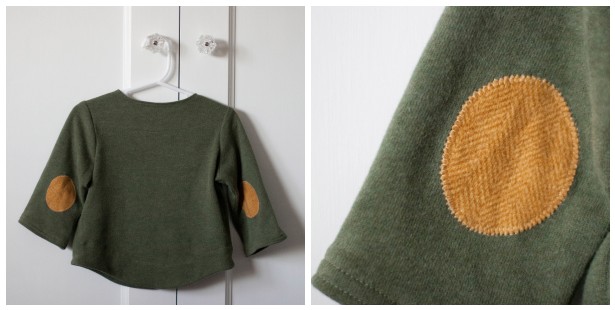
Hi, I’m Kristin from skirt as top and I’m here today to talk about elbow patches!  I’ve been spotting lots of elbow patches on adult shirts and sweaters this fall, and I love the trend.  I thought it’d be fun to add them to homemade kids’ clothes for a little “mini-professor” style, too.  Problem is, kids’ sleeves are very narrow and that means it’s pretty much impossible to sew the patches on after the garment is already completed.  That makes finding the correct placement for your elbow patches a bit tricky.  In this tutorial, I’ll show you how to add properly placed elbow patches when you’re making a shirt from scratch.

MATERIALS:

  • Tailor’s chalk or water-soluble marker
  • Clear ruler
  • Elbow patch pattern (draw an oval shape onto a piece of paper – mine is about 2.75″ tall x 2.25″ wide and works for about 6-12 month – 3T sizes, though you can make it whatever size you like)
  • Cut (but not sewn) sleeve pieces from your shirt or sweater pattern (Shown is the Oliver + S Sailboat Top.  To draft your own pattern, try Dana’s free 90 minute shirt tutorial)
  • Scraps of coordinating fabric for the patches (try small floral for girls, plaid flannel for boys, or even suede if you’re feeling adventurous!)

DIRECTIONS:

1.  Wrangle your kid while they’re wearing a long-sleeved shirt from their wardrobe.  Mark an X on their elbow with tailor’s chalk or water-soluble marker.
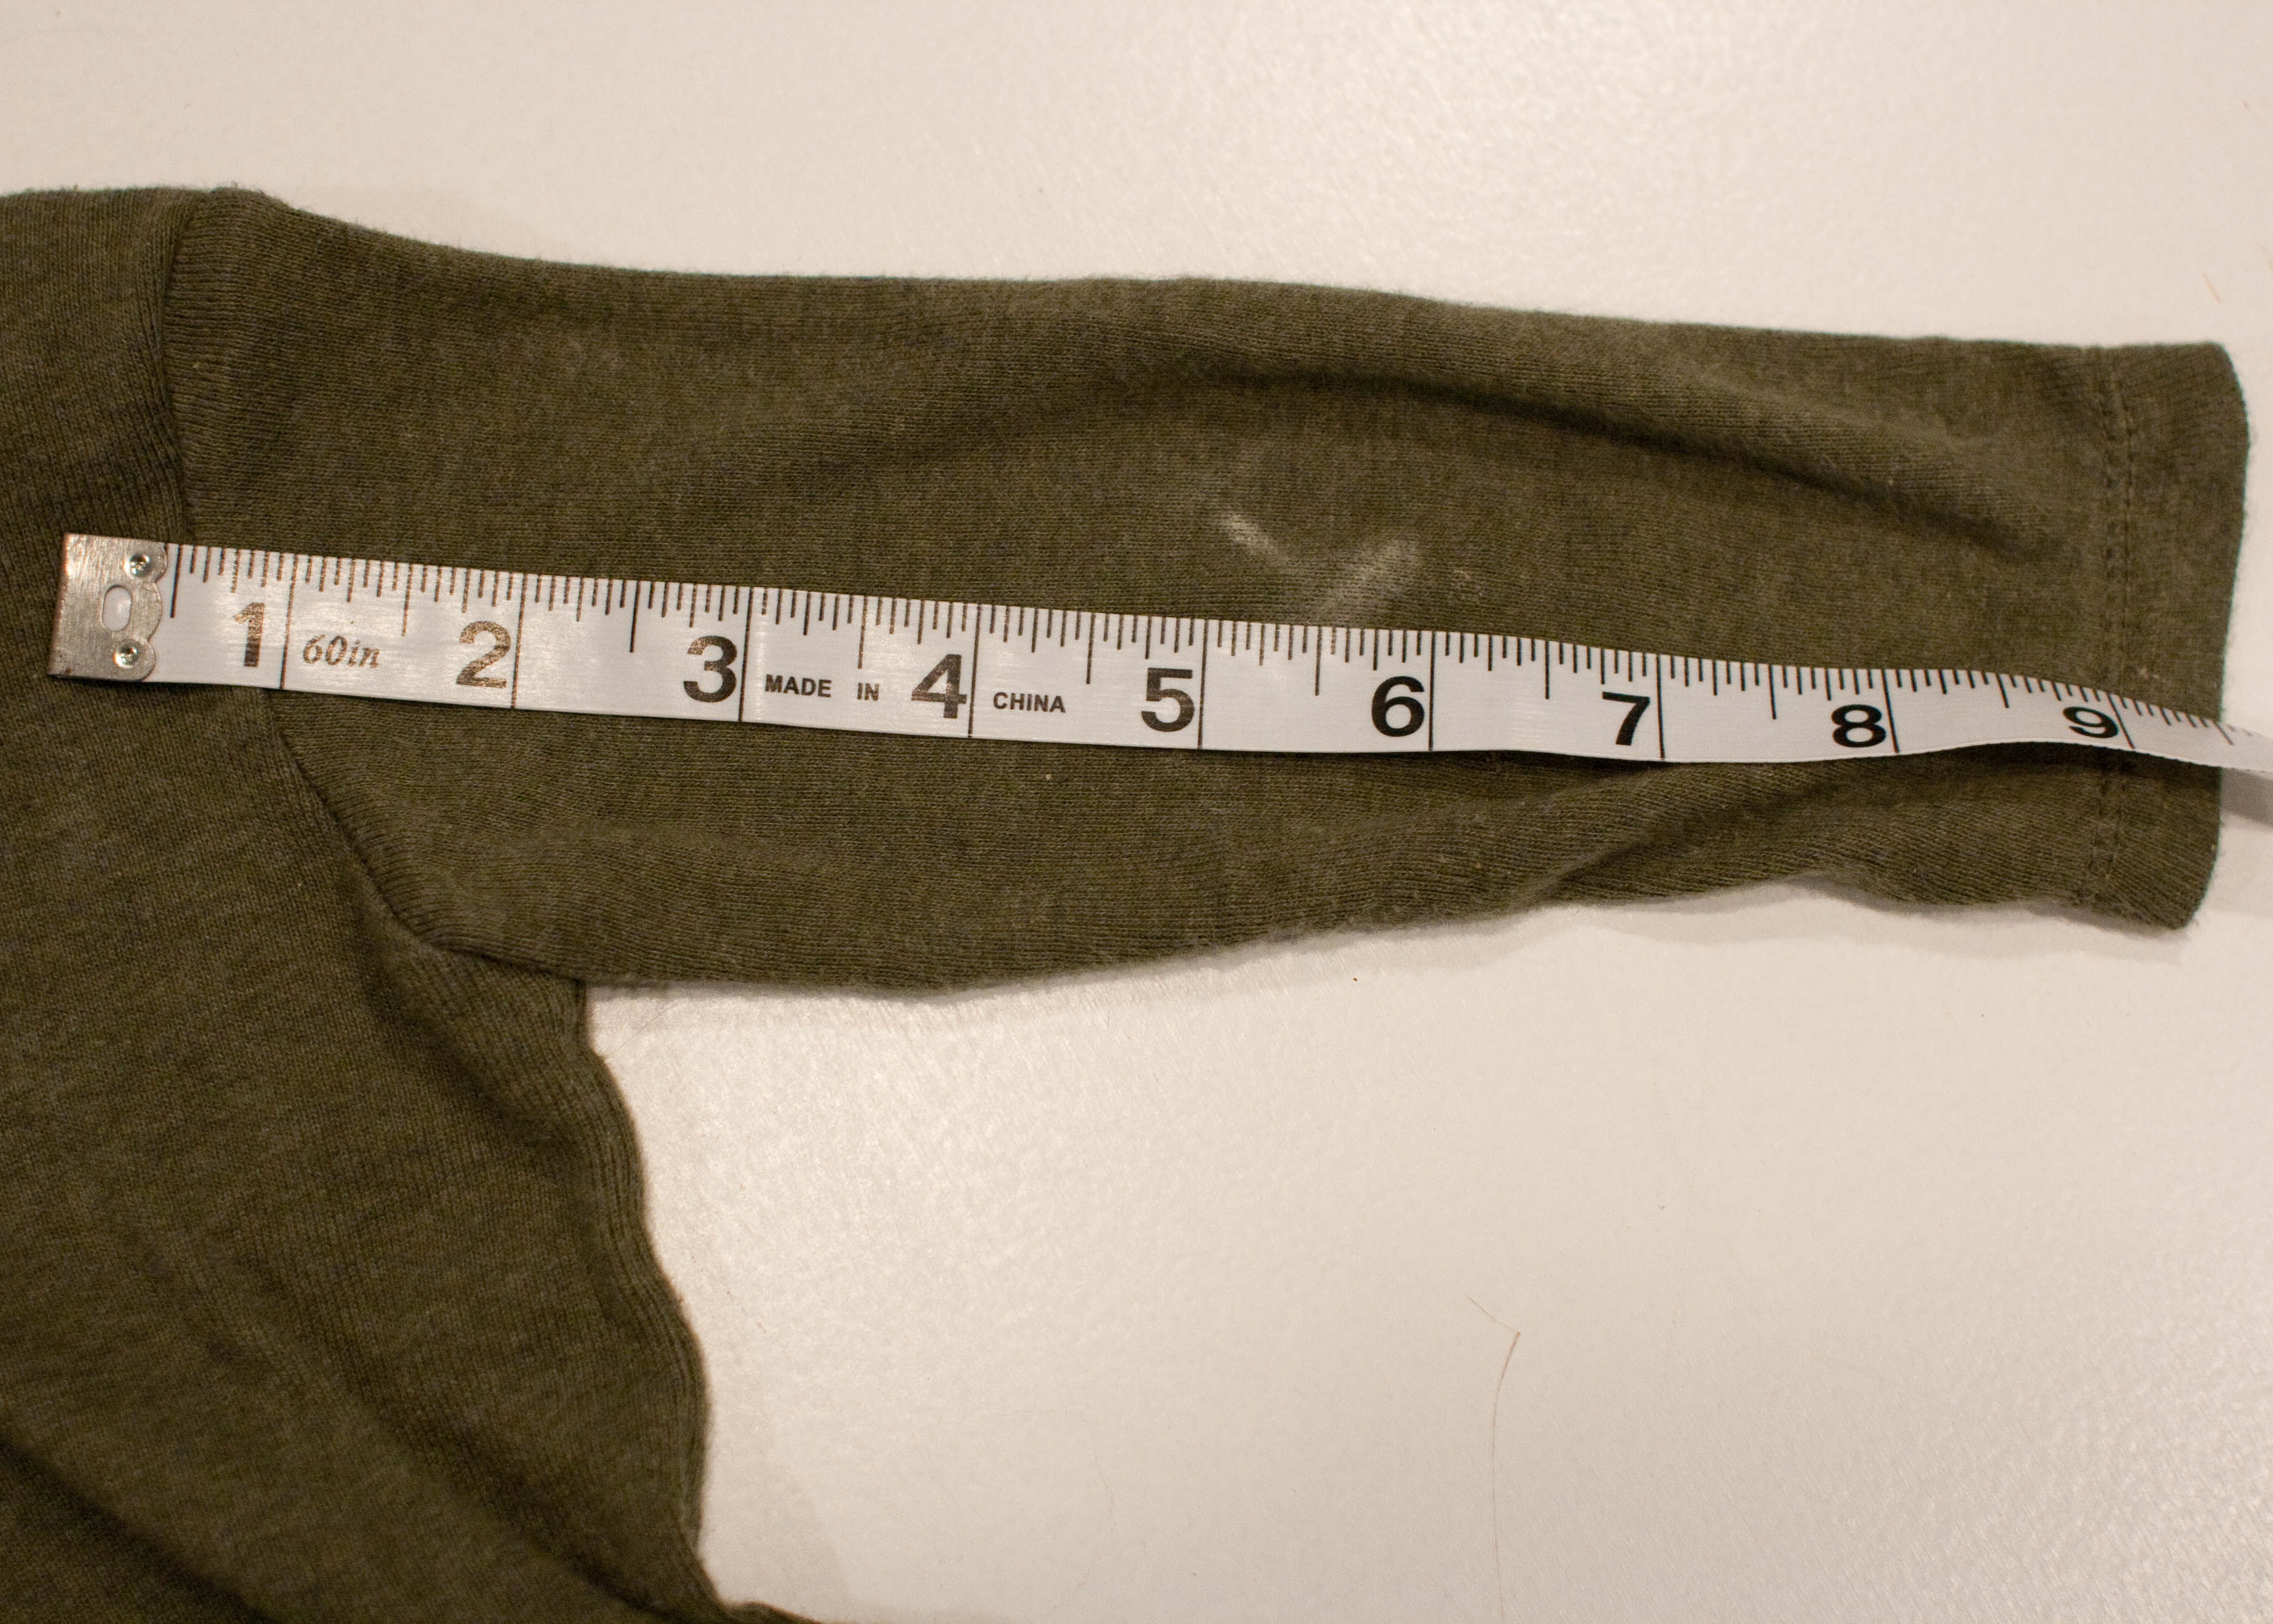
2.  Take the shirt off of your kid, measure from about .5″ above the shoulder (to account for the seam allowance) down to the center of the X that you marked earlier.  Write down this measurement (for my 10 month old, it was 5.5″).  We’ll call this the “Elbow Measurement” because I’m super original.
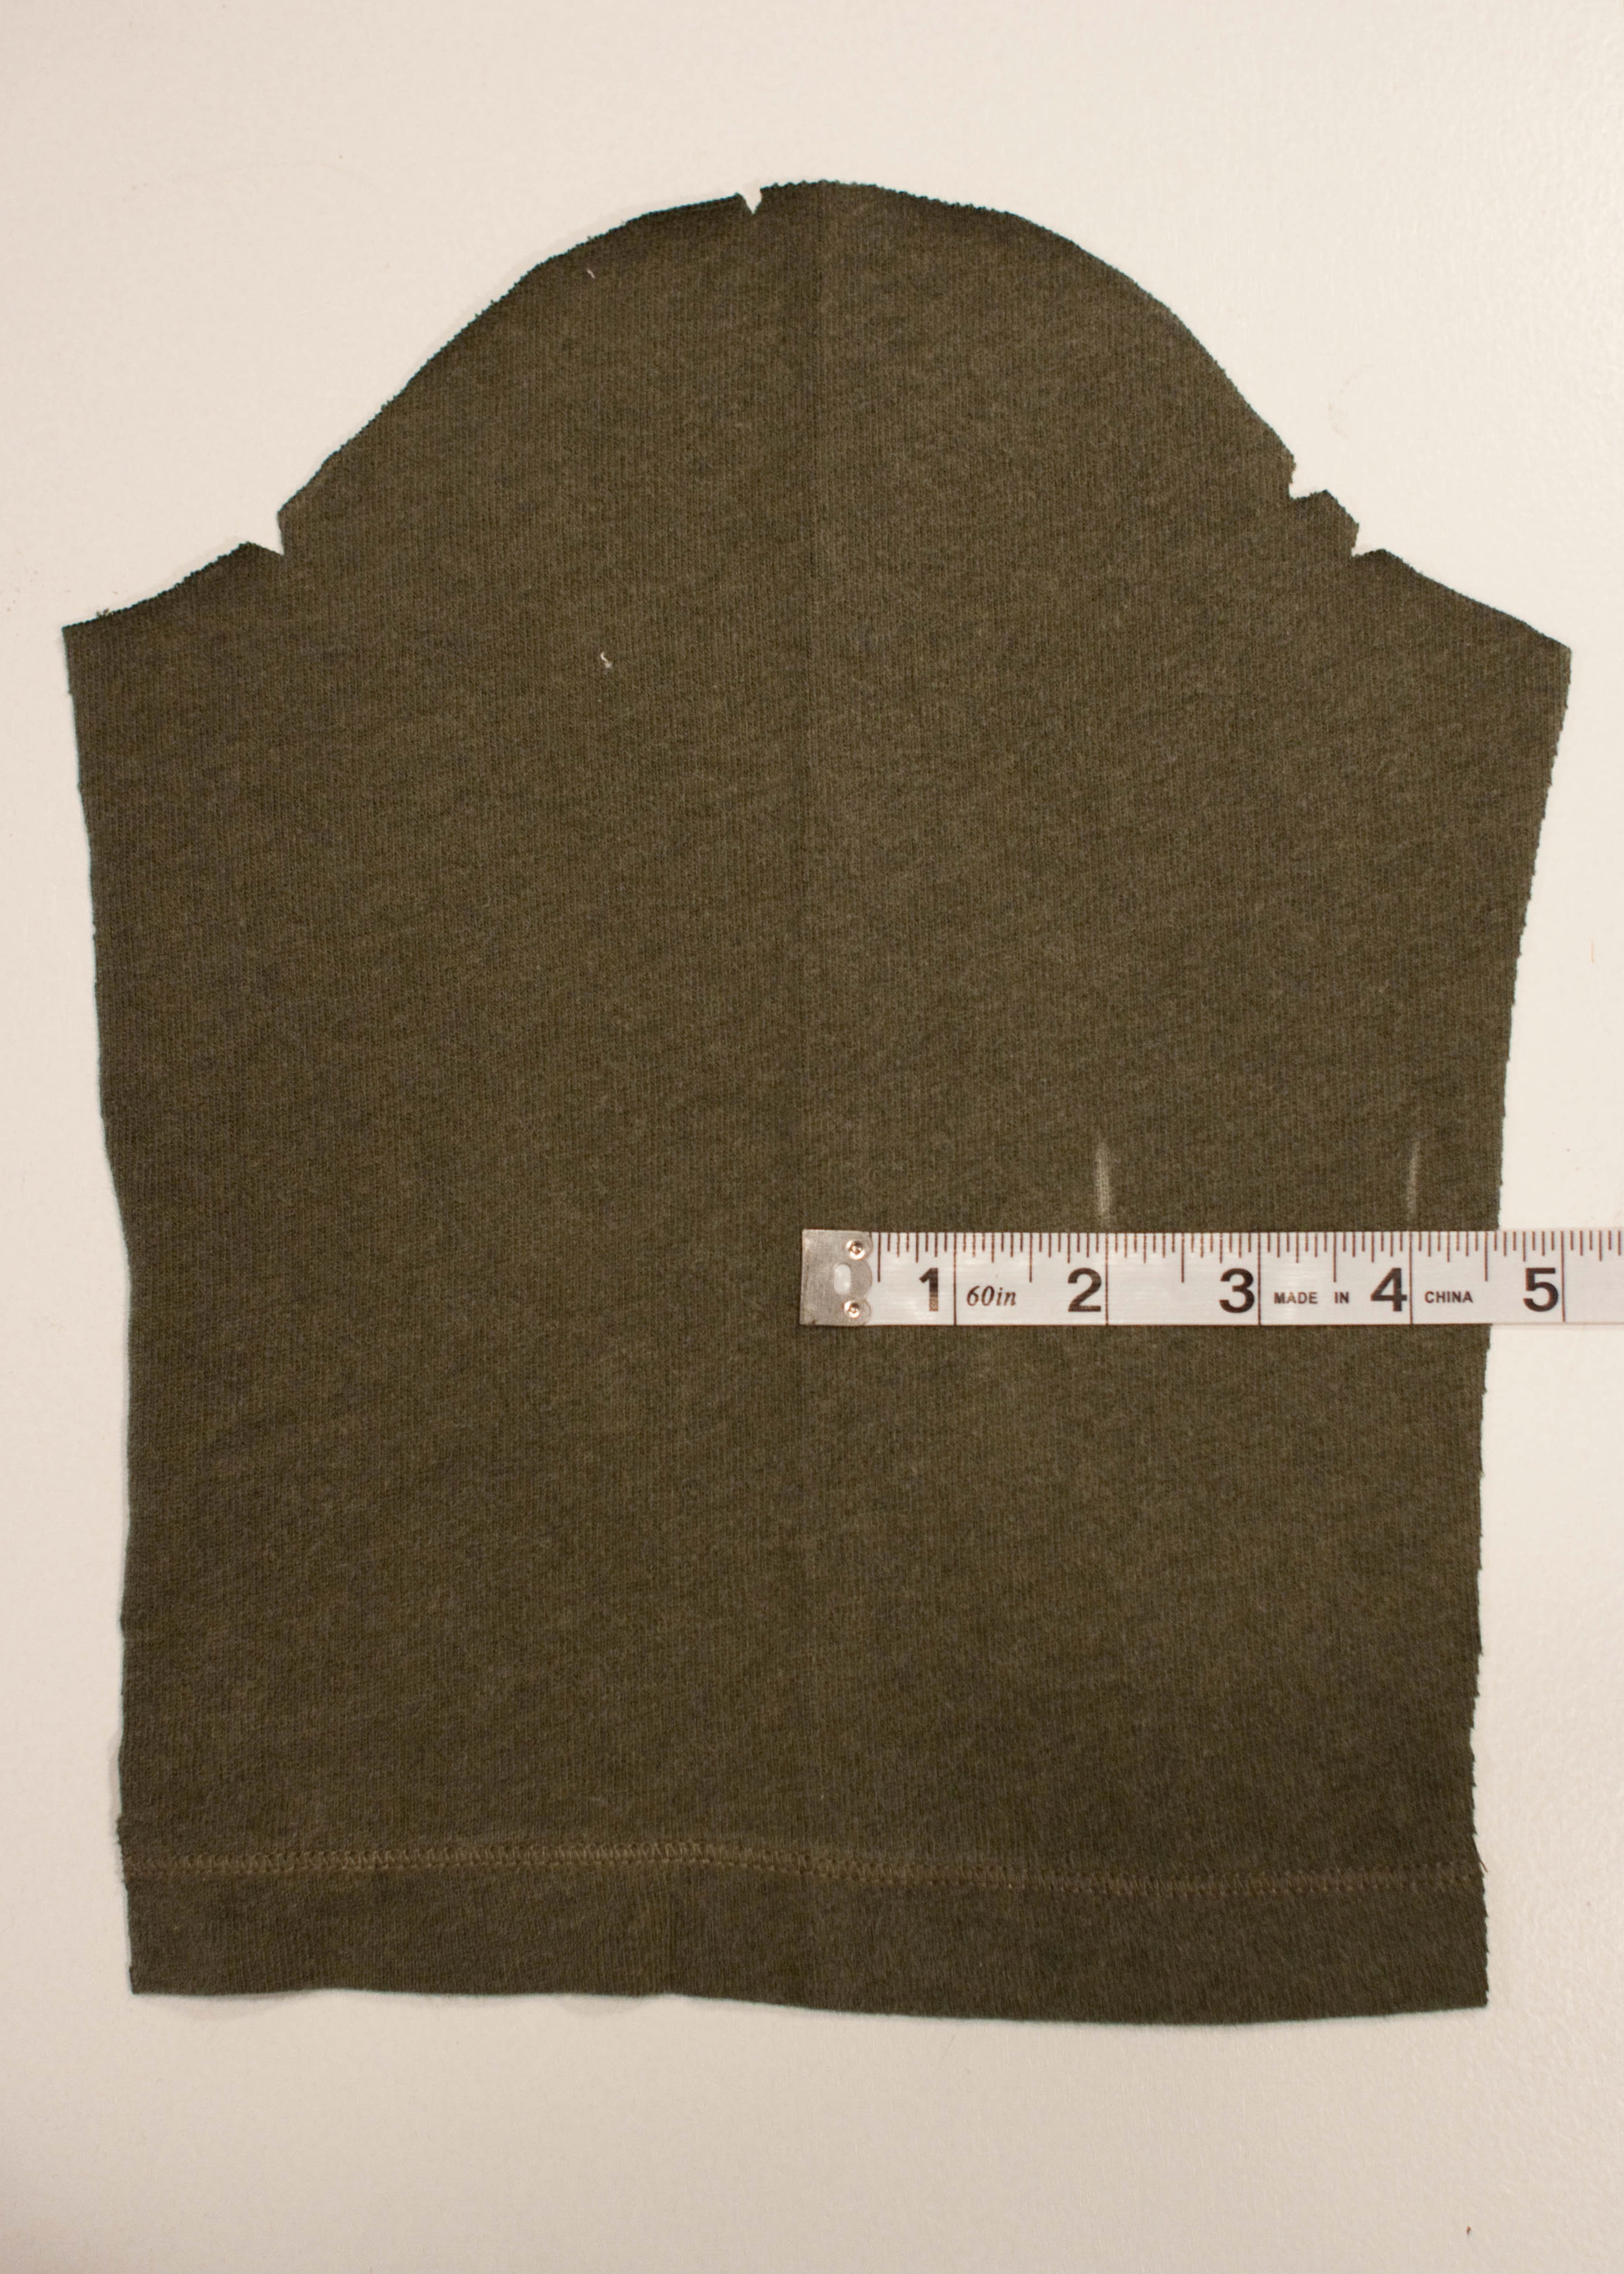
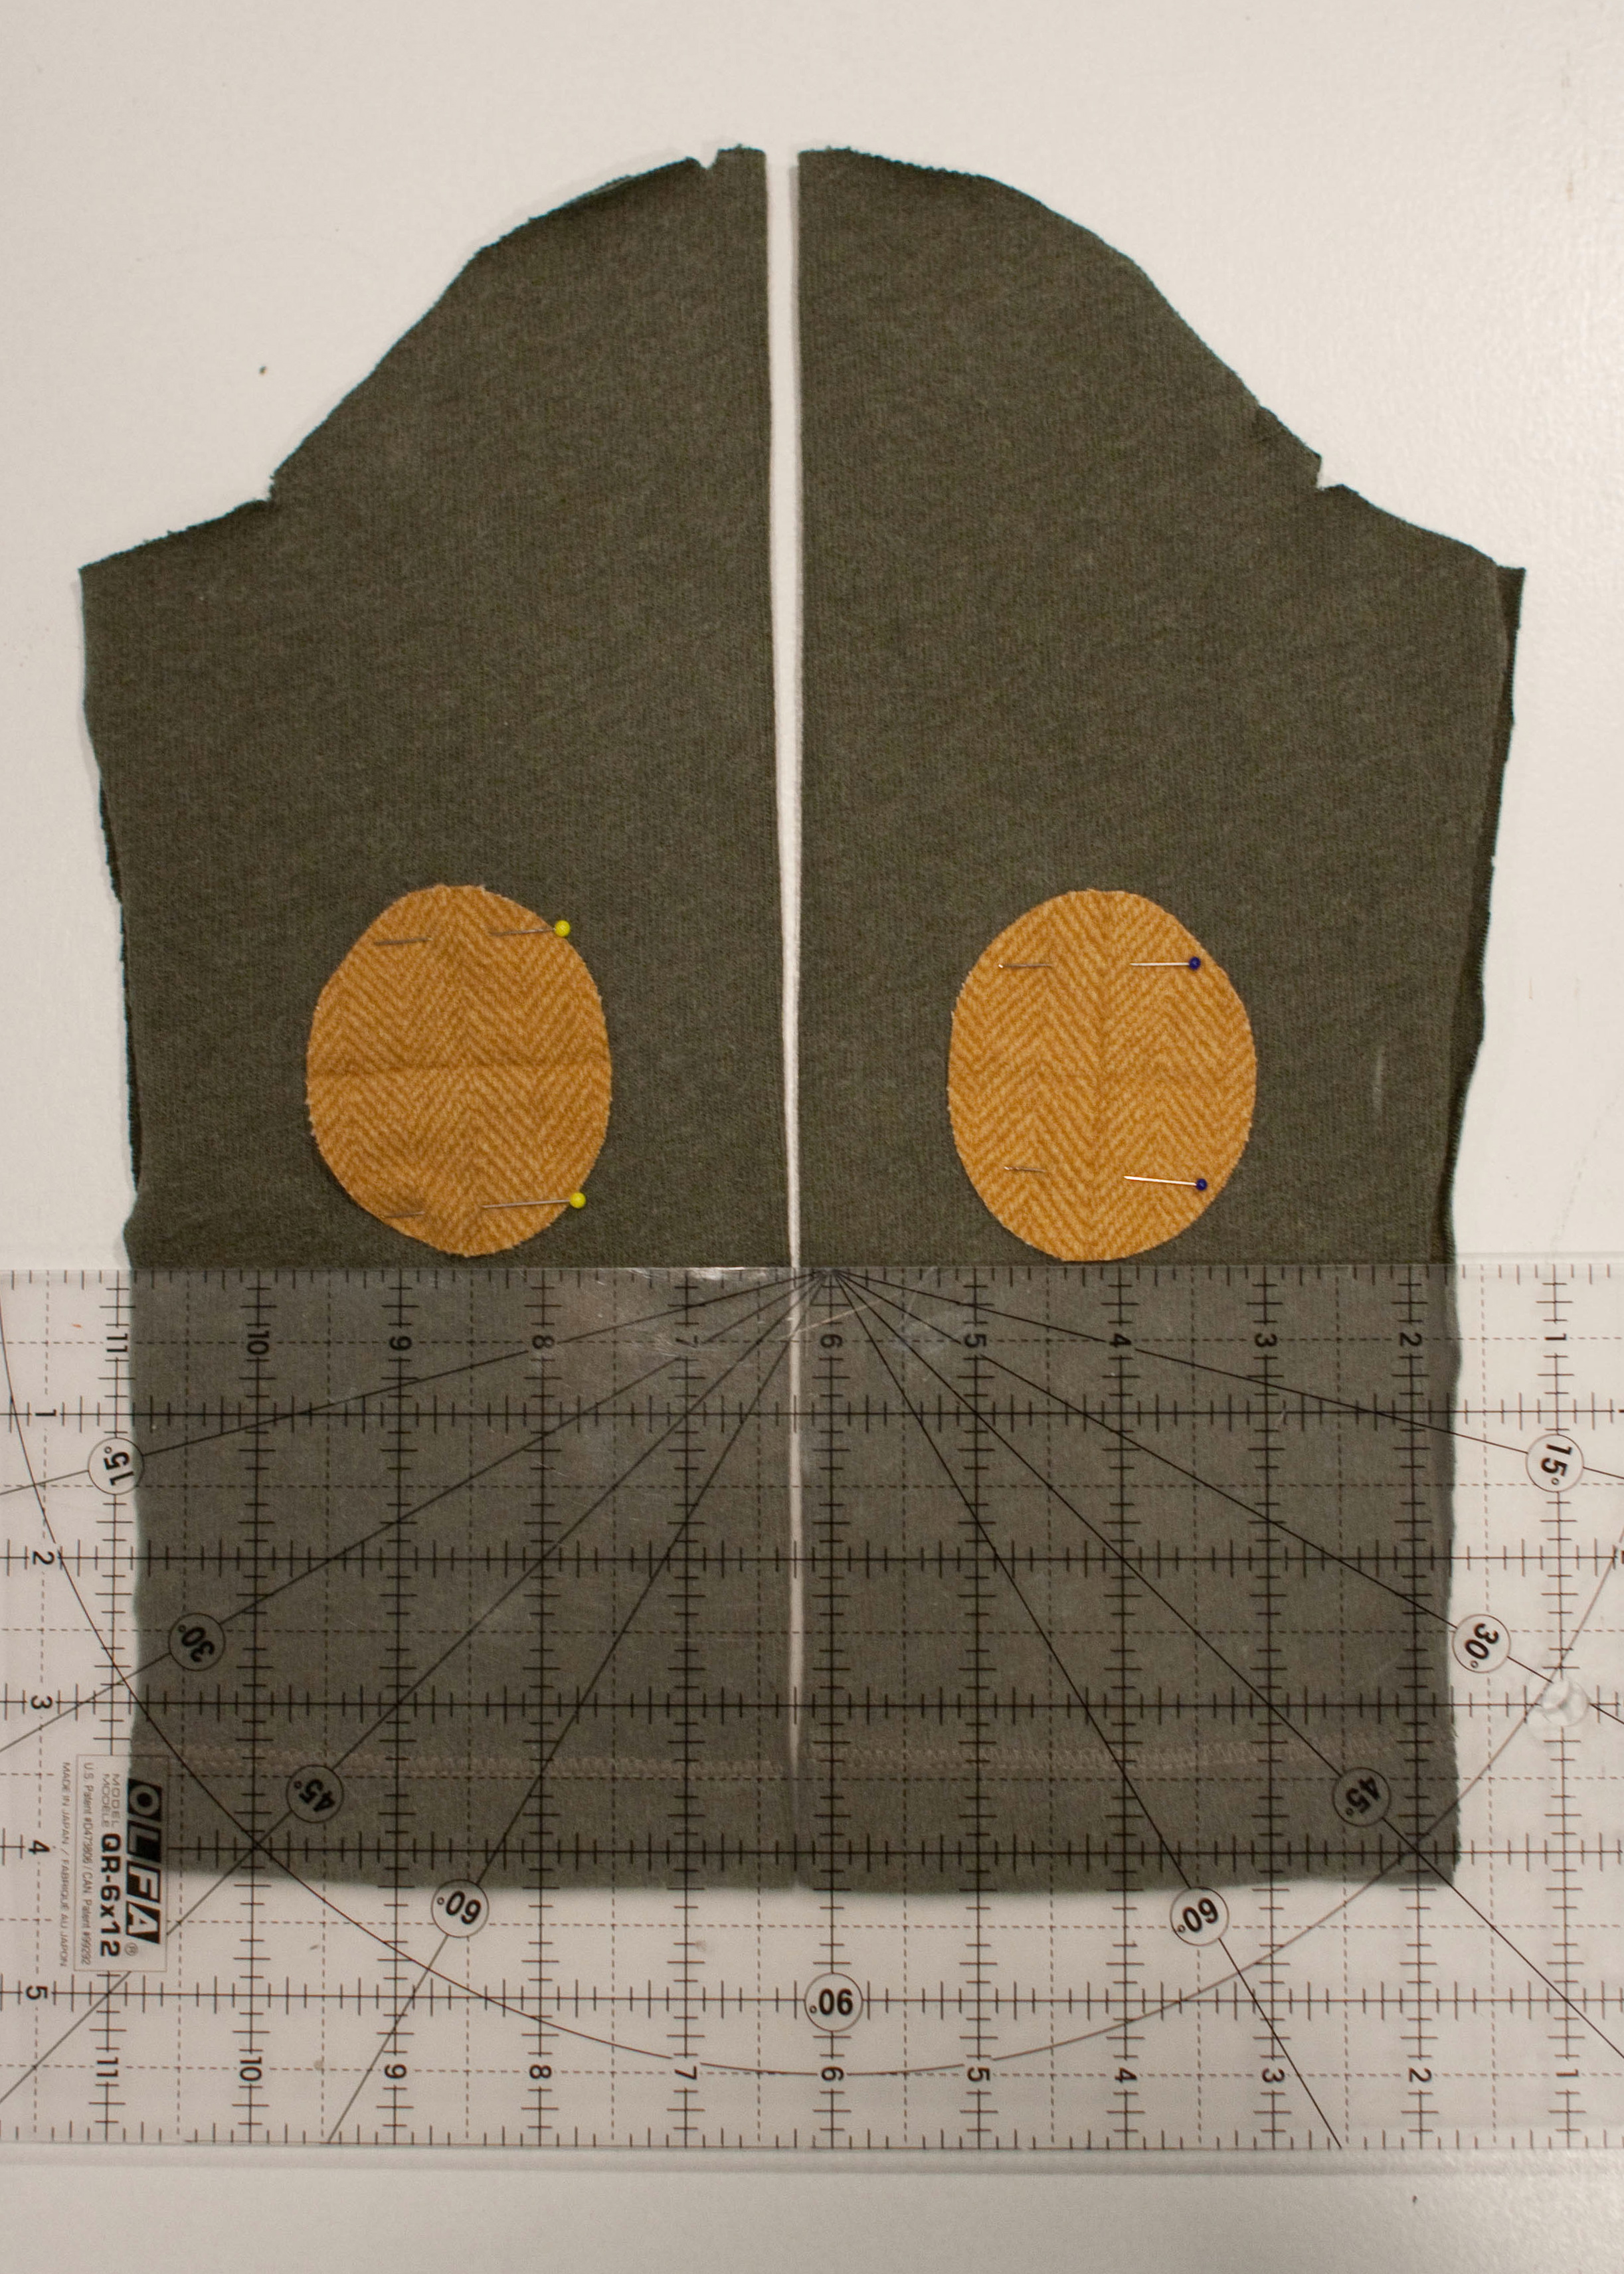
3.  Go to one of your new garment’s sleeve pieces.  Fold it in half to determine the center line, and press.  Determine the back of the sleeve per your pattern, since that’s the side we’re adding the patch to.   Mark your seam allowance from the cut side of the sleeve with water-soluble pen or tailor’s chalk, then find the center point between the folded center and the seam allowance mark and draw a vertical line (just guess approximately where the patch will hit on the vertical axis).
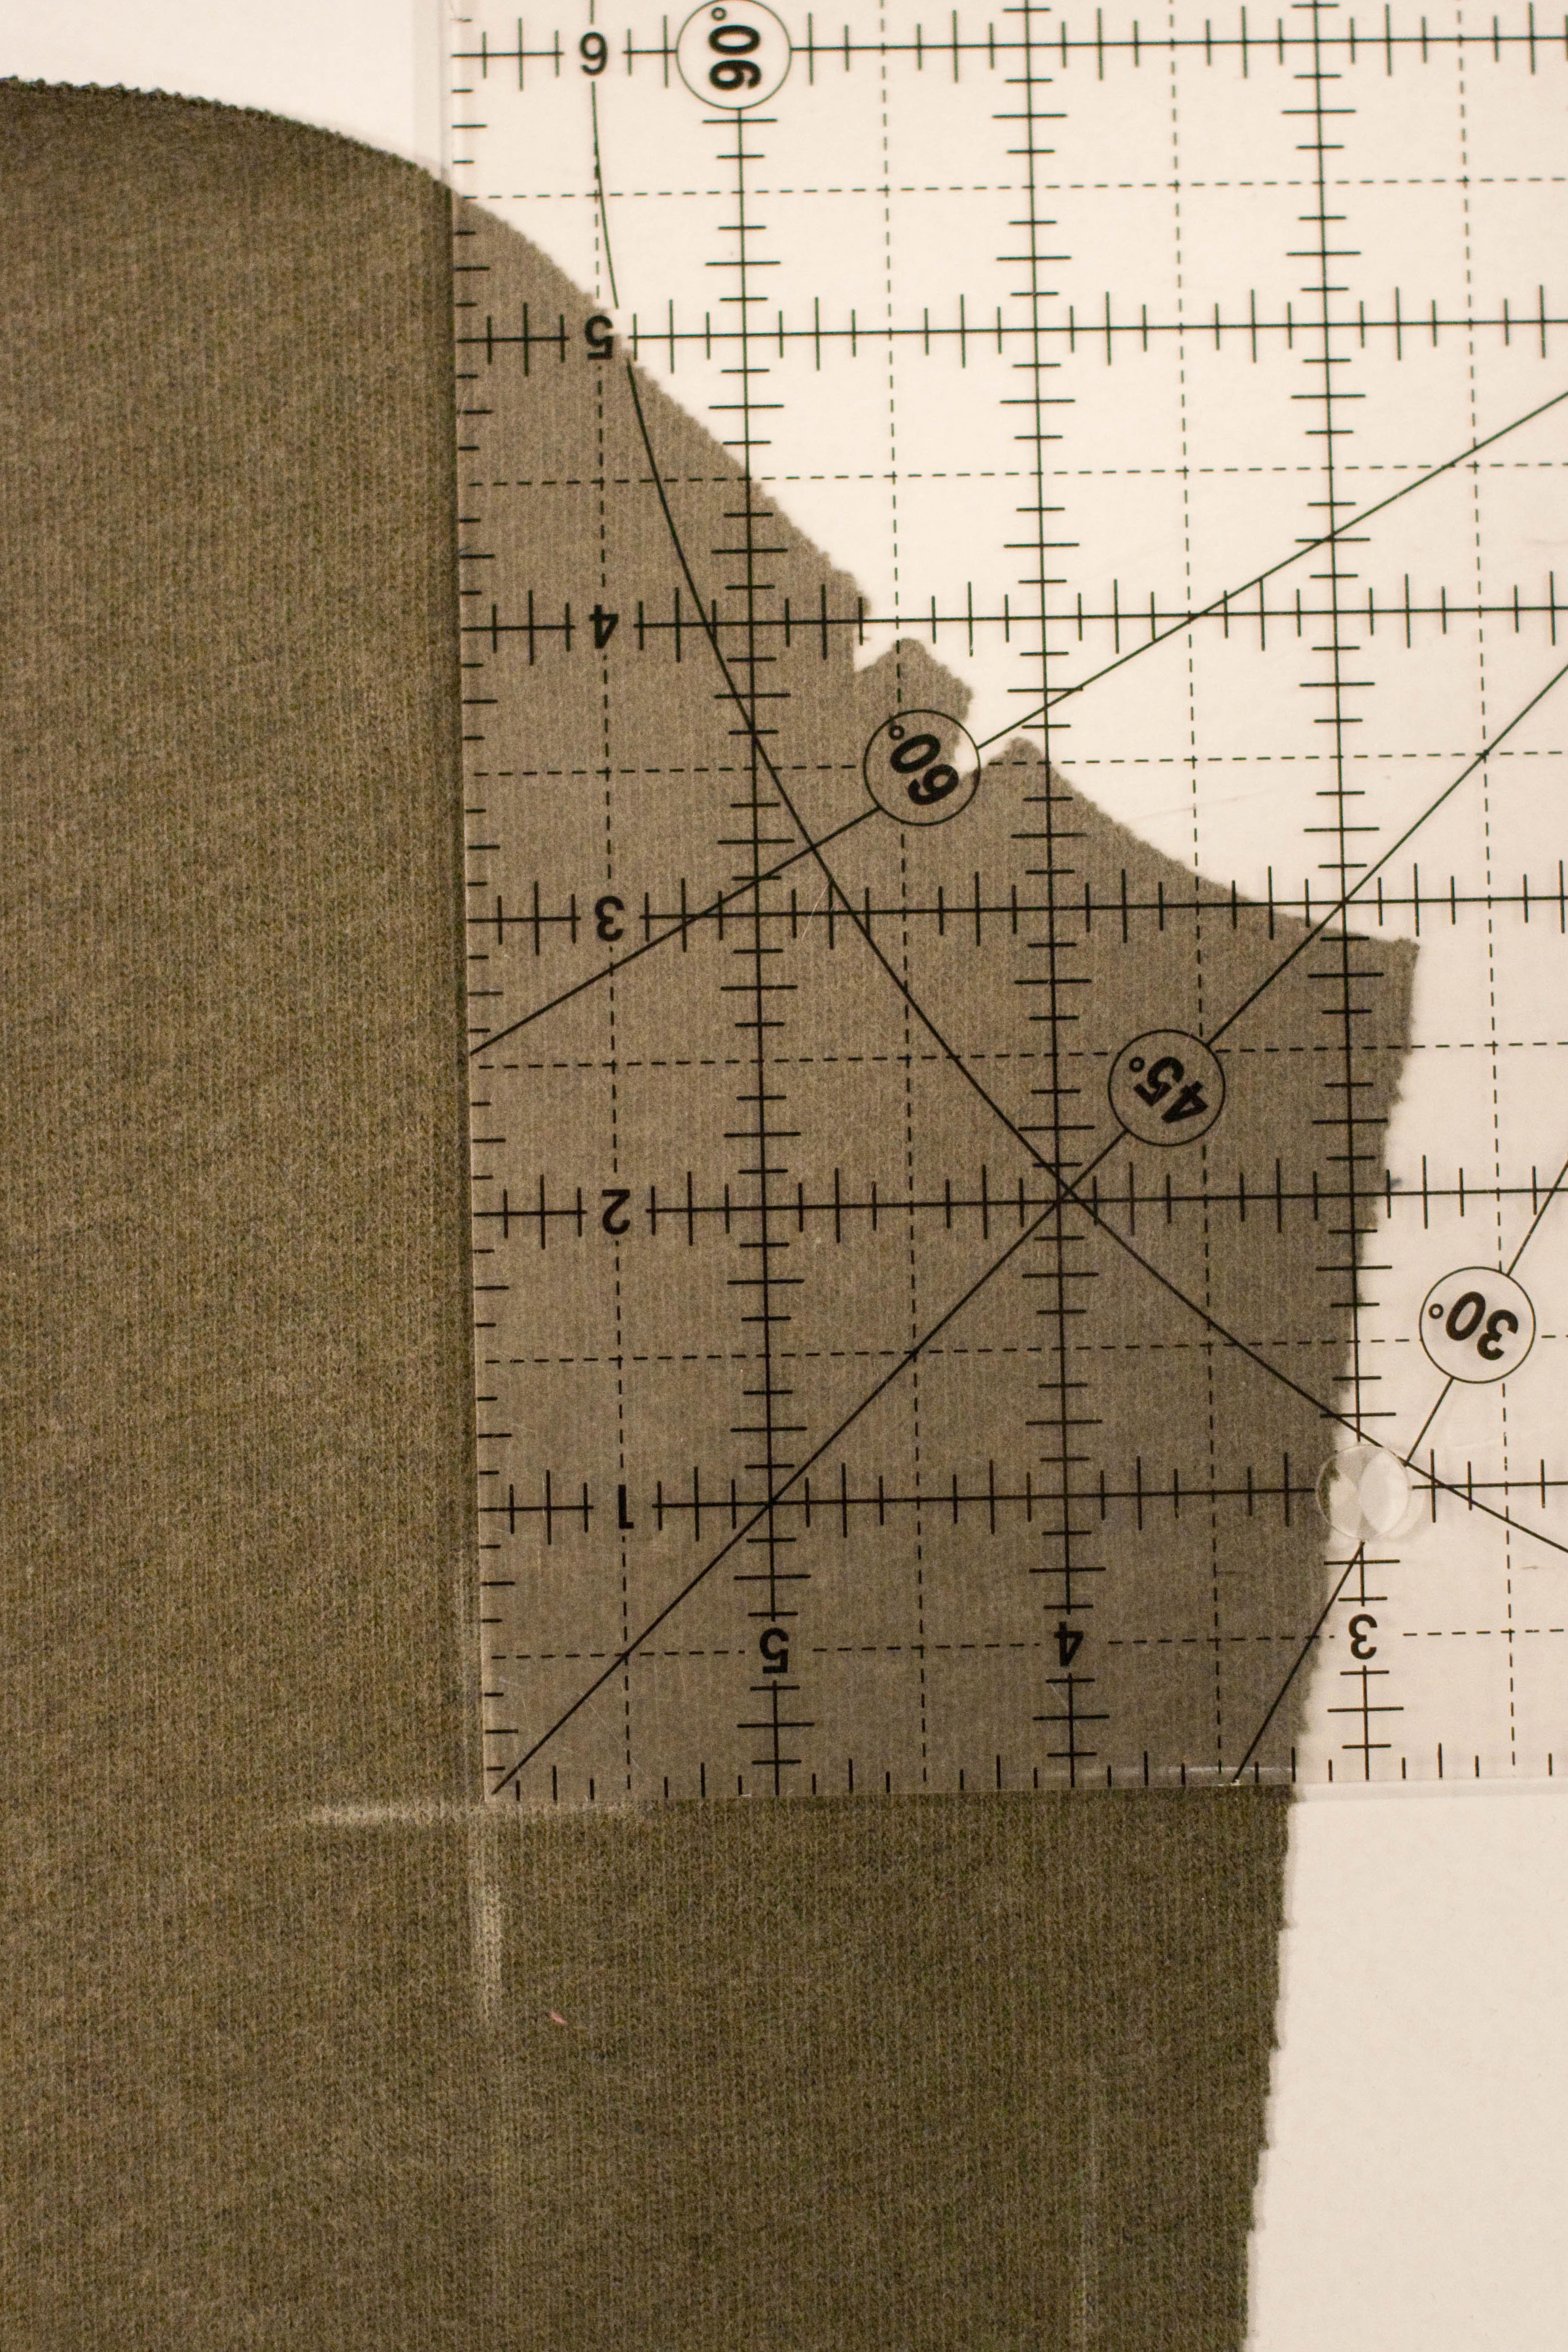
4.  Measure down from the shoulder edge along the vertical line that you marked in Step 3.  Mark your sleeve with a horizontal line at your Elbow Measurement (remember mine was 5.5″) so your markings form a +.  I shifted my ruler over to the edge for clarity, but you should line it up through the middle of the ruler to make the + shape.
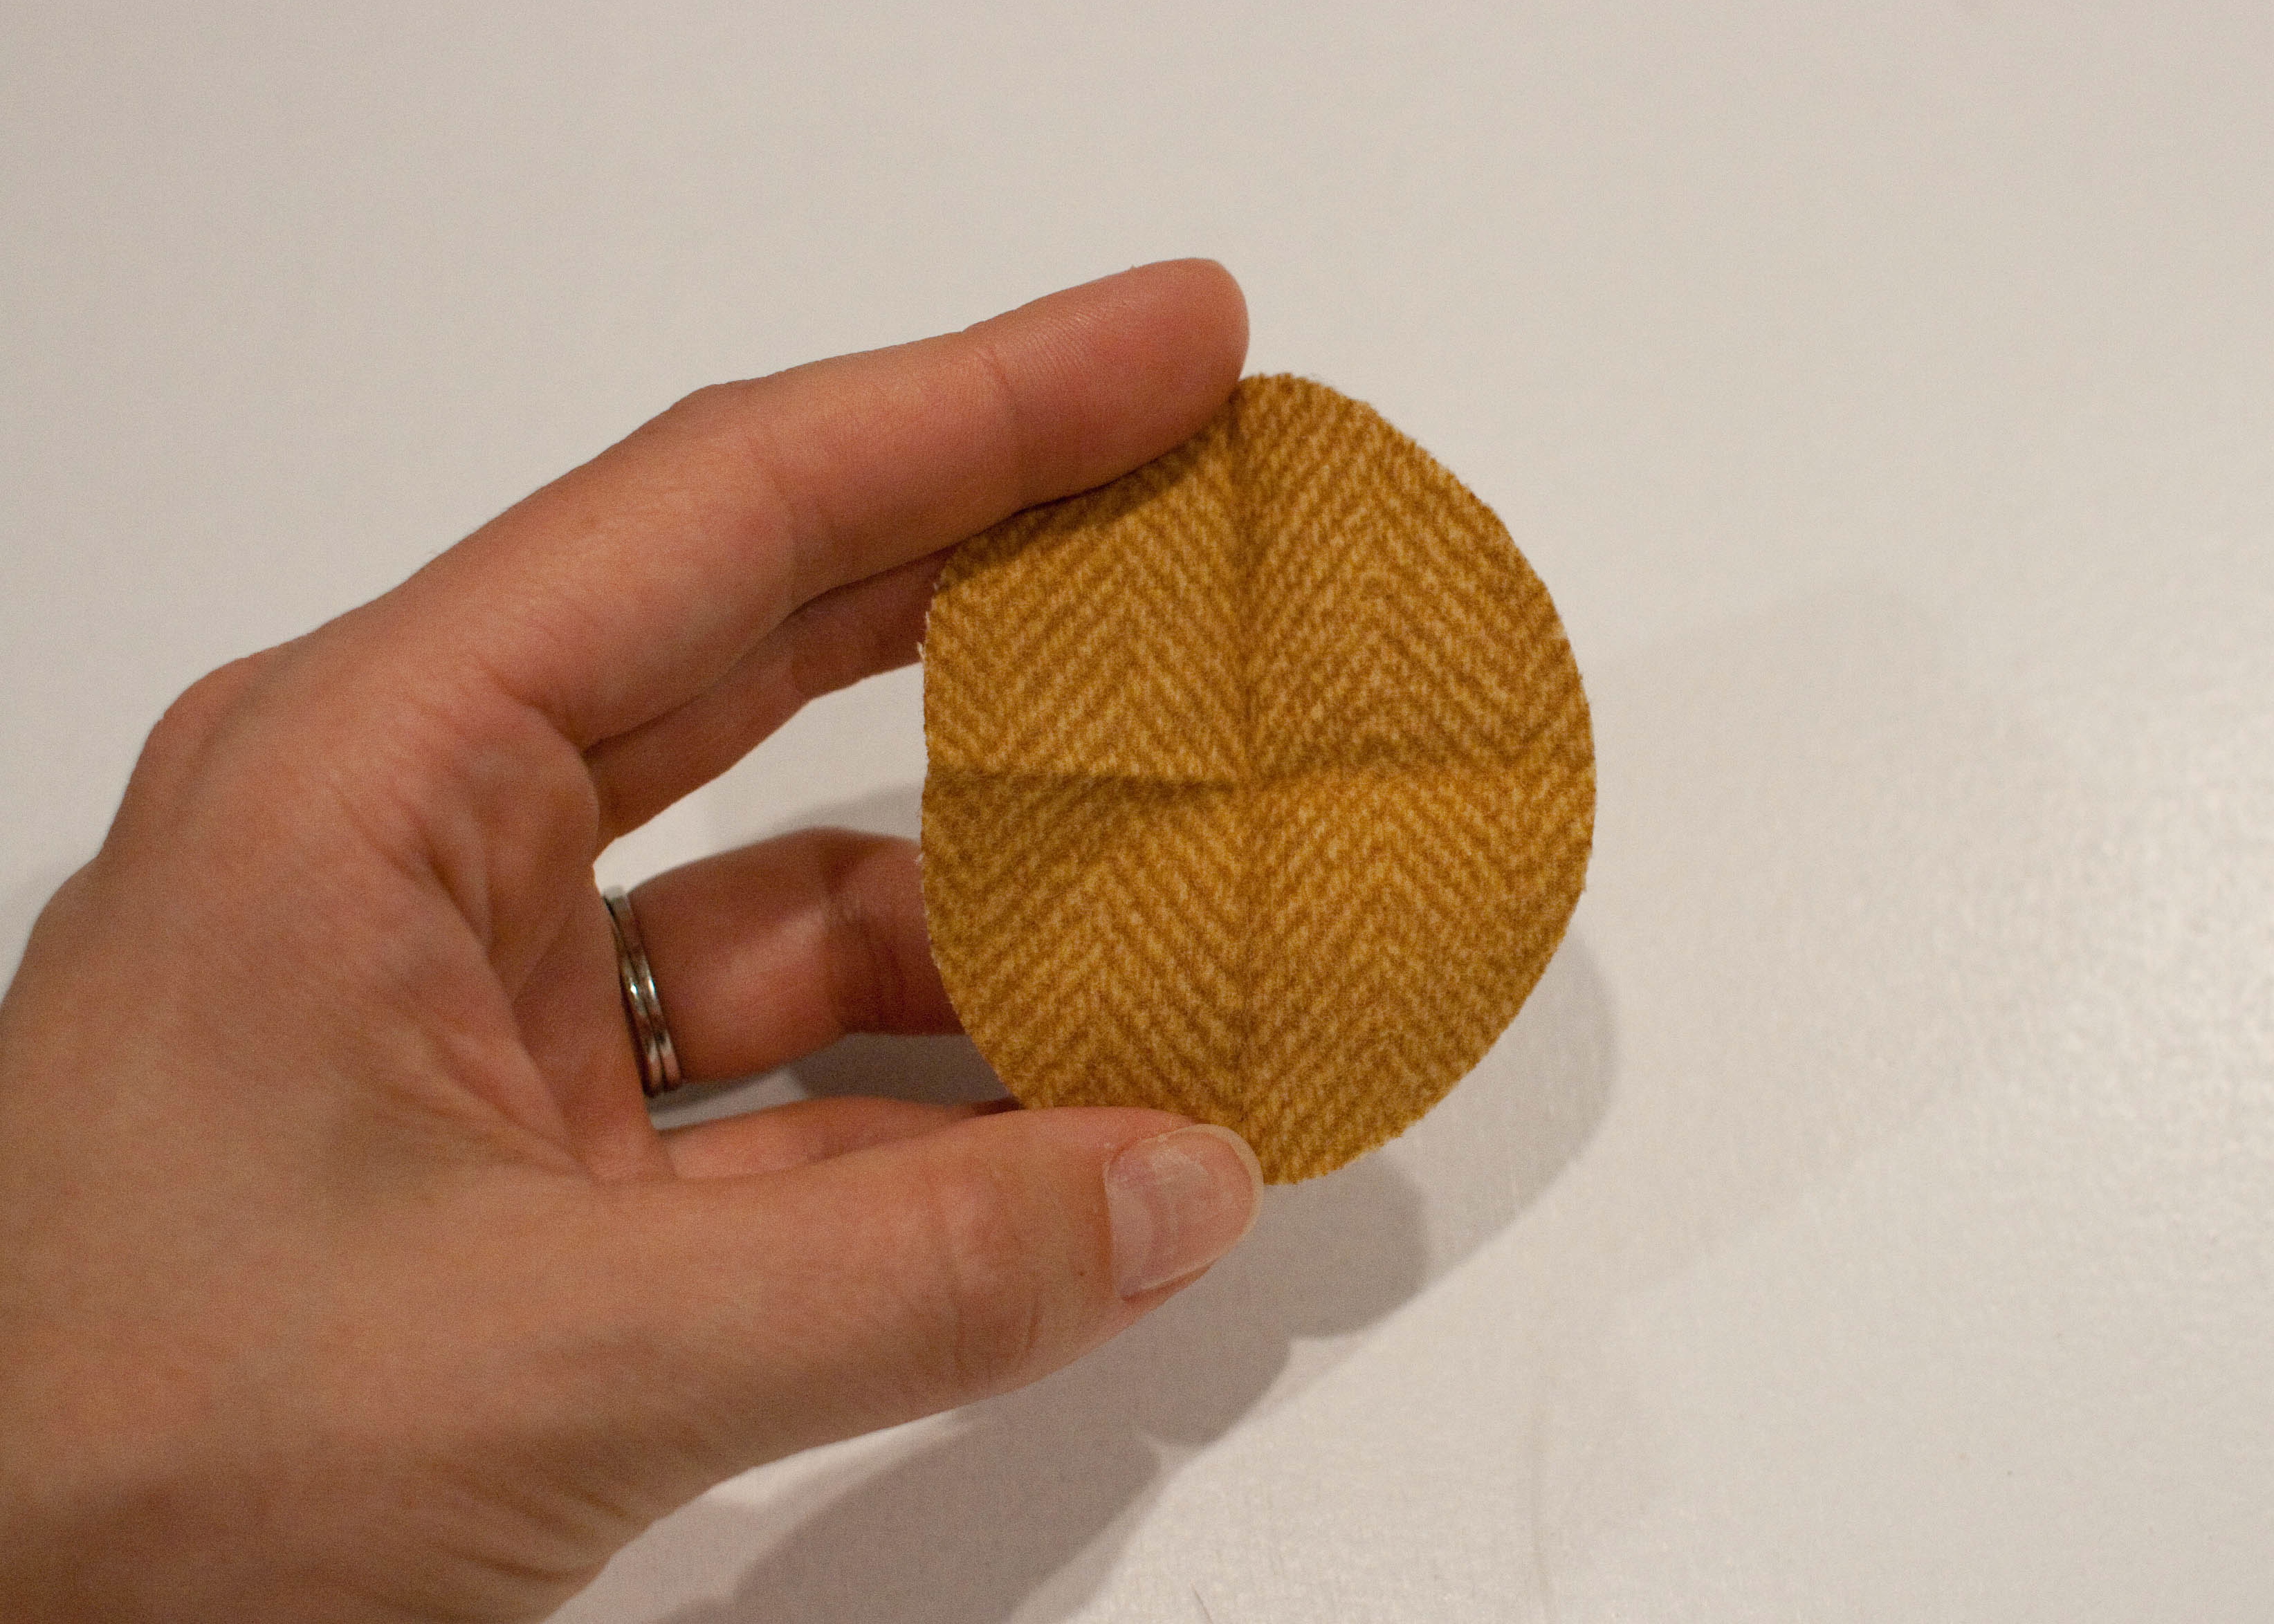
5.  Trace the patch pattern onto your patch fabric, cut them out, and find the center of each patch by folding it into quarters and pressing slightly.  Apply fusible web if desired (the patch is essentially an appliqué).  Match the center of the folds on one patch with the + marking on your sleeve and pin into place.
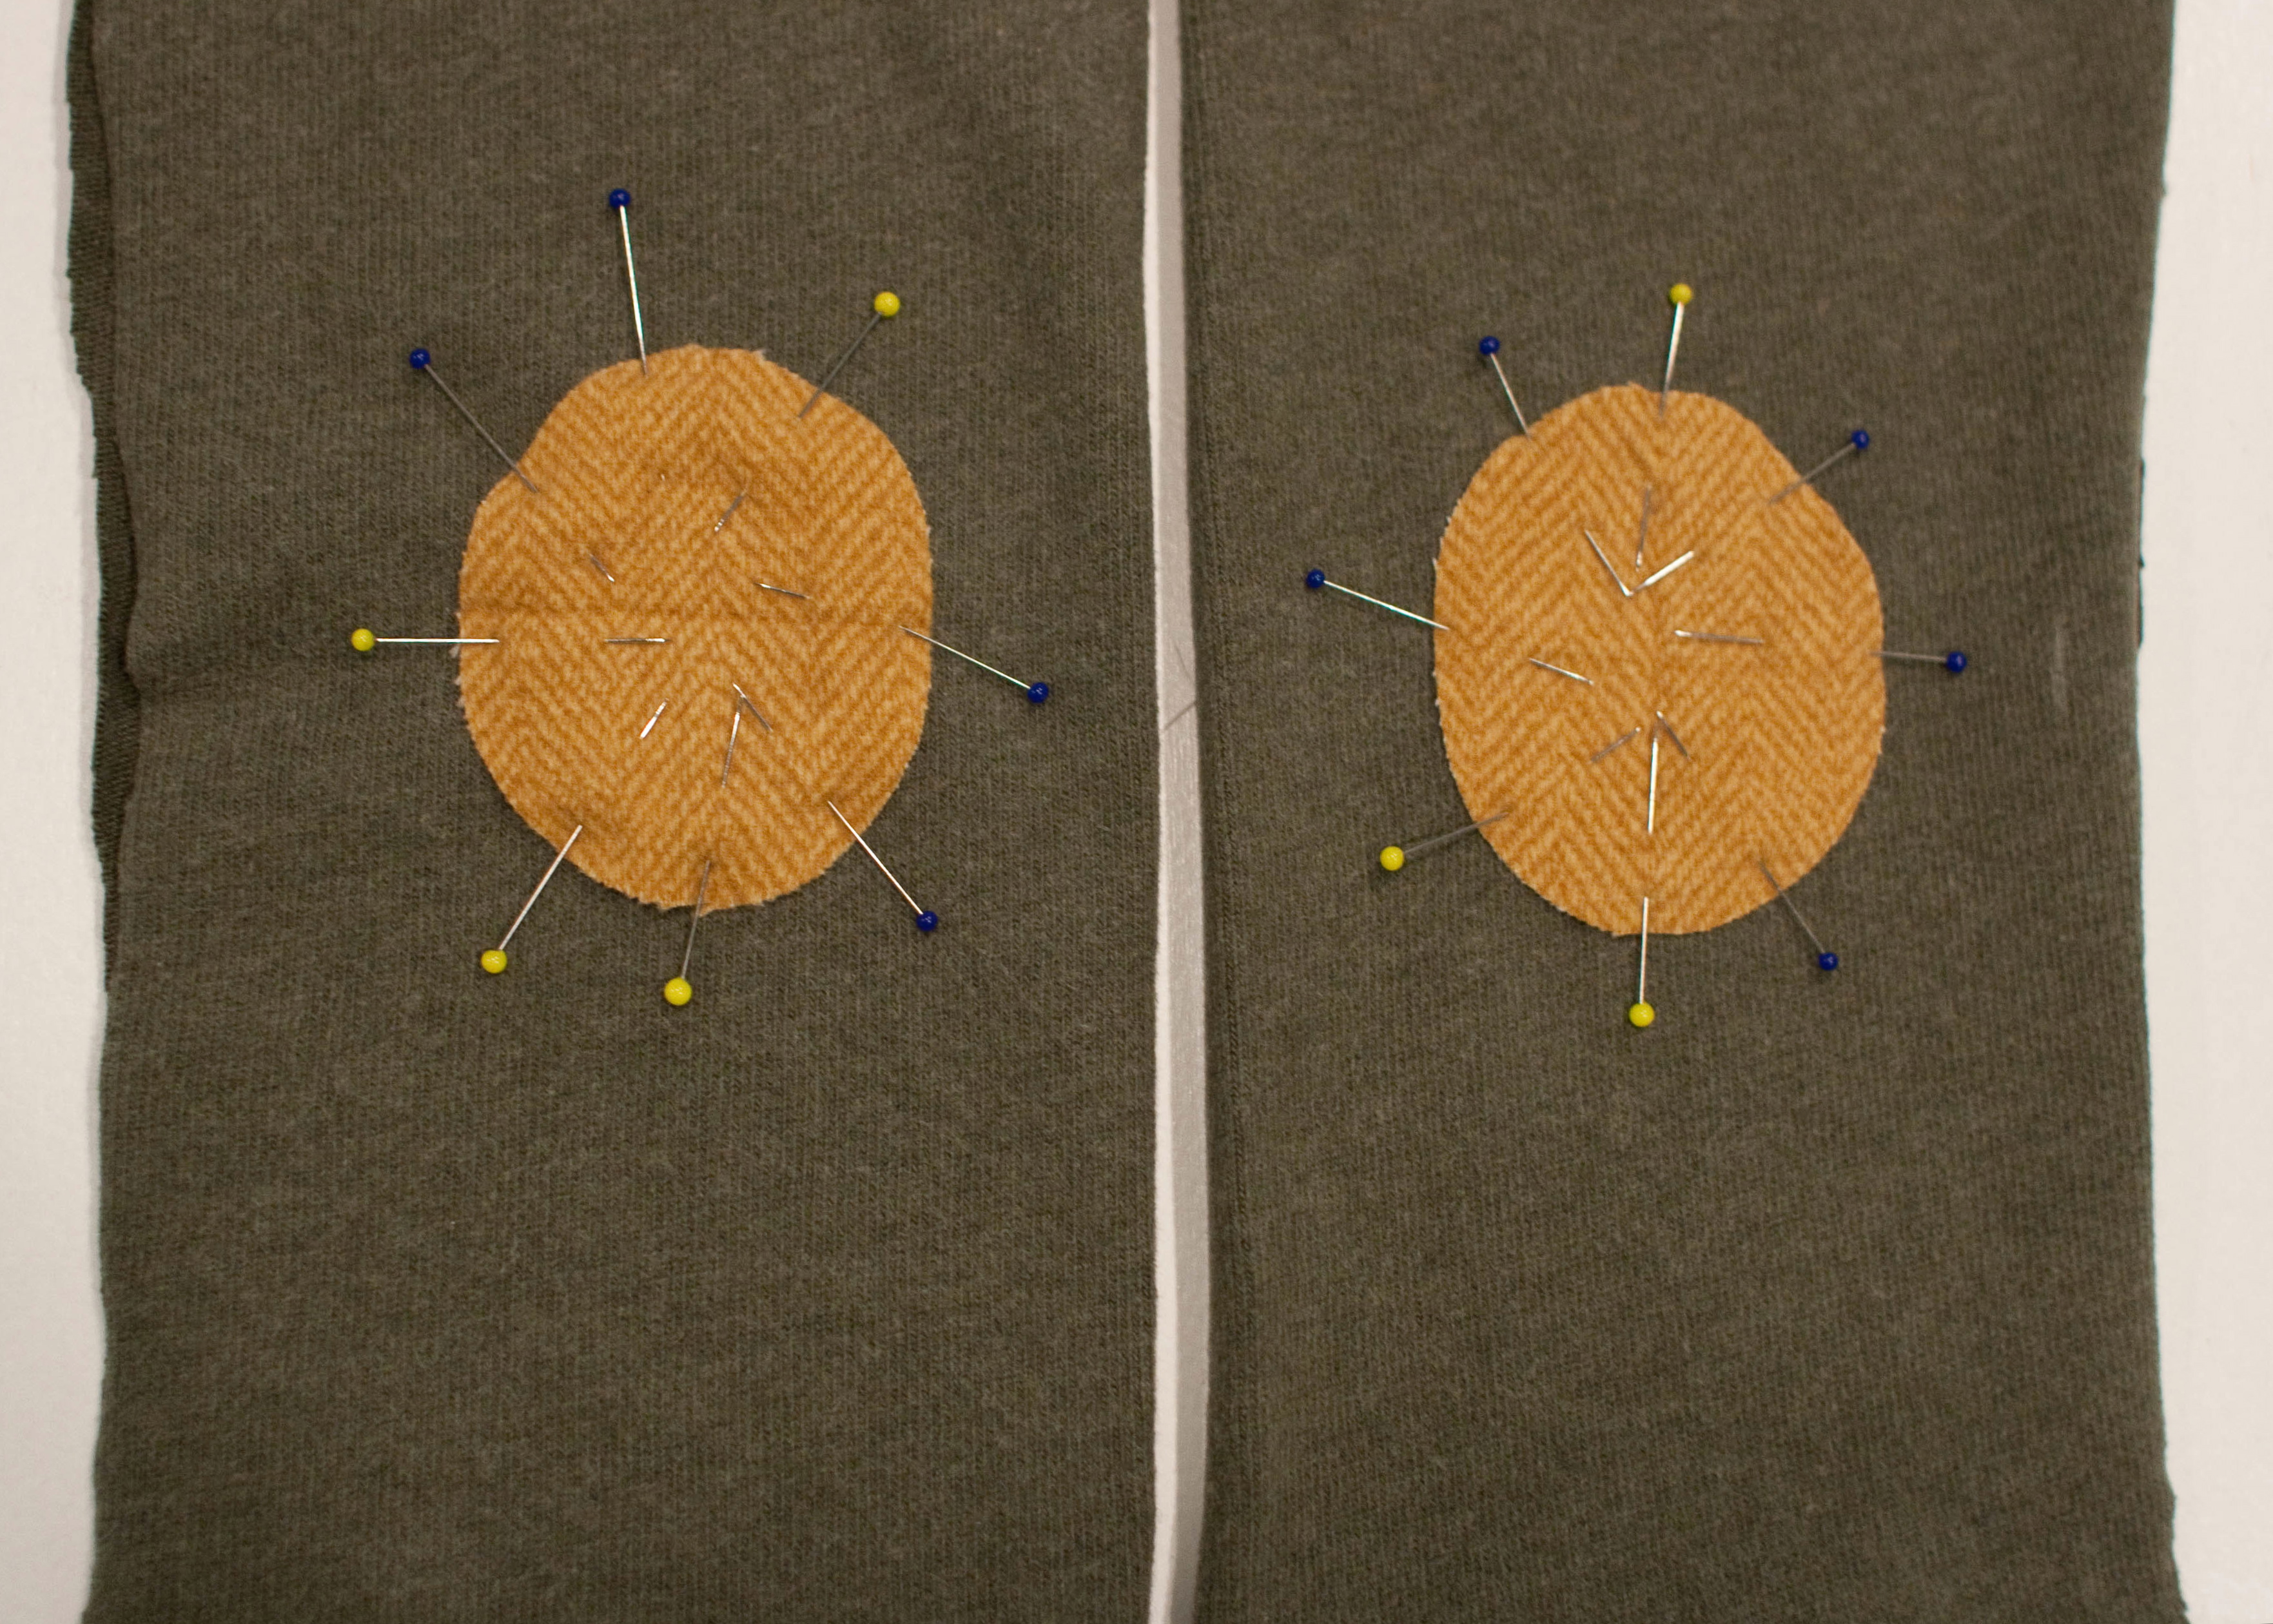
6.  Lay your second sleeve piece down so the sleeves are side by side with the edges aligned.  Using your clear ruler as a guide, place the second patch on its sleeve to mirror the one you already pinned on.  Measure in from the side edges to center it, as well.  Make sure your sleeves are mirror images so you don’t apply the patch to the front of a sleeve!  Pin the second patch into place.  Be generous with pinning if you didn’t use fusible web.
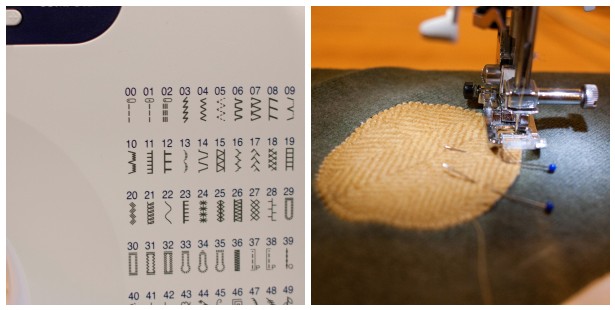
7.  Sew around the edge of each patch using a straight, zig zag, or blanket stitch.  I used a blanket stitch here (number 11 on my machine).
8.  Repeat for the other sleeve.  Your elbow patches are on!  Press each patch to set the stitches (unless you’re using leather), then finish your garment per the pattern instructions.
I hope this helps you add a little extra punch to your little one’s long sleeved shirts and cozy fall sweaters.  Thanks so much for having me, Meg, and happy KCWC sewing, everybody!

 I discovered Mary Frances work during one of the first KCWCs. She spent the week making outfits inspired by illustrations in children’s books–the frog and toad trousers were so stylish I wanted some for myself! For this pre-kcwc party week, Mary Frances has written a fantastic tutorial for hoods. You can add a hood to an existing shirt or a pattern you are working on, she has directions for both.  Plus she’s put a bit of elastic in the hood to help it stay on which I think is absolutely genius! 

DSC_0399

Hello elsie marley readers!  I was so excited when Meg asked me to guest post about clothing details that I quickly signed up for pants closures… then spent half that night lying awake, gripped by visions of HOODS and the finer points of their construction.  Luckily Meg is one who understands late night visits from the (pushy, pushy) sewing muses and she tolerated–nay, encouraged!–my change of heart.

DSC_0347

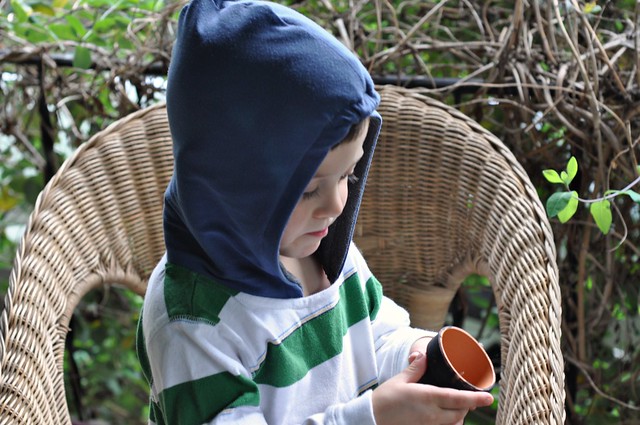
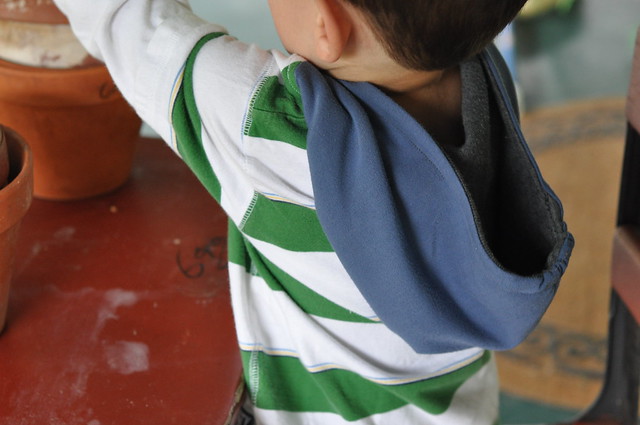
But really, who could blame me?  Hoods are a fun and easy detail to add to any shirt or jacket.  They provide the functionality of convenient warmth (no more losing track of hats) and the fashion bonus of being particularly cute on kids.  They are great for boys’ or girls’ clothes, evoking the fly-behind feeling of a superhero’s cape as easily as the fairytale mood of Little Red or a princess-in-the-woods.

Hoods provide a surprising number of opportunities for personalization and creativity.  The tutorial below is for a pretty basic lined hood, but you could use the same techniques to come up with many different variations:

–Experiment with shape–this pointy one (via Meg’s pins) makes me swoon.
–Add cat/dog/bear ears or dinosaur fins for a Halloween (or any day!) costume.
–Play with different kinds of gaps and overlaps at the neck, like these from Trula.
–Use the liner to showcase a special or wild fabric that might be a little much for a full garment: I like this one by Heidi of mypapercrane.
–Add embellishments like decorative topstitching, edge lace, fancy drawstrings, or piping.
–Once you have mastered the two-panel hood, experiment with three-panel construction–these are more common on heavy garments like rain jackets and offer yet another fabric “zone” to play with; the jacket in Anna Maria Horner’s Handmade Beginnings is a great example.

Ready to add a hood?  Here’s the higly official

DSC_0390

Gather Your Materials
DSC_0319

You will need:
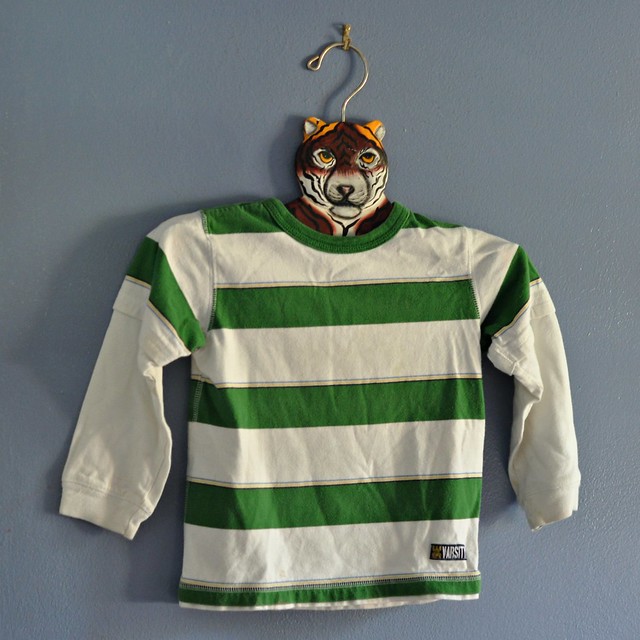
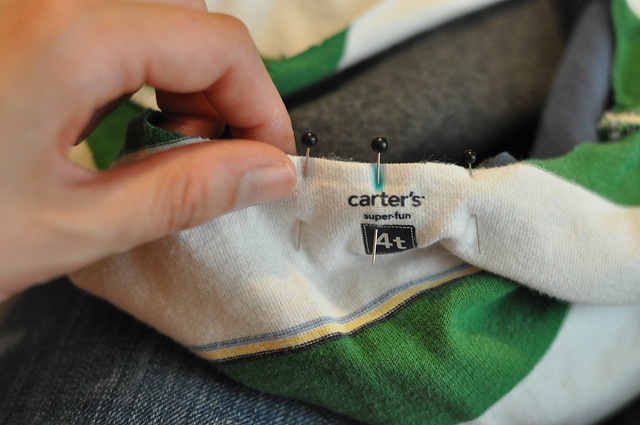
–The shirt you’ll put the hood onto. I used a hand-me-down storebought shirt, but you could also modify a pattern to include a hood. Just make the shirt/jacket/cardigan up to the point of attaching the collar, and make and attach a hood instead.
–1/3 yard outer fabric
–1/3 lining fabric
(I used an old knit shirt for the outer and an old sweater for the lining.  You can use any fabrics that you think will complement and sew nicely onto the base shirt.)
–3 inches of 1/4″ elastic (optional)
–paper and pencil for tracing the pattern
–pins, scissors, thread, measuring tape and whatever other sewing gadgets you like to use

Make Your Pattern
DSC_0313


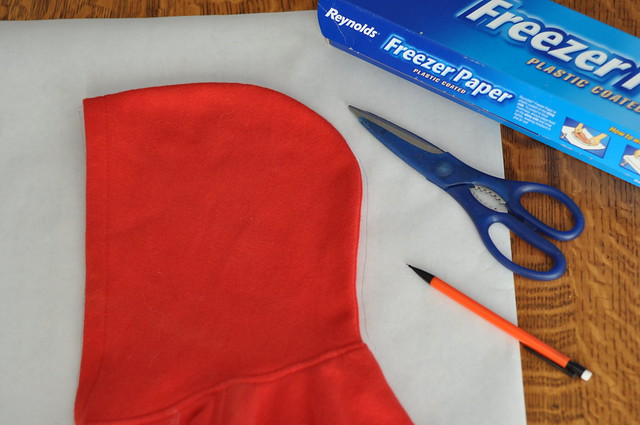
1.  You can use a hoodie you already have to get the general shape.  Fold your hoodie in half longwise, lay it on your pattern paper (I use freezer paper so I can iron the pattern on at the cutting stage) and then trace the hood with a pencil.
2.  After you trace the hood (or maybe you just winged it and drew a hood-like shape; that’s OK too), you’ll need to check your dimensions and adjust slightly:
–With a flexible measuring tape, first measure from the top of your child’s head down to the base of their neck.  Add 1 to 2 inches to this number (1″ will be a more closely fitting hood, 2″ will be looser; err on the long side if you are planning to cut an exisiting collar away from a shirt) and adjust the height of your hood pattern to match.
–Now measure the circumference of the collar of the shirt you’ve chosen.  If you’re going to cut off a pre-existing collar (see below), be sure to measure below it at the cutting point (the measurement will be slightly larger than the top-of-collar circumference).  Take half of that measurement and adjust the width of your hood pattern: a larger width will mean your hood overlaps at the front, a smaller width will leave a gap at the neck.
DSC_0315
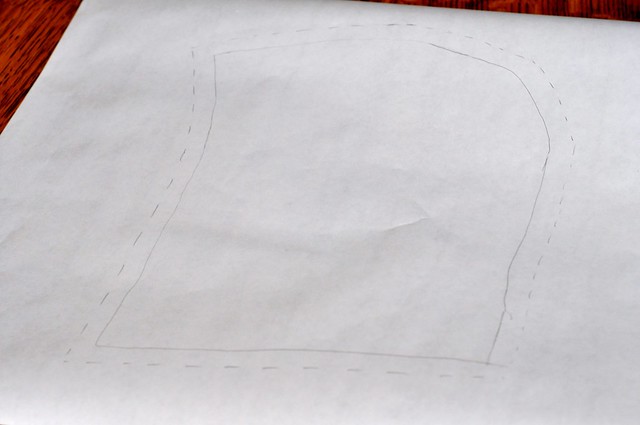
3. Add 1/2″ seam allowance all the way around the new pattern.
4. Cut your pattern out!

Cut Out Your Hood Pieces
DSC_0324

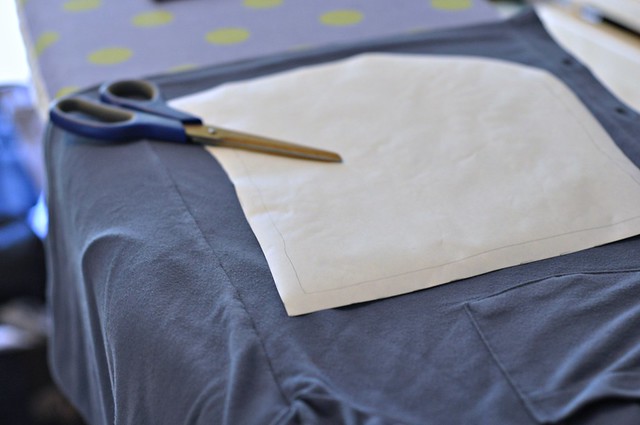
1.  Fold your outer fabric in half such that the hood pattern will fit onto it.
2.  Lay the hood pattern on top (not directly along a fold), pin or iron in place, and cut through both layers of fabric (cutting the two sides at once helps keep you from making the unfortunate mistake of forgetting to reverse the pattern piece on one-sided fabrics).
3.  Repeat for lining fabric.
4.  You will have 4 identically-shaped hood pieces: 2 outer and 2 liner.

Sew the Hood
DSC_0328

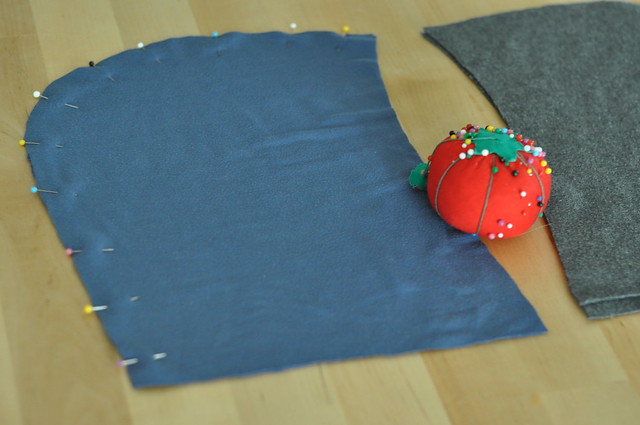
1. Take your two outer pieces and, with right sides together, pin along the curved side of the hood (you are making the main seam that goes from the top of the head all the way down the back).
2.  Stitch a 1/2″ seam, backstitching at beginning and end and removing pins as you go.
3.  Repeat steps 1-2 for liner fabric.
DSC_0331

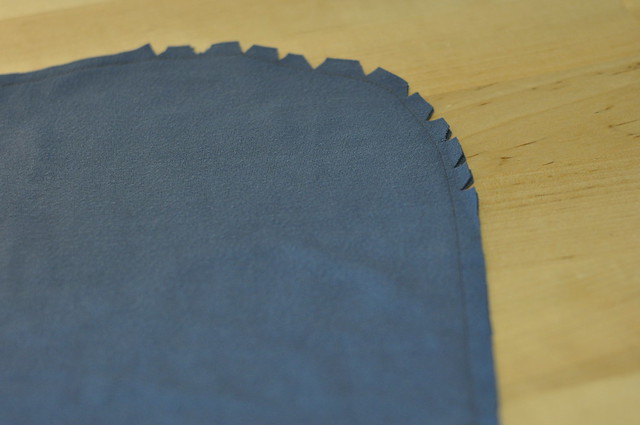
4.  For outer and liner, trim seam to 1/4″ and clip notches along the curve.
5.  Press seams open.
DSC_0332

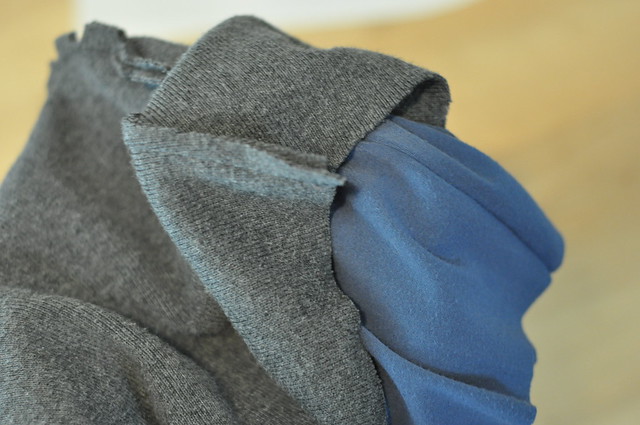
6.  With right sides together, slide outer hood into hood liner; match center seams and pin together along “face edge” of hood.
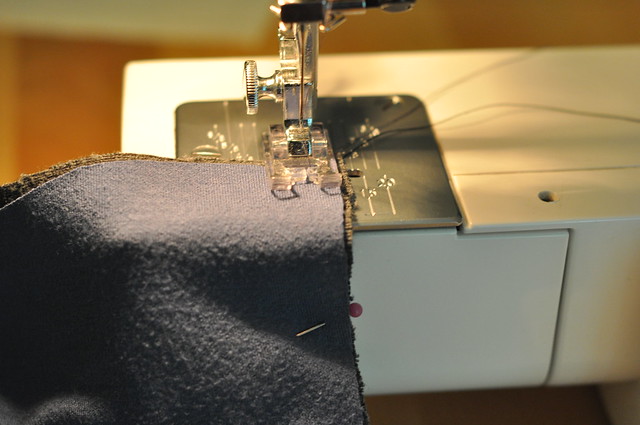
DSC_0334

7.  Stitch a 1/2″ seam along the edge you have just pinned, backstitching at beginning and end and removing pins as you go.

(**Steps 8-10 are optional and a little fussy, but I think they really help the hood stay on the head!**)
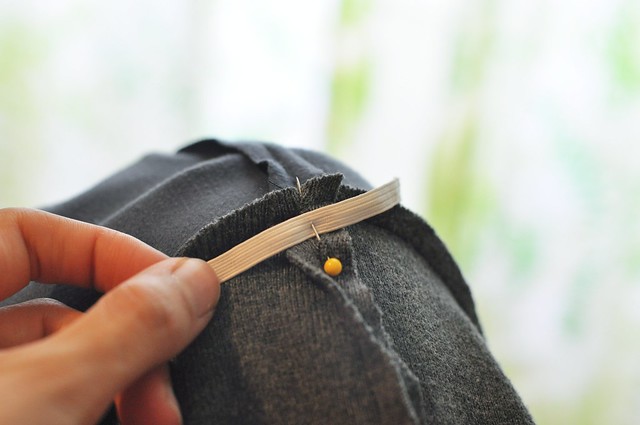
8.  Take your 3″ piece of elastic and mark the center.
DSC_0336

9.  Spread the outer and liner of the hood open (I found this easiest to do over my knee) and pin the center of the elastic to the center seam of the liner fabric only.  You want to position the elastic as close to the edge seam as possible (without crossing into the seam allowance)–you are going to enclose it within the topstitching.
DSC_0337

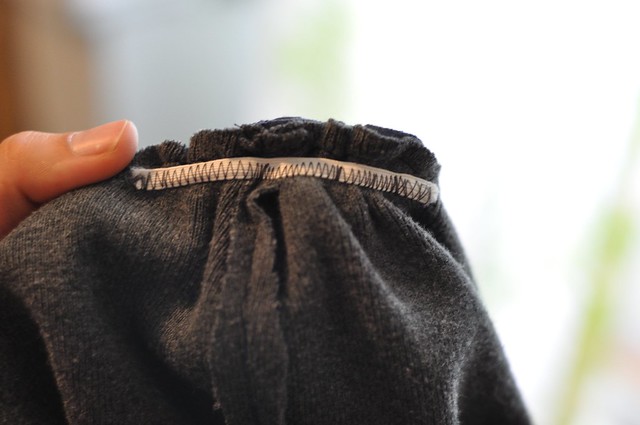
10.  Using a zigzag stitch, stretch and attach the elastic to the hood liner.  I pull the first part of the elastic out about 2″ extra (or as far as it will go) and use my presser foot to catch it, then use my hands to stretch the elastic as I stitch.  Make sure you are only stretching the elastic, not the fabric itself.

11. Turn the hood right side out and press.
12.  Pin along the face edge again, making sure to match center seams.  This is so the two layers won’t slip around while you are topstitching.
DSC_0338

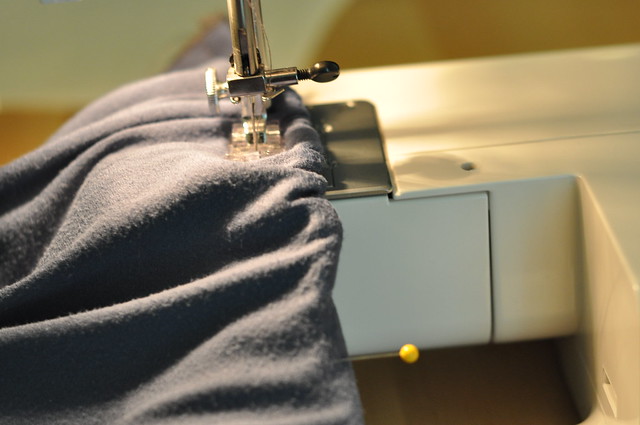
13.  Topstitch along the face edge about 1/2 to 5/8″ in. from the edge.  If you used elastic, sew carefully along that area, using your hands to keep the liner flat as you go (don’t stretch the hood fabric itself).

Attach the Hood to the Shirt
DSC_0340

DSC_0341

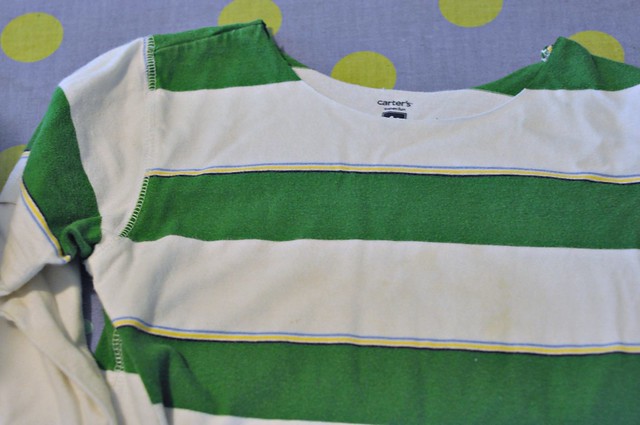
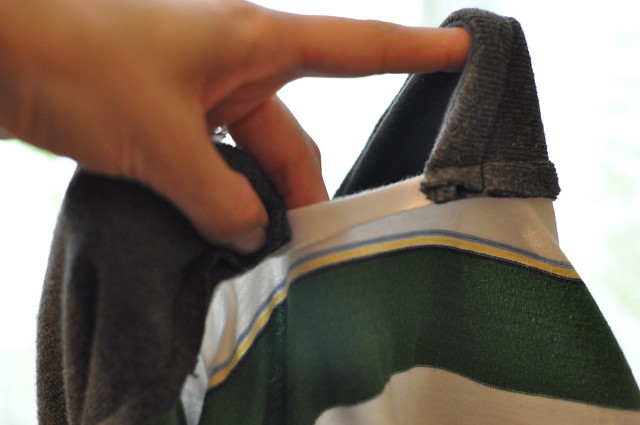
1.  If you are using a premade shirt, you will probably want to remove the existing collar.  Cut it away from the shirt closely and carefully.
2.  Fold your shirt in half longways and mark the center front and back of the raw collar.  Use these points to guide you as you pin the hood to the shirt, right sides and raw edges together. Make sure the overlap or gap at the front lines up the way you want it to.  (I pinned with the shirt inside out, so the hood is inside the shirt in this picture.  It would have been easier, however, to turn the shirt right side out.  I ended up doing that anyway before I sewed.)
DSC_0342

3.  Stich all the way around the hood to attach it to the collar.
4.  Turn the shirt right side out and check to make sure the hood looks ok!  Then turn it inside out again.
5.  To finish the inside, trim seam neatly and press toward bottom of shirt.  Topstitch all the way around the collar within the seam allowance, catching the gap fabric (if you have a gap) to hem it as you go.  (If you are the fancy type, you could also use twill tape or a serger to finish the seam.)
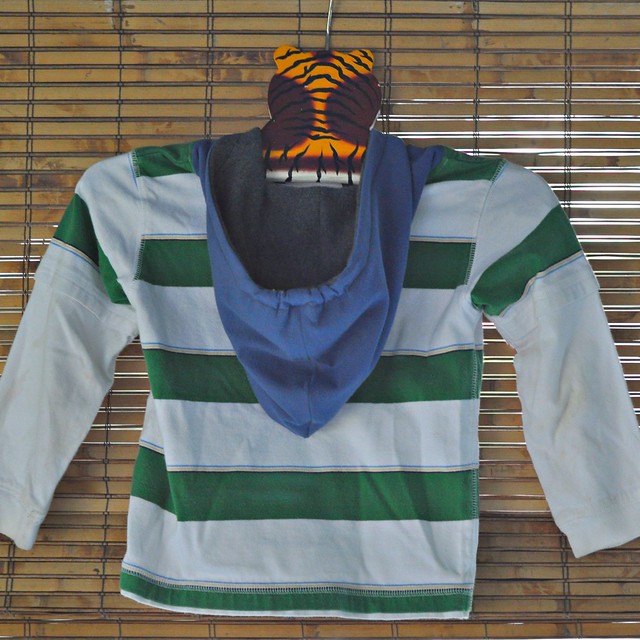
6.  Admire your new hooded garment!  I mean, your kid’s.  Unless you cheated on kcwc and used this tutorial to make a hoodie for yourself, which would work, but would be highly, highly unethical.  So don’t even think about it.
DSC_0418

DSC_0348

DSC_0383

DSC_0392

Mary Frances blogs bits of craft and life at this is marzipan.  Come say hello!

I want to welcome Sophie from Roubidou as our first guest poster this week! I have been watching her sew tiny, beautiful clothes all through her pregnancy: quilted jackets and fuzzy vests and amazing ensembles! Even though she was very, very pregnant, she agreed to write up a tutorial for us. And wow, what a tutorial it is! A cuff is a lovely detail and now you can put it on a shirt, a jacket, a pair of pants, or all three. After you’ve finished reading the tutorial she made, go have a look at the lovely baby she just made! Congratulations Sophie!
* * * * * * * * * * * * * * * * * * * * * * * * * * * * * * * * * * * * * *

Hello dear Elsie Marley readers,

When Meg asked me to do a little tutorial for KCWC I was pleased as punch not only for an opportunity to be a guest on one of my favourite blogs but also to be part of this autumn’s sewing frolic after all (our daughter is supposed to arrive on the 10th). I sewed the outfit to introduce three slightly different types of cuffs and hope you can follow the instructions without too much effort. I’m a self-trained dilettante so the tutorial below is merely what worked for me.

Happy KCWC,

Sophie

* * * * * * * * * * * * * * * * * * * * * * * * * * * * * * * * * * * * * * *

Shirt:

1. Sew the shirt as indicated by your pattern ignoring the instructions for the sleeve finish. Look at the given seam allowance and the sleeve finish method of the pattern, calculate the length of your cuff plus seam allowance to determine how much you’ll shorten the sleeve before adding the cuff and placket. To save fabric you could do this before cutting the fabric. If you have your little client ready and willing have her/him put on the garment to tailor the sleeves according to his/her measurement.

2. Make a pattern for you placket and cut out the placket twice (you’ll want mirroring plackets unlike the ones in the photo).

3. Place the placket with its ride side onto the wrong side of the sleeve and sew a little rectangle. Slash through the placket and sleeve down centre right between the stitches and carefully clip to the corners of the rectangle.

4. Turn the placket to the right side of the fabric and press. Now it’s likely to become a bit finicky. I very much prefer sewing for kids since it is so much quicker, pieces are easier to handle and you need less fabric. But sewing this placket, especially for a size 2 shirt, I wished I was sewing an adult sized shirt. To help you through this fabric origami it might be good idea to have a ‘real’ shirt with a placket lying next to you for visual guidance.

5. Fold back the long edge of the shorter side of the placket and pin in place. Then sew the folded edge in place stopping at the top of the gap. Tie the thread ends securely on the wrong side.

6. Next, fold the other side of the placket across the shorter side and press under the long edge. Fold back so that the pressed-under edge is on the sewing line and pin in place. Now, fold under the top pointed end,and press. Sew the long folded edge and make sure the underside of the placket is not caught in the stitching. Stitch an X at the end of the placket. Finish by tying the thread ends on the wrong side.

7. Now, gather the sleeve, stitching along the sleeve line with the longest stitch available on your sewing machine. Pull on the threads to manipulate the sleeve.

8. Cut out the cuff in the desired size. I used a one-piece cuff cut from the fabric in one piece and applied fusible interfacing to the half of the cuff that will be the upper cuff. Fold the seam of the non-interfaced side and press. Next sew the cuff onto the sleeve, right side to right side and trim the seam allowance. It’s important that you have an overlap as large as your seam allowance on both sides.

9. Fold and press the cuff to itself, right side to right side, so the folded side of the cuff comes to the sleeve-to-cuff seamline. Sew the ends in line with the two openings, cut the seam allowance, and press the seams open.

10. Trim, turn and press the cuff to the right side. I sewed the folded under cuff in place by machine, but if you want an invisible finish for your could,  hand stitch the folded edge on the inside with a blind-stitch or a slip-stitch.

11. Make a buttonhole on the upper side of the cuff and sew a button on the underside of the cuff. Repeat for the other sleeve.

Jacket:

1. Sew your jacket bearing the same alterations in mind as with the shirt.

2. Now on to the band cuff. Cut the cuff in the desired size, you’ll have two pieces of different fabric per cuff. Since the outside fabric is already thick I didn’t use fusible interfacing, depending on your fabric you might want to apply interfacing to the upper cuff. Pin the two pieces together, right sides facing, and turn under a seam allowance on the under cuff and press. Stitch the lower edge together. Trim and press open the cuff. 


3. Then sew the short side ends together, trim and press again. 

4. If you want to gather the sleeve before sewing on the cuff, do so now. Then sew the sleeve to the upper cuff, right sides facing. Trim and grade the seam. 

5. Press the seam allowance towards the cuff. Turn the cuff inside along the foldline, wrong sides facing. On the inside of the sleeve sew the under cuff in place either by machine or handstitch.

6. Repeat for the other sleeve and that’s it. 

Pants:

1. This cuff is sewn very similar to the shirt cuff. The main construction difference is that this is a lapped cuff which is used for bound or faced openings. I didn’t use any of these openings since I lined the pants and had my raw seams of the opening sandwiched between the lining and the main fabric. With a lapped cuff you’ll have to sew the cuff onto the knee sleeve with an overlap where the button will be. Sew your pants bearing the same alterations in mind as with the shirt

2. Now to the cuff. Start by sewing a line of piping (with your zipper foot) long enough for two sleeve cuffs. Then cut the cuffs in the desired size (i simply used a cereal bowl to trace the round edges). You’ll need four pieces altogether, I used the same fabric inside as outside in order not to distract from the piping. Pin the piping to the right side of one sleeve cuff. Stitch close to the stitching line on the piping, sewing with your zipper foot.

3. Turn under a seam allowance on the under cuff and press. Place the under cuff over the piping, right sides facing an sew the outer line of the cuff close to the previous stitch and the piping again with your zipper foot. Trim, turn and press the cuff.

4. Now attach the cuff to the knee sleeve as you did with the shirt but leave a seam allowance on one side and an overlap (long enough for your button) on the other side. Sew the cuff to the knee sleeve as you did with the shirt. Fold and press the cuff to itself, right side to right side, so the folded side of the cuff comes to the knee-sleeve-to-cuff seamline. Sew the shirt end in line with the opening and trim. Sew the overlap end along from the knee-sleeve to-cuff-seamline and then down to the cuff. Clip the corners and press the seams open. Push to the right side and finish the edge of the under cuff either by hand or machine.

5. Make a buttonhole on the upper side of the cuff and sew a button on the underside of the cuff. Repeat for the other knee sleeve.

And ready is a cuffy outfit.