Errol, the chicken, is packed up and ready to go to Brooklyn. He’ll be at Fact & Fancy, a new gallery/shop started by two lovely ladies from Etsy. Rudolpho and Werner will be there too. I’m very excited about this, but right now I’m just tired.
good night.
Posted in plush. 14 Comments »
because it’s friday and I don’t have anything to show you anyway.

The concept:
a. Type your answer to each of the questions below into Flickr Search.
b. Using only the first page, pick an image.
c. Copy and paste each of the URLs for the images into fd’s mosaic maker.
The Questions:
1. What is your first name?
2. What is your favorite food?
3. What high school did you go to?
4. What is your favorite color?
5. Who is your celebrity crush?
6. Favorite drink?
7. Dream vacation?
8. Favorite dessert?
9. What you want to be when you grow up?
10. What do you love most in life?
11. One Word to describe you.
12. Your flickr name.
If you need to see the answers, go here. I stole this from domesticali, but you should play along.
Posted in misc. 7 Comments »

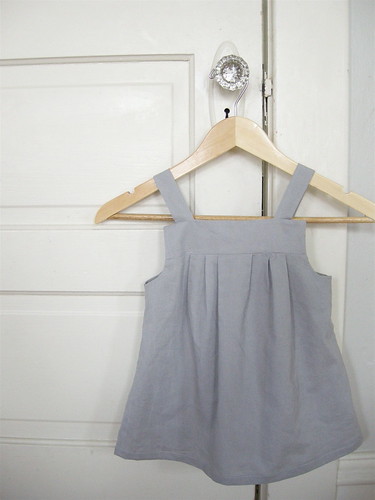
This is the first dress I’ve made for my daughter, even though I’ve bought yards (and yards) of different pretty prints since she was born (2 and a half years ago!) intending to make many dresses and skirts. I was nervous about using a pattern and nervous about trying to fit a garment on a toddlers, but they are straight little noodles, so really it’s not hard at all. When Martha from Uniform Studio started making a garment a day for the month of may, I thought if she could whip out 30, then I could probably make one. So now that May is 2/3rds over it’s done. Granted it took me most of the month to find the pattern, but last weekend at the thrift store there it was and for 10 cents!

I had the idea for a little dress with a big pleat in the front and a strip of patchwork going down the middle and it turned out exactly the way I wanted, thanks mostly to the pattern. The back and the front are the same in the original, I just combined all the little pleats into one big pleat in the front and kept the back the same.

There is a lot going in these parts over the next month, so things might be quiet here. I’ll try to pop in once and a while, but I don’t think I’ll have much time for making. In the meantime, I’ve updated some of my links (especially the clothing section) so you can jump over there for your craft blog fix.
have a great weekend!
Posted in sewing clothes. 31 Comments »

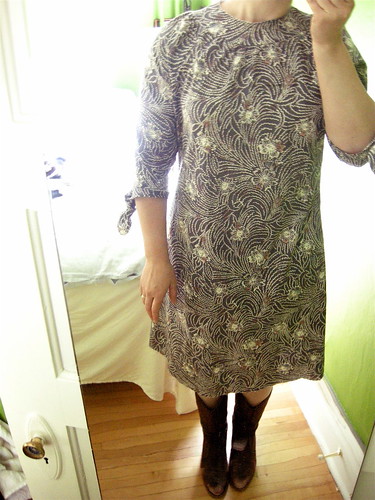
Simplicity 3835, almost done. This is my first dress and it went surprisingly well. I don’t know what I was afraid of really. Everything I had trouble with was only due to me not paying attention (or not reading the directions). But it’s too big. I wanted to make sure it wasn’t going to be too small and I guess I did that, but dammit now I have to fix it. I read somewhere that the arms were cut on the small side in this pattern and with my baby hefting biceps, this bigger size fits my arms just fine. So do I have to take the arms completely off to take the dress in? I’m guessing the answer is yes. Oh well.
A few other garment making questions:
when do you finish the raw edges? As you go or should you wait on certain ones until your sure it fits (yup, I zigzagged those damn armholes)? My kenmore sewing machine has an “overlock” stitch–not the real thing I’m sure, but should I use that or a zigzag to finish the edges?

I fell in love with the print at the store ($3 a yard = $10 dress) but it’s a lot of print in one place and I’m not too sure if I can pull it off. Maybe it’ll look better when it actually fits. I’m on the garment making bandwagon for sure now. No one told me how easy this is. So I’m telling you. The pattern is by built by wendy and the directions are clear as a bell (the zipper was almost too easy). So stop being intimidated by some tissue paper and sew yourself an outfit. I already have a long list of things to add to my wardrobe.
Posted in sewing clothes. 24 Comments »

This project is from an old issue of Cotton Friend, a japanese magazine that my husband brought back for me from Singapore. These are incredibly handy and I have many more in the works: for all the crap little things in my studio and all the markers, crayons and glue sticks that are under the couch. I thought you would like to make some too, so I whipped up a tutorial. Here you go:

Materials:
28 oz. tin can (if you have a different size can, just measure the height and circumference, add seam allowances, and the rest is the same)
linen, or other fabric
lining fabric
embroidery floss
glue (I used rubber cement, but plain white glue should do just fine)
Directions:
Wash your tin can and take off the paper. Cut two 13″ X 4.75″ rectangles–one from linen and one from the lining fabric–and one 13″ X 1.5″ strip of linen. Embroider the design of your choice on the fabric or leave it plain if you like. Place the two large rectangles together right sides facing, and sew around using a 1/4 inch seam allowance. Leave a 2 inch opening in the middle of one of the short sides for turning out. Clip the corners, turn and press (I like to press it so a little of the lining shows). Sew the opening closed. Fold the strip of fabric in half the long way and press. All the way along one side clip almost up to the fold. Glue the unclipped side to the inside of the tin can, then glue the outside. Wrap the finished piece around the can and sew shut (I like my stitches to show, but you could of course use an invisible stitch).
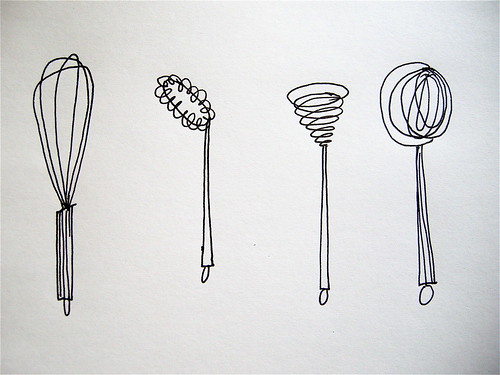
I was planning on having a pdf file with embroidery designs you could download, but I’m not having much luck with that at the moment. Until I figure it out here are pictures of the designs you can print out and use (you will probably have to resize them a bit). If you want to see these or any of the instructional photos more clearly, click over to my flickr site.
Edited to add: please click here and you can download both sets of designs for your own stylish, embroidered tin can cover.


drop me a line if you make one!
Posted in tutorials. 63 Comments »


