kcwc fall 2011: day two

October 11th, 2011

cashmere baby outfit

When I started KCWC my kids were much smaller and their clothes did only take an hour to make. Now it’s pockets and more pockets and buttonhole elastic and nice, sturdy seam finishes (i.e. lots more time for one stupid pair of pants). I made some baby clothes for a new(ish) baby and wow! you can just crank those teeny things out! The pants came from the sleeves of a felted cashmere sweater and they came together so quickly I did a bias bound seam finish along the crotch seam, because I felt like they couldn’t be done already.

baby pants closeup

I still had more of the hour left, so I made a hat to match. The pattern is from Martha Stewart. Originally, the hat is made from felt and the seams are zigzagged together so they lie flat. I made two hats with normal seams and then sewed them together: cashmere on one side, jersey on the other. I’ve made this hat many, many times. I like how the orange tag on this one make the hat look like a skate punk blue bird.

baby hat

I finished both things in about 45 minutes, so I thought what they hell, I’ll make a ball with the scraps. Well, the ball took longer than both. The pattern is for a paper pieced, hand stitched pentagon ball. Hand stitching isn’t really my favorite thing, but when you do it with your best friends on a beautiful fall day and a hot cup of coffee it’s not all that bad.

patchwork baby ball

The flickr group is really starting to fill up. One day and you guys are already on a roll! I already mentioned this on twitter, but one of my sponsors, Too Sweets, is offering my readers a 15% discount on her patterns (they are in pdf form, so you could use them today!) just enter KCWC15 when you check out. And while you are at it, check out my other lovely sponsors–many of whom sell very stylish children’s clothes patterns.

kcwc collage day 2

  1. button fly skirt
  2. fake fly pants
  3. baby leg warmers
  4. tunic or vest from scarf

Happy KCWC!


kcwc fall 2011: day one

October 10th, 2011

stripey top

The first day of the kids clothes week challenge is finally here! Full disclosure: I had my sewing week a few weeks ago so I could have a garment to show you each day, but that was a little challenge to myself. Don’t feel the need to finish something everyday. One hour sewing, pattern making, or fabric cutting–it all counts. What’s important is that you do it every day. Blogging and laundry can wait a week.

stripey top back

It seems silly to be making a sleeveless top for a fall challenge, but I only had the littlest bit of this awesome stripey fabric (thanks, lil!) and I wanted so badly to make something for my daughter from it. The pattern is from Happy Homemade vol. 5, a japanese sewing book. I’ve raved about Happy Homemade vol. 2 in KCWCs past, so I thought I’d see what vol. 5 is all about. It is everything you would expect from a sequel: sort of like the original, but not as good. Still, this is an adorable top, that came together quickly and uses just a bit of fabric. So really the book isn’t without it’s merits.

edited: I get all my japanese sewing books off etsy, search for either of these titles there and you should find them.

a coat in the works

Just because I’ve done a bunch of sewing already doesn’t mean I’m not up for more. The good sewing vibes the come out of KCWC are too good to pass up. We are 300 strong and counting this time around! If you haven’t already, go over to flickr and join the elsiemarley group so you can show off your fabric piles and patterns and finished garments. While you are there check out the eager beavers who have already posted some gorgeous pictures, like these guys:

kcwc collage day on

  1.  de-stash dress
  2.  dog shirt
  3.  tula pink tunic
  4.  stripey pants


Today’s tutorial comes from an amazing Australian seamstress, Sophie from Cirque du bebe. Sophie is new to sewing, though you would never believe it looking at the clothes she makes. They are always super hip and beautifully finished: like this hoodie and this outfit and this stylish number.  She can pick a bold print and make it look so effortless, so right. For example she pairs a crazy-glasses-wearing-man print with stripes, pastel blue, and safety orange and it’s awesome! So I knew whatever she was going to come up with for a tutorial was going to be good, but I didn’t know it was going to be this good…

** * * * * * * * * * * * * * * * * * * * * * * * * * * * * * * * * * * * * *
Hello, Sophie here from Cirque Du Bebe. Today we are going to take an ordinary kiddie shirt and transform it into ‘lift-the-flap’ clothing. Because, lets face it, those books are more fun! You will learn how to make a simple ‘stuffie’ (completely removable for washing) and watch your kids turn it into an interactive prop for creative play. You could even make a few and rotate them.


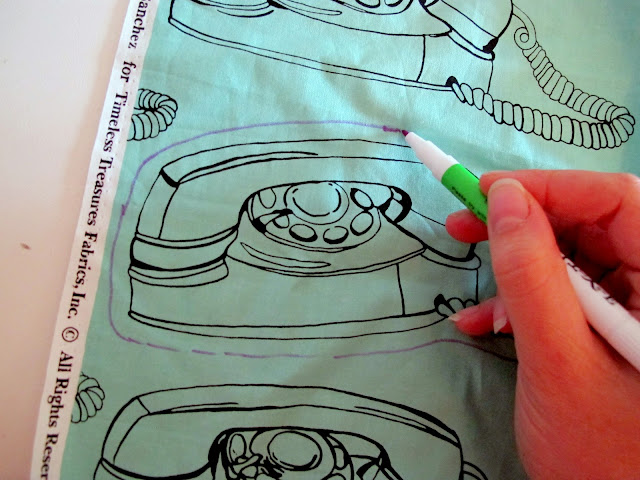
1. Get inspired. What do you think would make a fun prop? A moustache? An ice-cream? An envelope with a felt letter? Your fabric stash can be a good place to draw inspiration…do you have some stripes that scream villain or conveniently, a fabric with a ready made prop lurking in the print (see telephone). You could put something noisy inside; crinkly plastic, a bell. The cord can become part of the game too! You guys are the creatives. Go wild.

2. Gather materials, including some stuffing to fill the shape with.

3. Cut the cord and attach velcro. The cord should be long enough to reach where the prop will be used (but not long enough to go around a neck) plus an extra inch that will be fixed inside the stuffie. Cut a narrow strip of velcro (about an inch) and secure it to one end of the cord with a zig-zag stitch, going up and back several times.

4. Draw the sewing line. This will be the perimeter of your stuffie when it is poofed up. This line should be just out from the edge of the image so you don’t lose any of it when you sew.

5. Cut the shape just outside the sewing line this time. This will become the seam allowance.

6. Flip over and re-draw your sewing line on the wrong side.

7. Cut the felt backing. Pin the fabric to your felt and cut around the shape.

8. Attach velcro to felt backing and to shirt. Sew a couple of strips of velcro to the back of the felt backing. Cover a generous area…the stuffie needs to be easy to slap on in a hurry (when you have to hang that telephone up fast). Now for the shirt. When considering where to place the complimentary velcro strips see if there is somewhere in the fabric design to disguise black or white velcro, like in stripes as above. This just makes for a slightly neater look but its not a biggie if its not possible. Pin and sew the velcro on, making sure the stuffie has plenty of area to stick to.

9. Attach cord and sew stuffie. With your fabric right side to right side (velcro facing outside), sandwich the cord between the two layers and pin in place, leaving an inch hanging outside and the rest on the inside. Shut the lid and pin around the remainder of the shape. Sew your Stuffie following the line you drew earlier, making sure the cord is still tucked inside. Leave a gap in the stitching large enough to turn stuffie back the right way.

10. Now stuff it. Stuff it real good.

11. Close the opening with small neat hand-stitching, using co-ordinating thread.

12. To add a little extra tactile goodness and give the stuffie a quilted effect, pick a couple of lines to emphasize and sew along them.

Congratulations…if you made it this far you didn’t stuff up. Sorry. Now stick that stuffie on and enjoy the entertainment.

I’m very happy to have Sascha from Piccoli Piselli (it means little peas!) here today to tell us a bit about pintucks. Sascha is a very talented sewer who cranks out fantastic clothes for all three of her kids. She is a wiz with knits and totally hilarious to boot!

* * * * * * * * * * * * * * * * * * * * * * * * * * * * * * *

Hi there! Sascha here from Piccoli Piselli. I thought I’d show you some creative ways to use pintucks and pleats in children’s clothing.

A few years ago I made this top with freestyle pintucks on the bottom of the sleeves.

ever since then I’ve been meaning to experiment a little more with pintucks. Generally pintucks are sewn with a special pintuck presser foot and a double needle.

I’ve never gotten around to buying one that fits my machine and then I’d be limited to the fine, evenly spaced pintucks (which are beautiful and can be used in children’s wear in so many ways, especially heirloom garments).

So here’s some ideas for adding pintucks and pleats to your sewing:

I know it’s difficult to see from this photo, but I added pleats to the A-line dress as well as the pocket. For the dress I decided that re-drafting the front to accommodate the pleats would require too much math, so I stitched pleats to a piece of fabric that would roughly cover the size of the front panel of the dress.

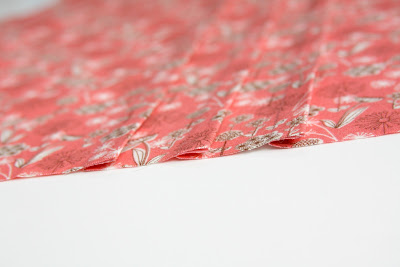
Here’s a better picture of the pleats. What you do to create the pintucks or pleats is really pretty simple:

  • First you press down the length of the fabric where your first fold will be (wrong sides together).
  • Then choose the size you want you pintuck/pleat to be. On the dress above I made them about 3/8″ wide.
  • Stitch down the length of your fabric.
  • After stitching one row, take the fabric over to your iron and press fabric open.
  • Next you want to determine how far apart each pleat will be. Again, I’m no fan of math so I kind of just picked where it looked nice.
  • Fold your fabric again (wrong sides together) and press.
  • Continue with the stitches until you’ve created the amount of tucks you need.

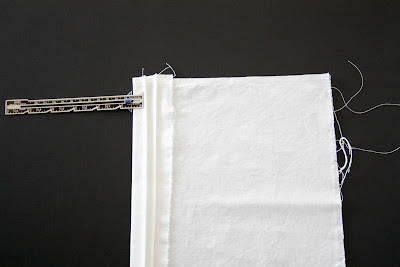
Here is a photo of some smaller pintucks I made for the pocket on the dress (I ended up making another set for the pocket with wider pleats to match the dress). I used this little measuring tool during pressing which really helped. I have no idea what it’s called, but I use it a lot in sewing.

When making small pintucks it can be a little difficult to keep the fine lines parallel. I guess the smaller pintucks would be better off sewn with a pintuck presser foot, but honestly the set I made above turned out pretty nice and I didn’t end up pulling out too much of my hair.

Here’s what I call “freestyle pintucks”. I wanted to go for a more wavy look (better luck next time) but I like the different widths I created here. I stitched the tucks across the grain of the corduroy. I think this is a great way to embellish boys clothing. Kristin from Skirt As Top did a great tutorial for how to make elbow patches yesterday. Just use her tute to add the patches to the knees of the pants.

Here is another pleat variation. Again, I made the pleats on fabric and then laid my pattern piece on the fabric and cut as usual. Can you see something odd in the left photo? Yup, I forgot that corduroy has a nap like velvet. It’s not too bad in person and as you can see by the photo on the far right, Vinny is happily wearing the pants. This is the best only photo I could take of him wearing any of the clothes I created for this post. He’s gotten very camera shy these days.

I saved my favorite for last…

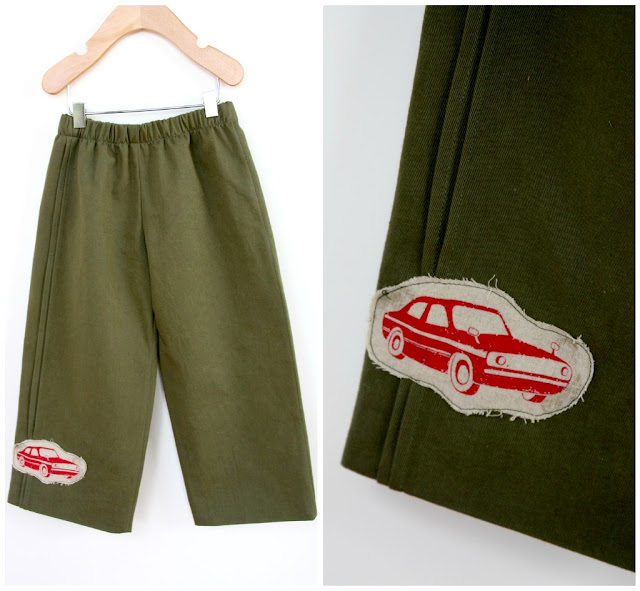
For this pair of pants I actually did not stitch the tucks before laying/cutting the pattern piece. What I did was add the amount I guestimated I would use in the tucks onto the side seam of one of the pant front legs. This doesn’t always work because of the way patterns are drafted. Most of the time the subtle curves of a pattern will be compromised by adding width nilly willy like I did. This definitely would not have worked for the A line dress above. Especially when you have a pattern with facings that need to fit perfectly. I’ve worked with these pants so much I was comfortable making the changes. Before stitching my pant leg closed I attached the car patch. I was too lazy to get out my fusible web so I used fabric glue instead. Mistake. It bled through and now shows permanently on the finished patch. Lesson learned. Hey, that’s what I’m here for. At least you learned today that fusible web is better than fabric glue for applique and corduroy has nap. Yourwelcomeverymuch.

Thanks for having me Meg!

I only recently discovered Kristin’s blog, skirt as top,  but was hooked right away. I think I found it first because of this beautiful top she made for herself. Turns out she makes cute kids clothes like crazy! I’m happy to have her here today to share her awesome tutorial for elbow patches.

* * * * * * * * * * * * * * * * * * * * * *

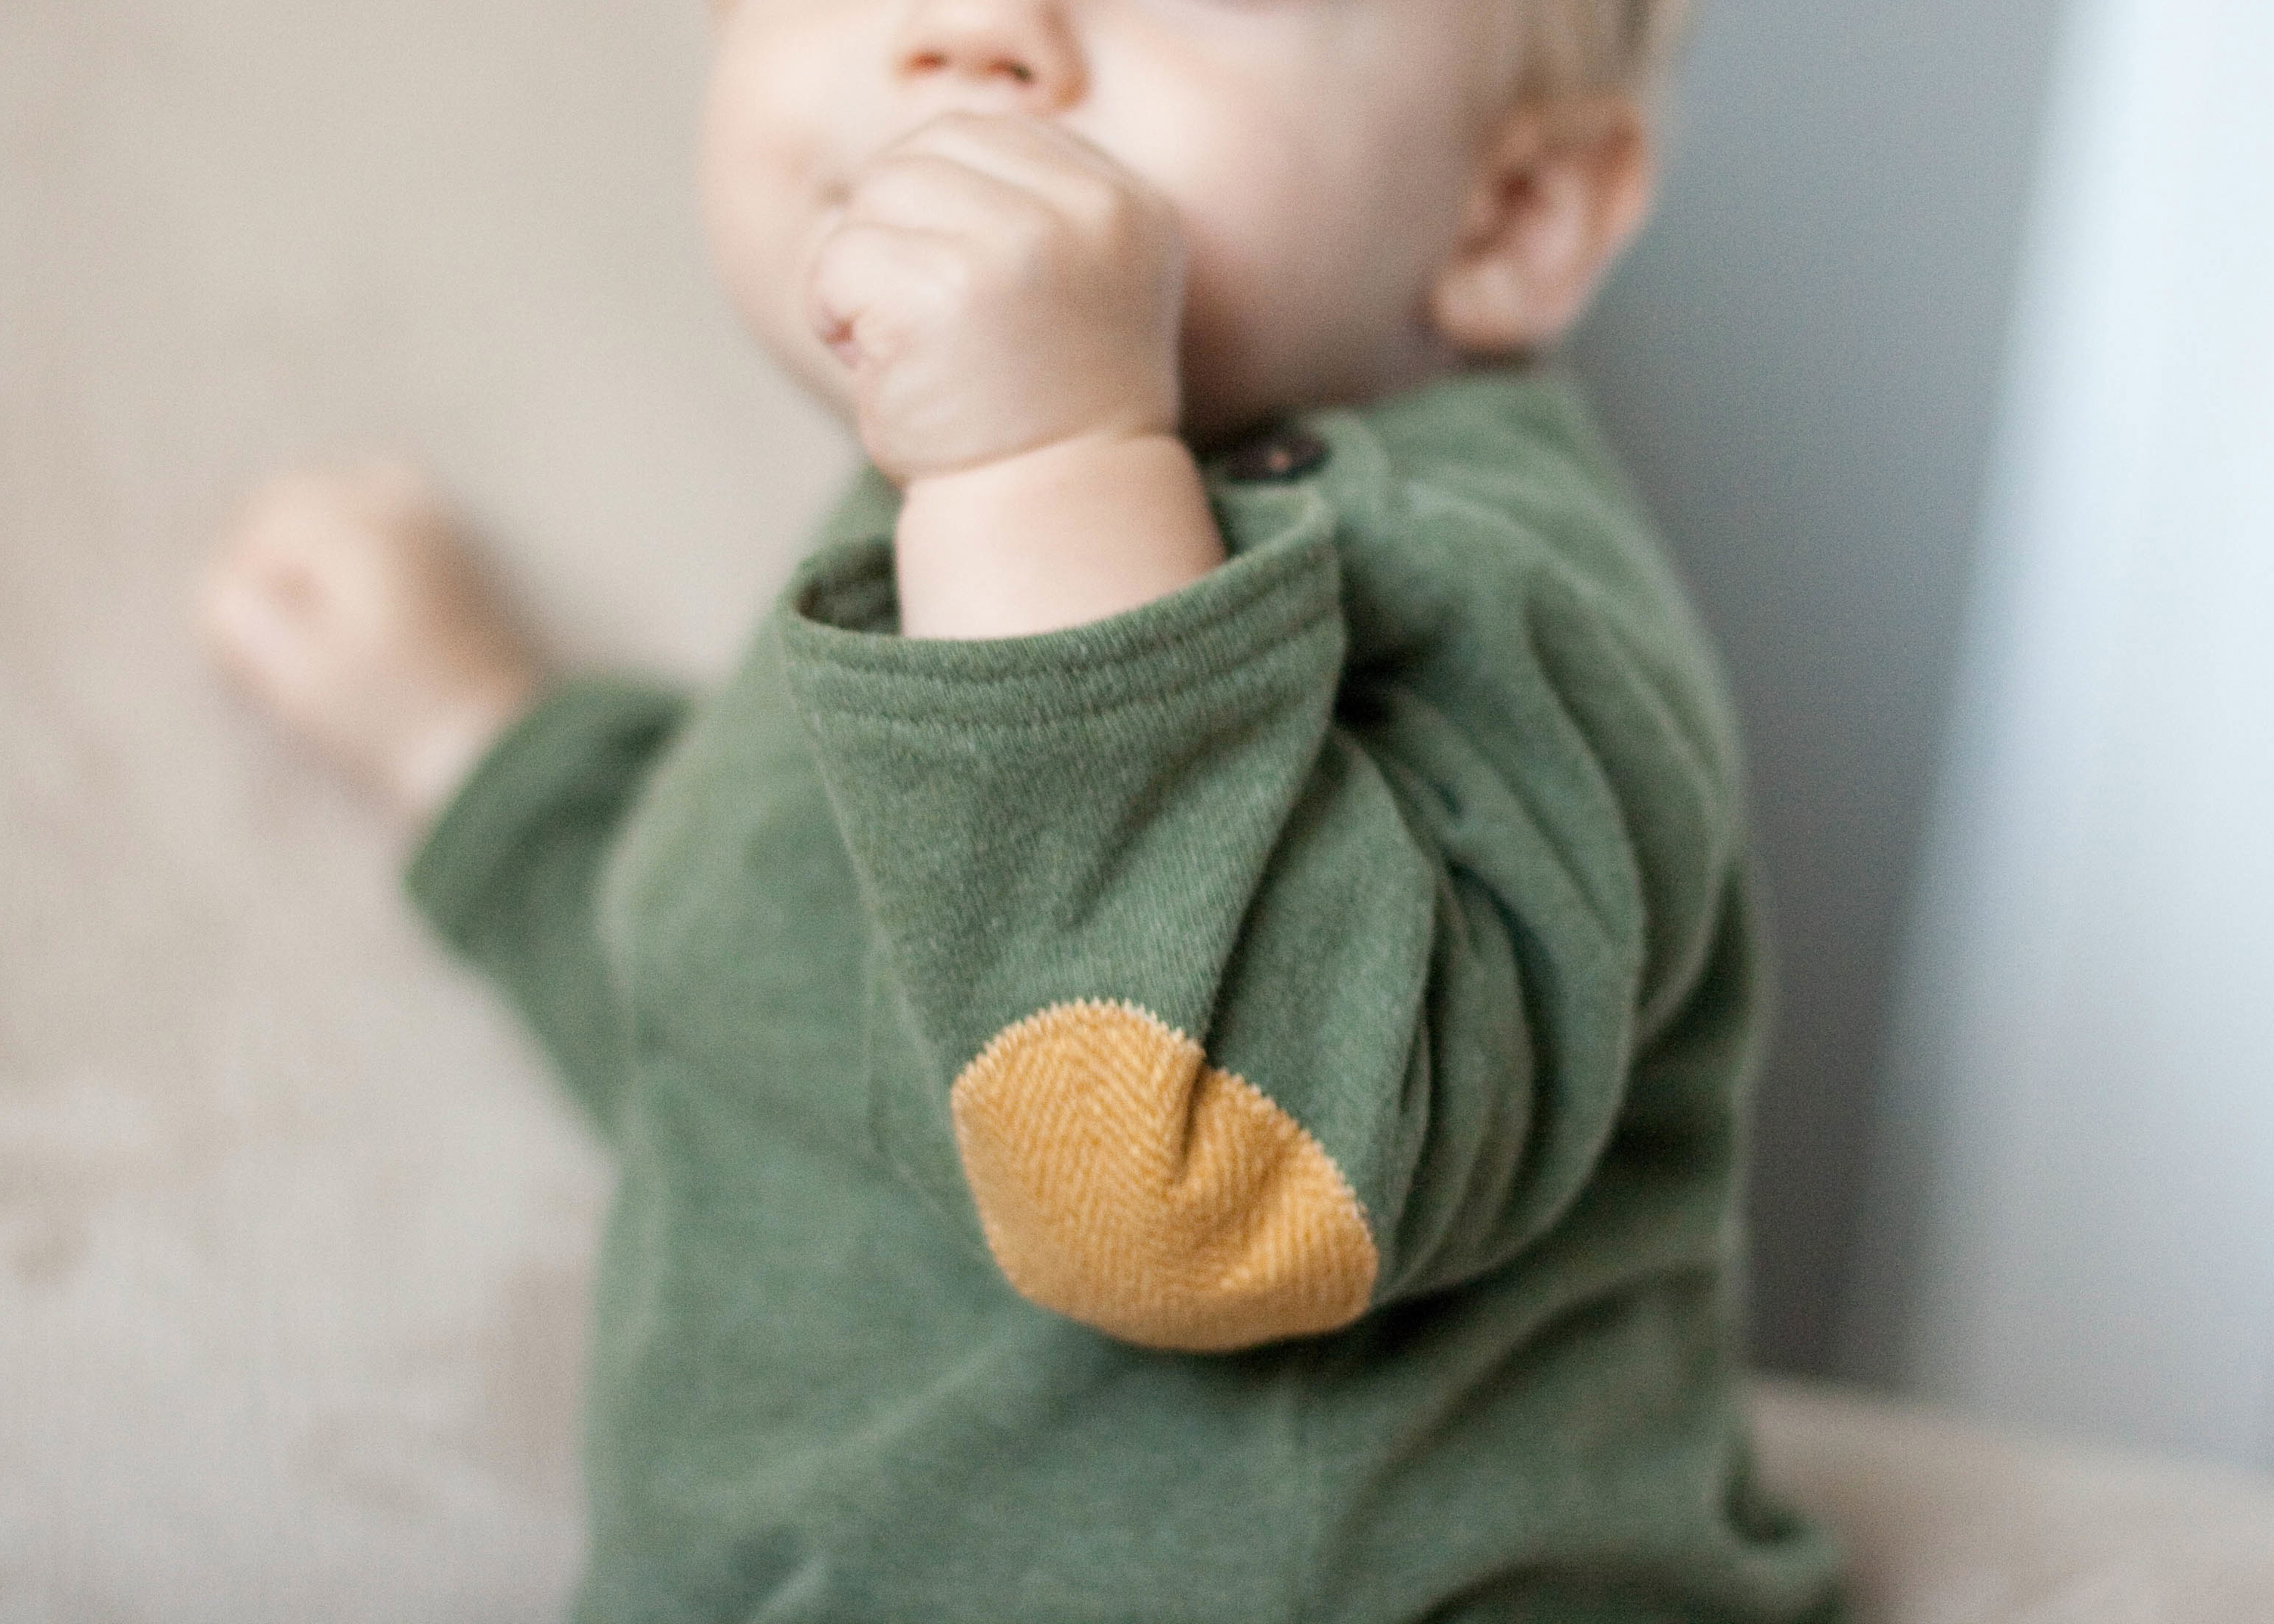
Hi, I’m Kristin from skirt as top and I’m here today to talk about elbow patches!  I’ve been spotting lots of elbow patches on adult shirts and sweaters this fall, and I love the trend.  I thought it’d be fun to add them to homemade kids’ clothes for a little “mini-professor” style, too.  Problem is, kids’ sleeves are very narrow and that means it’s pretty much impossible to sew the patches on after the garment is already completed.  That makes finding the correct placement for your elbow patches a bit tricky.  In this tutorial, I’ll show you how to add properly placed elbow patches when you’re making a shirt from scratch.
MATERIALS:

  • Tailor’s chalk or water-soluble marker
  • Clear ruler
  • Elbow patch pattern (draw an oval shape onto a piece of paper – mine is about 2.75″ tall x 2.25″ wide and works for about 6-12 month – 3T sizes, though you can make it whatever size you like)
  • Cut (but not sewn) sleeve pieces from your shirt or sweater pattern (Shown is the Oliver + S Sailboat Top.  To draft your own pattern, try Dana’s free 90 minute shirt tutorial)
  • Scraps of coordinating fabric for the patches (try small floral for girls, plaid flannel for boys, or even suede if you’re feeling adventurous!)

DIRECTIONS:

1.  Wrangle your kid while they’re wearing a long-sleeved shirt from their wardrobe.  Mark an X on their elbow with tailor’s chalk or water-soluble marker.
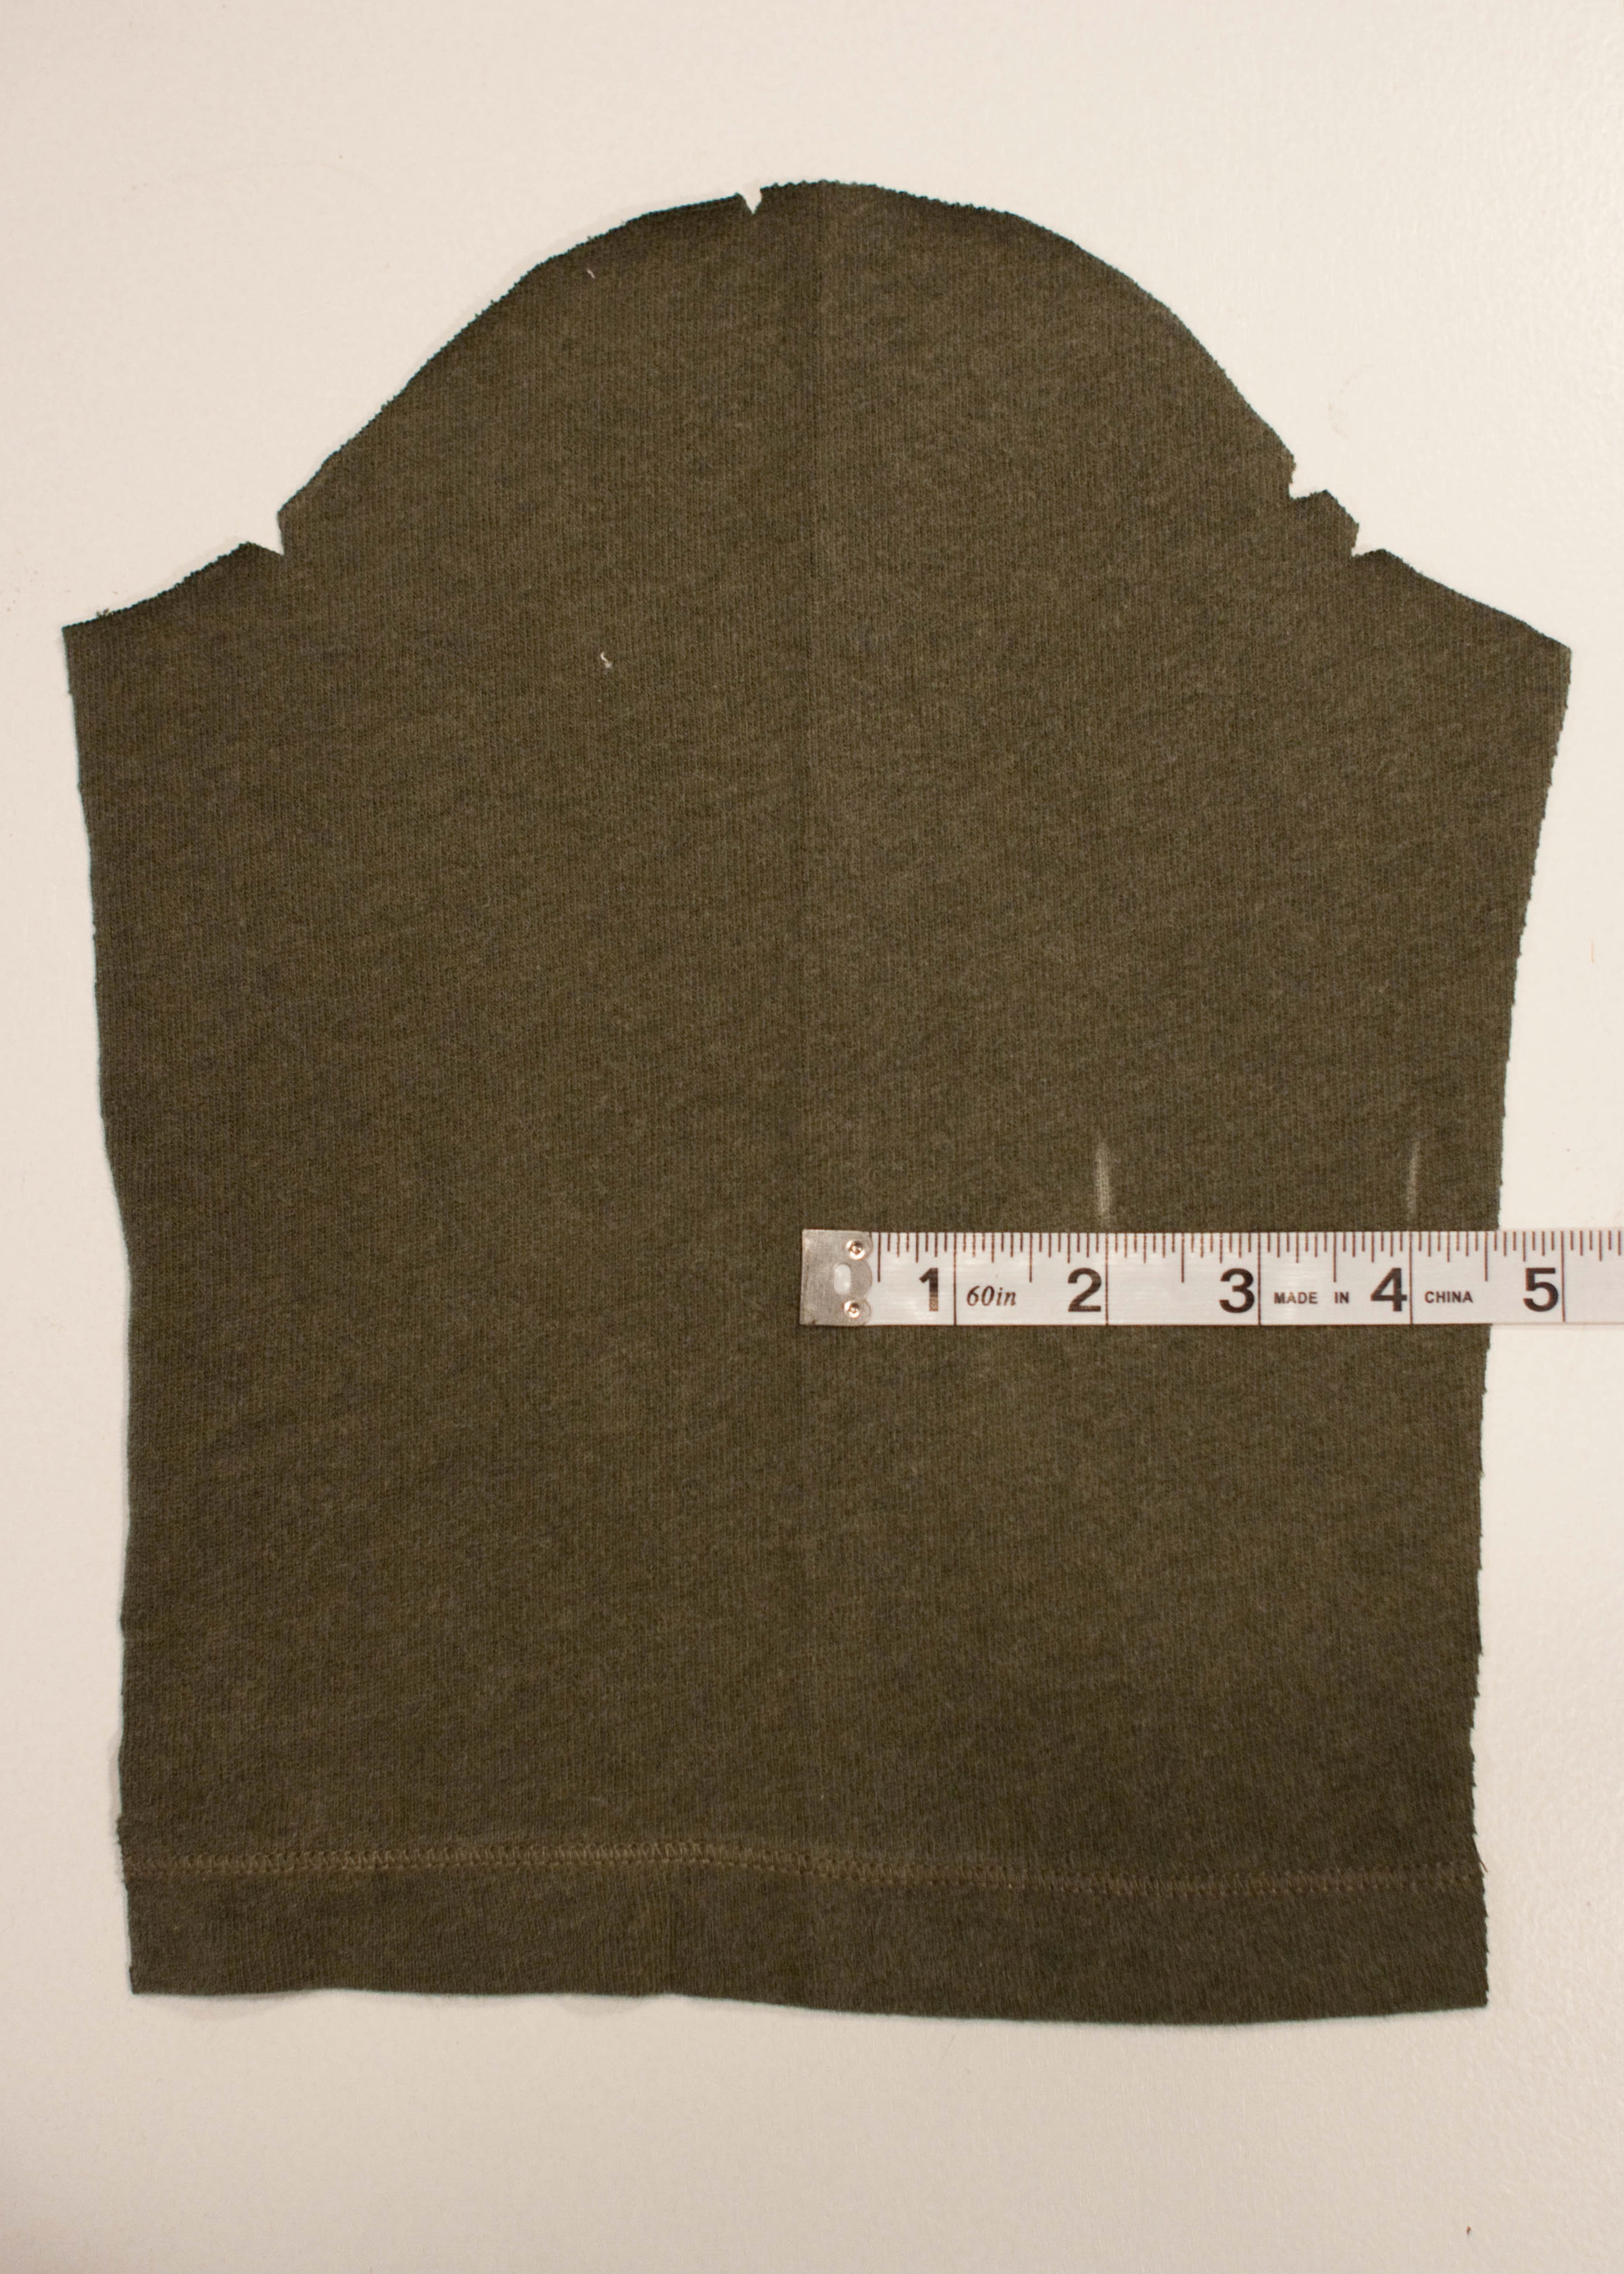
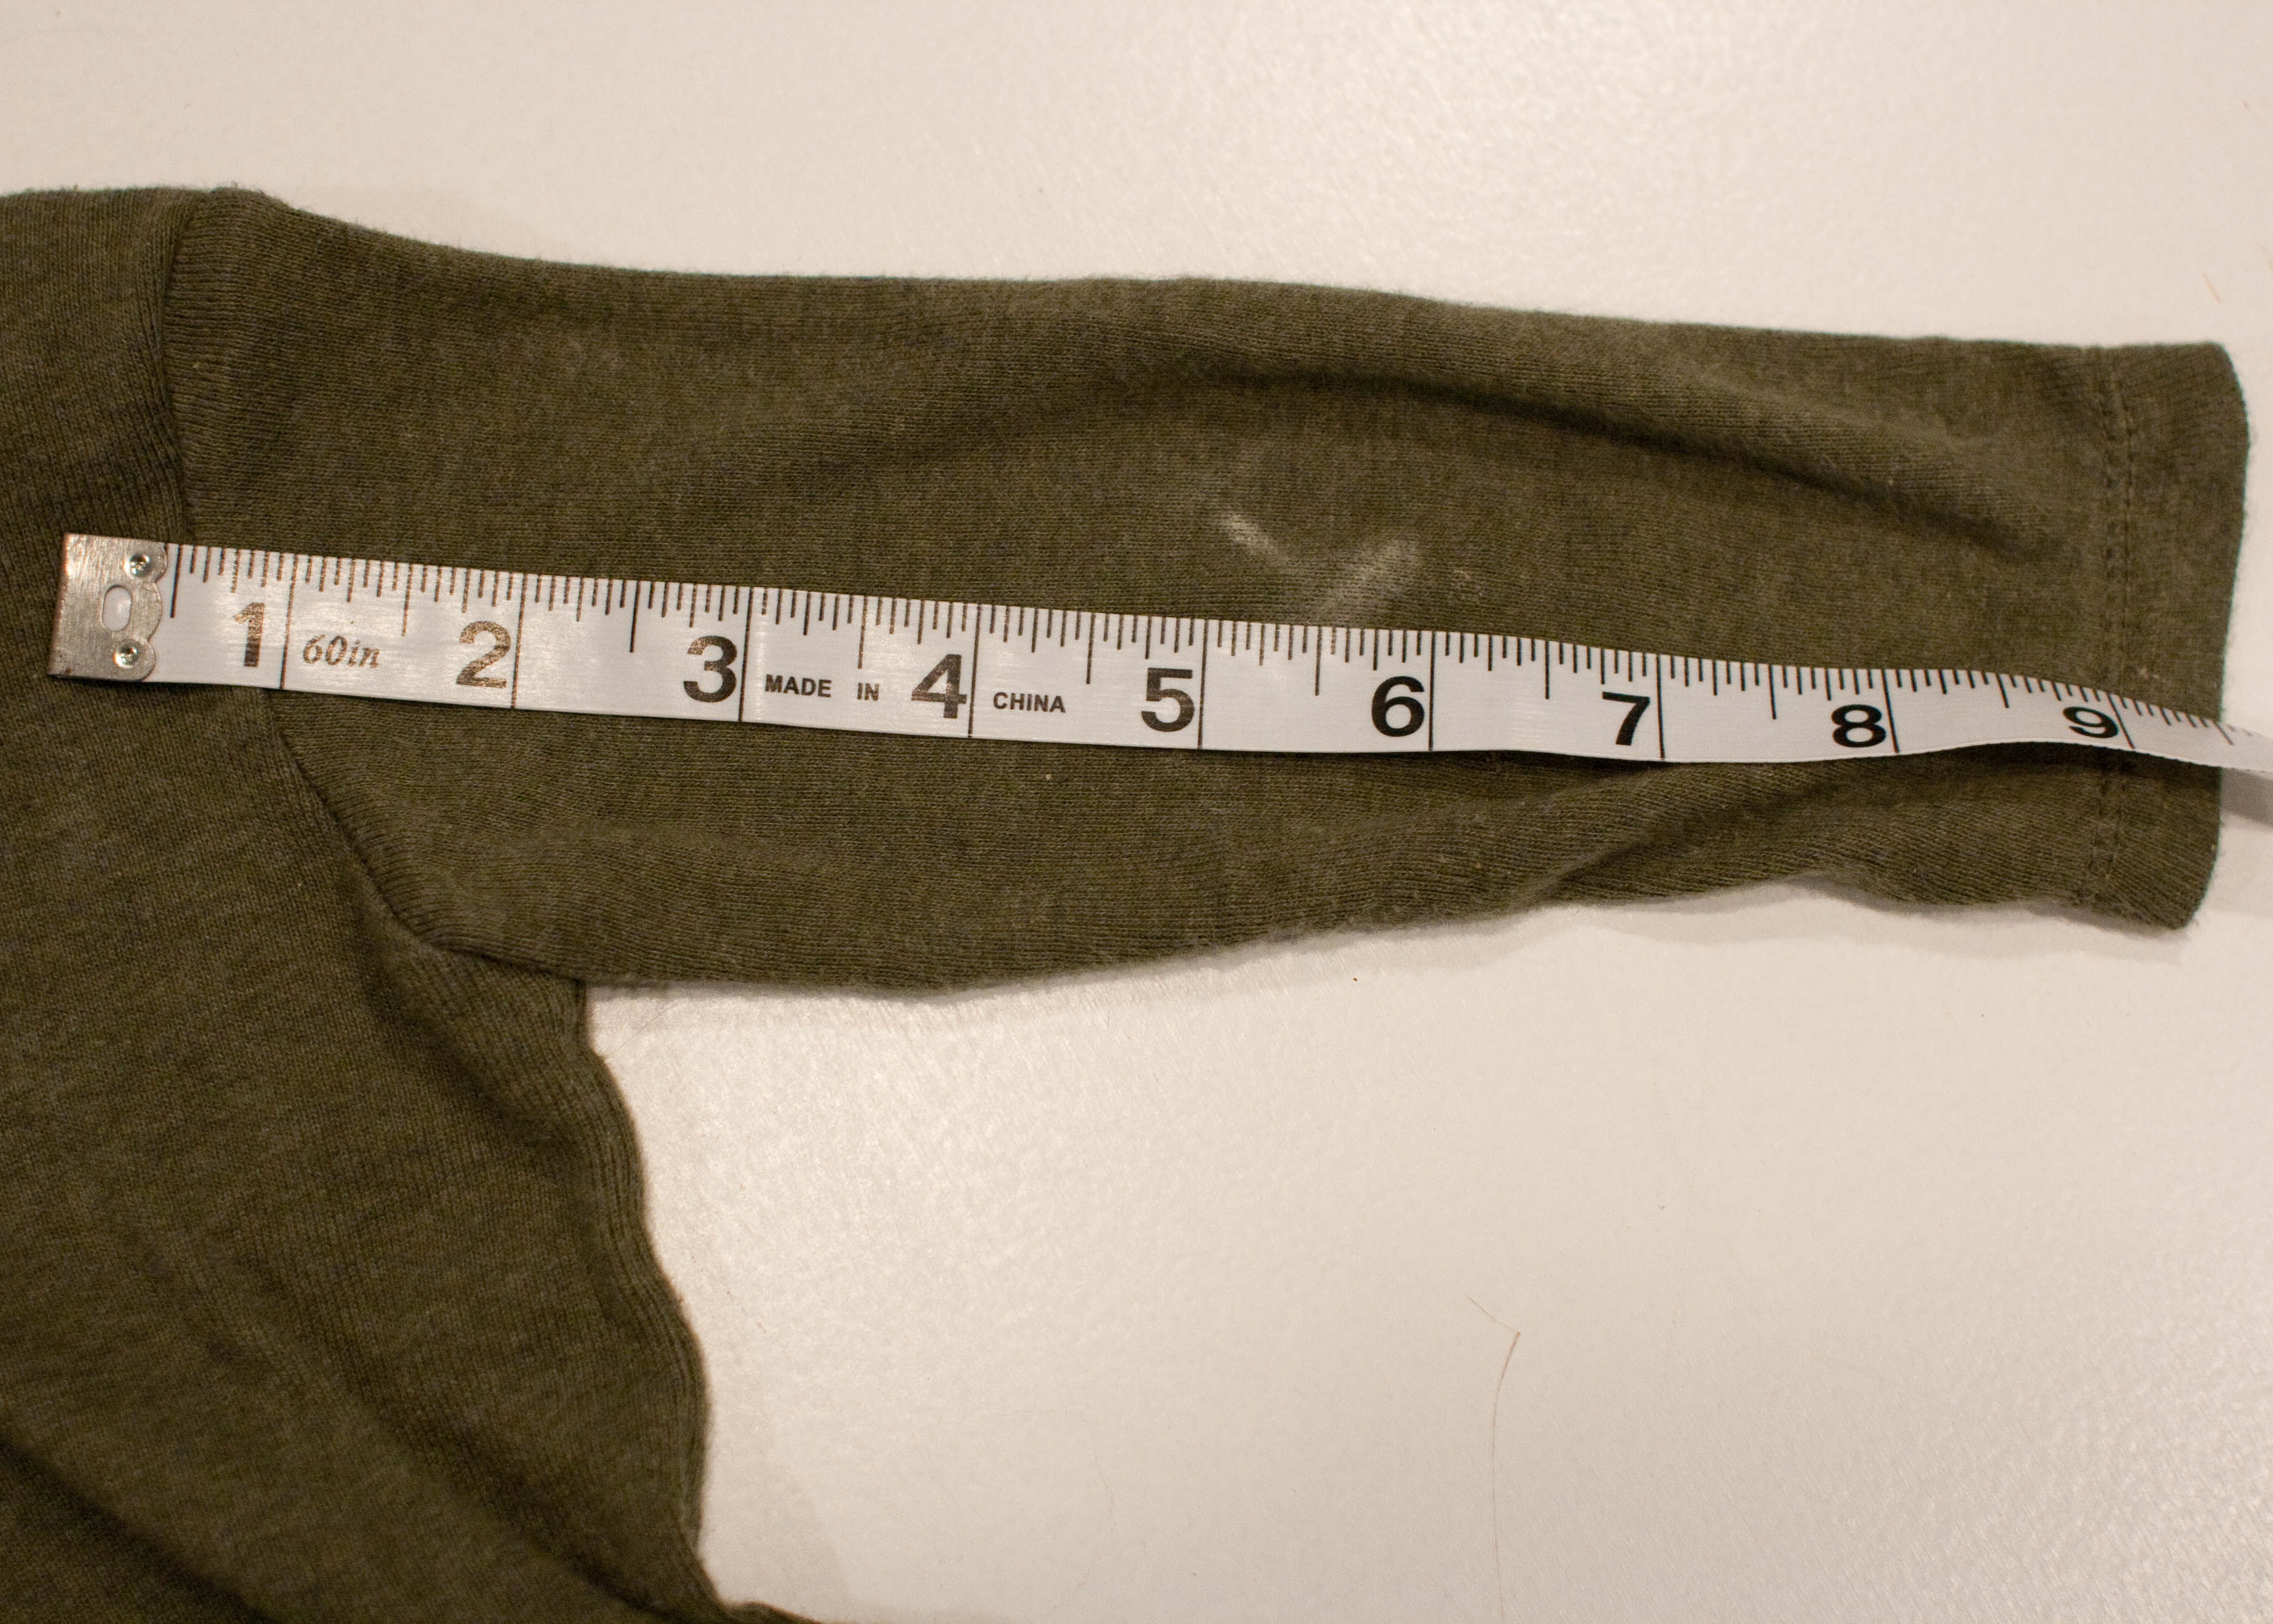
2.  Take the shirt off of your kid, measure from about .5″ above the shoulder (to account for the seam allowance) down to the center of the X that you marked earlier.  Write down this measurement (for my 10 month old, it was 5.5″).  We’ll call this the “Elbow Measurement” because I’m super original.
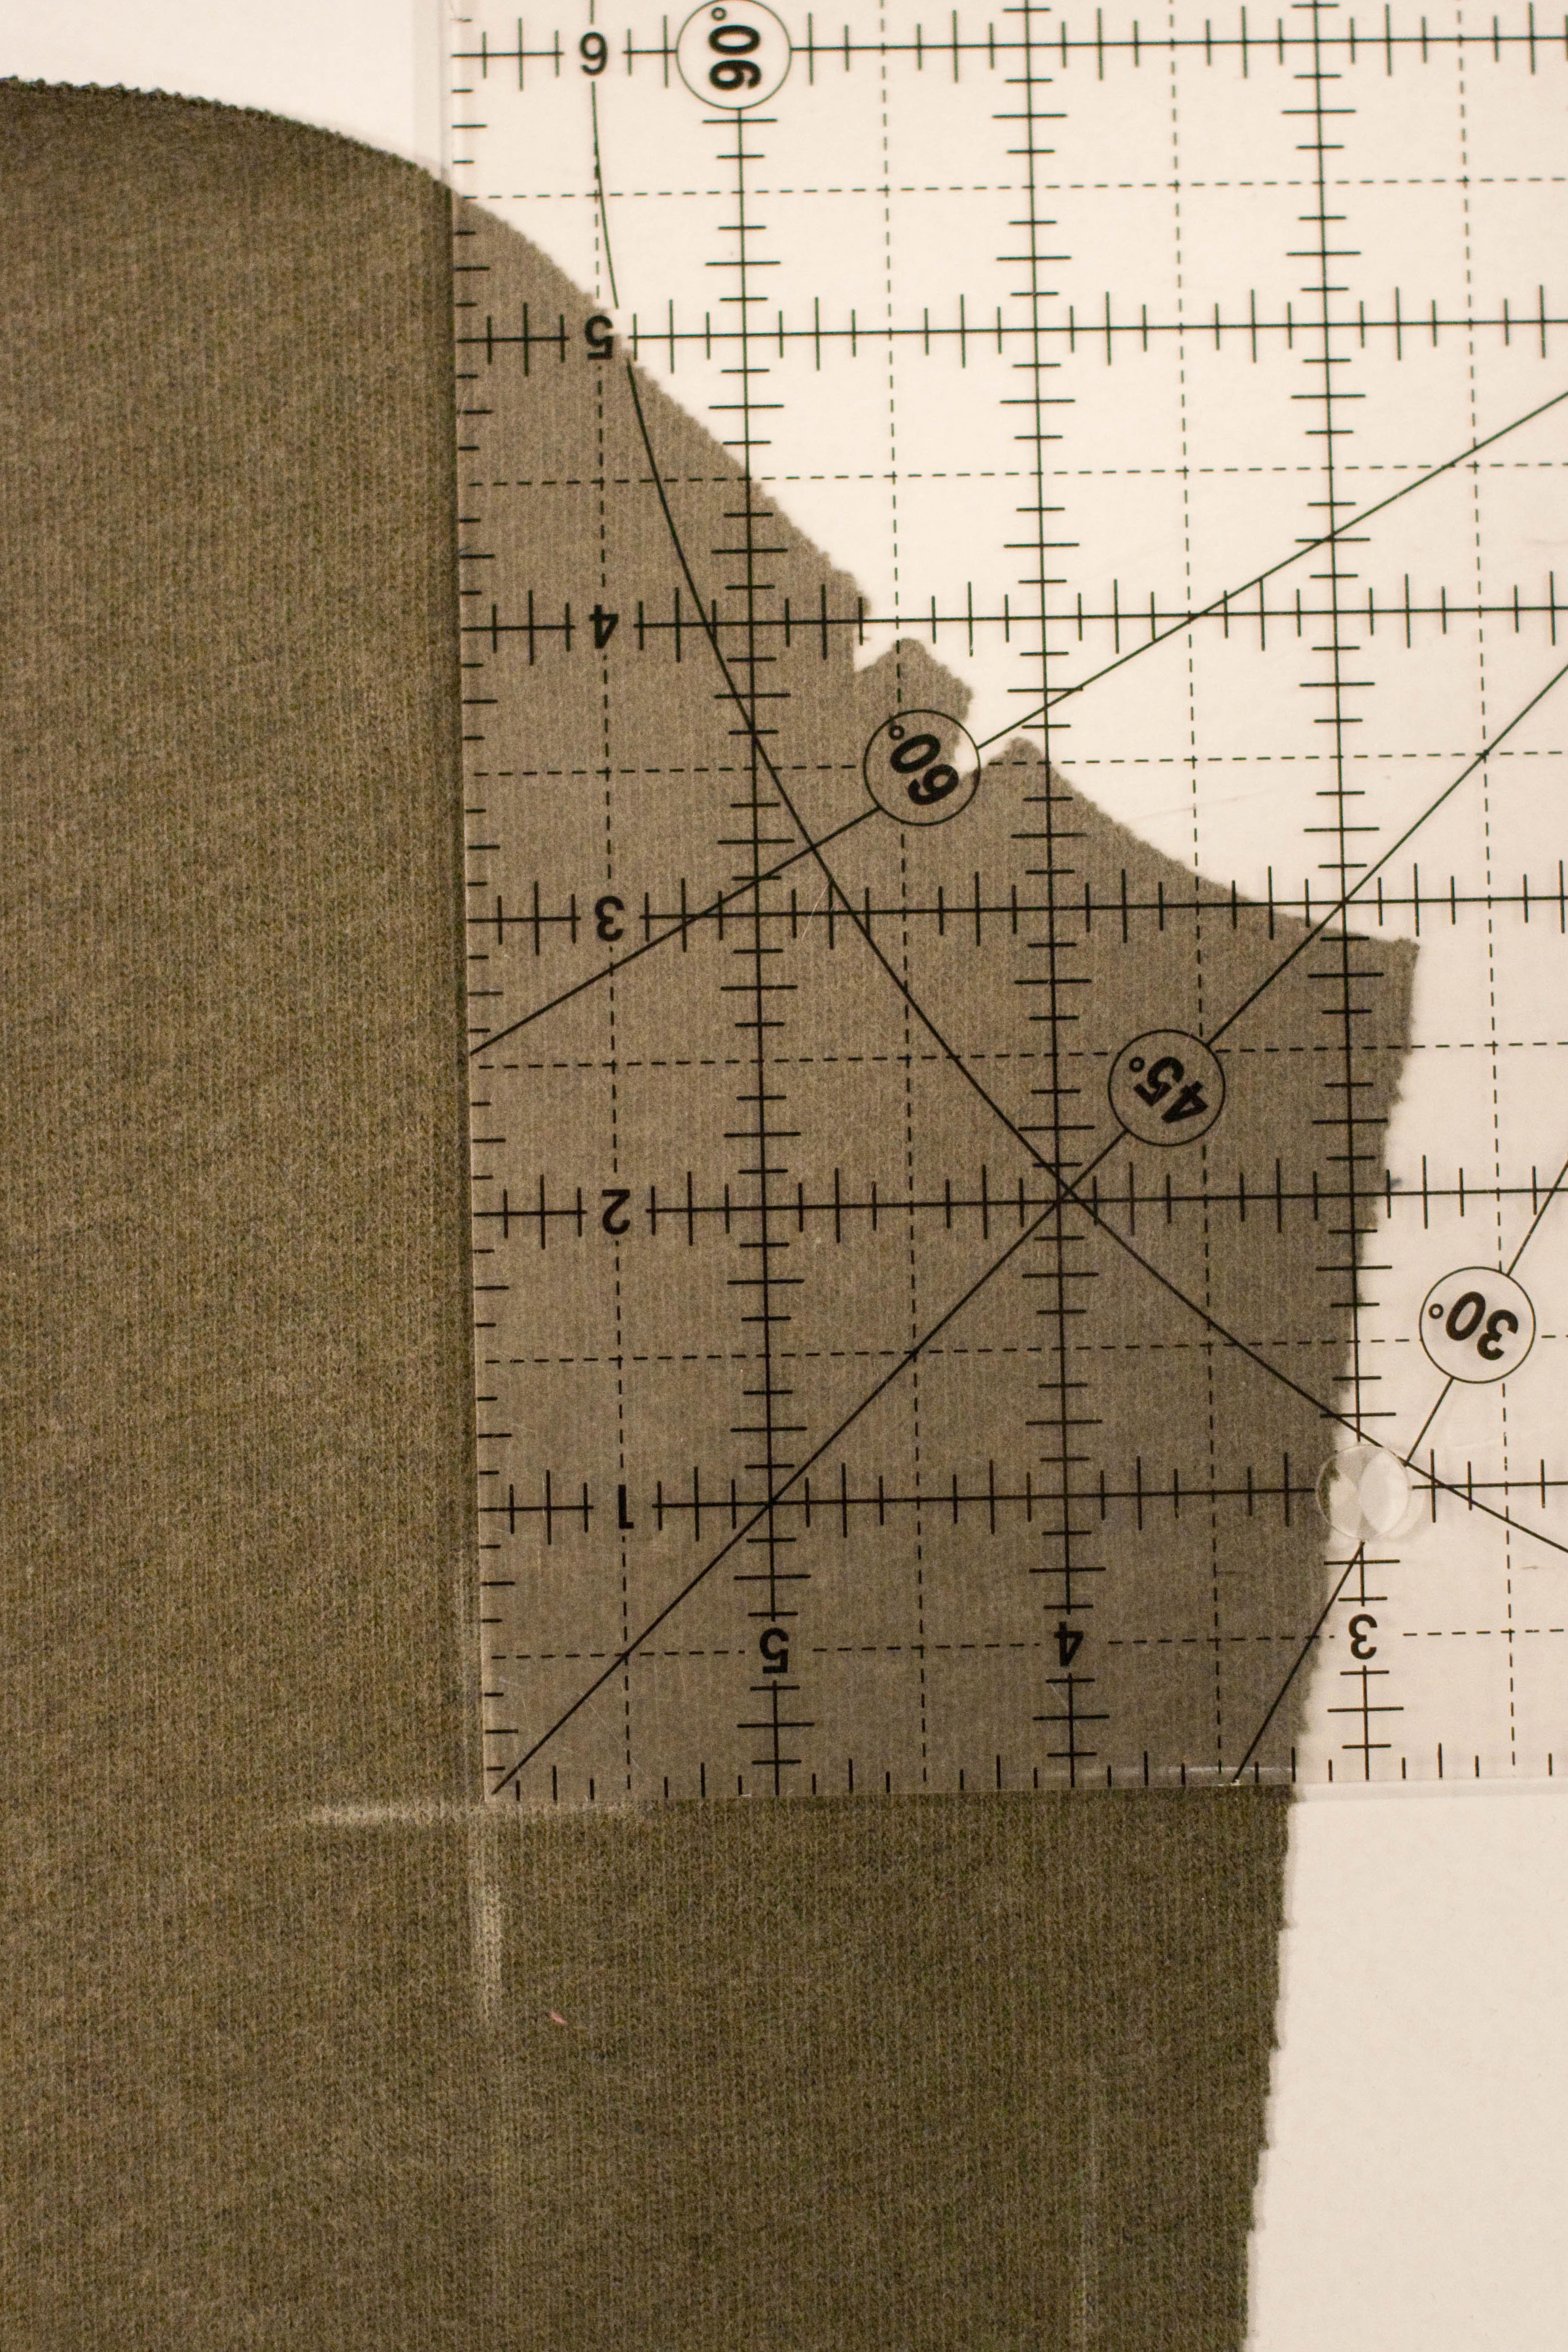
3.  Go to one of your new garment’s sleeve pieces.  Fold it in half to determine the center line, and press.  Determine the back of the sleeve per your pattern, since that’s the side we’re adding the patch to.   Mark your seam allowance from the cut side of the sleeve with water-soluble pen or tailor’s chalk, then find the center point between the folded center and the seam allowance mark and draw a vertical line (just guess approximately where the patch will hit on the vertical axis).
4.  Measure down from the shoulder edge along the vertical line that you marked in Step 3.  Mark your sleeve with a horizontal line at your Elbow Measurement (remember mine was 5.5″) so your markings form a +.  I shifted my ruler over to the edge for clarity, but you should line it up through the middle of the ruler to make the + shape.
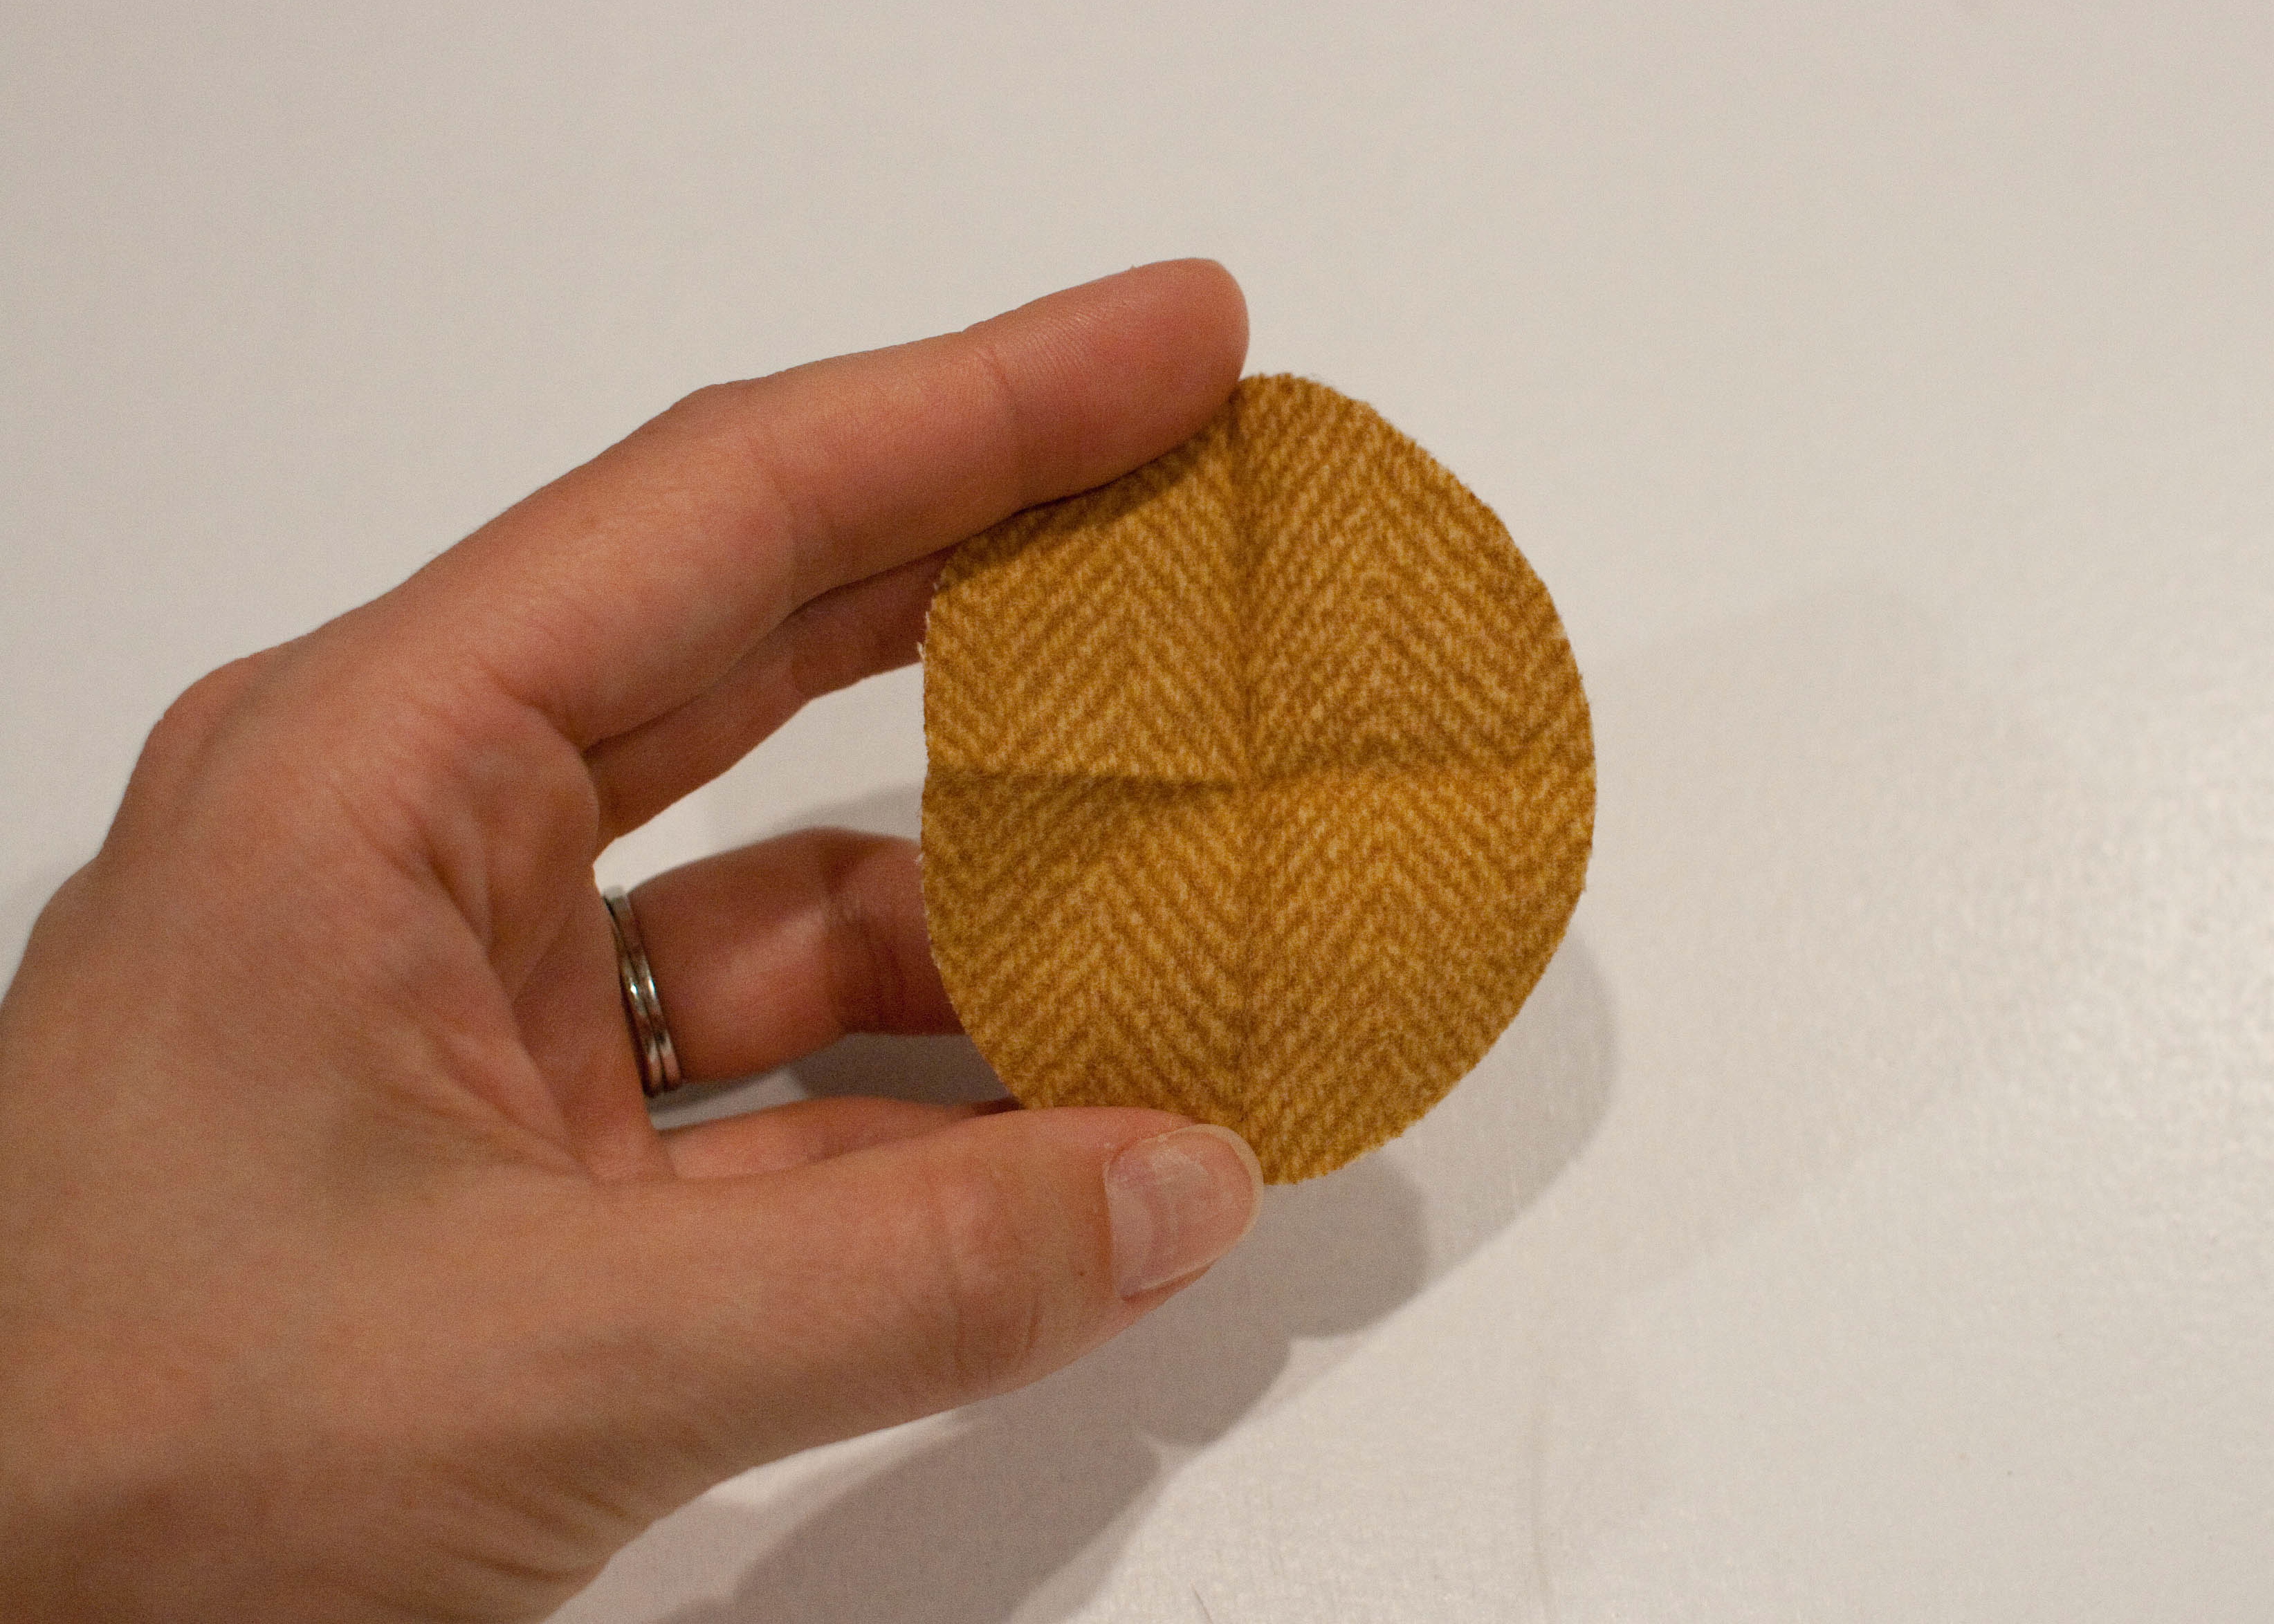
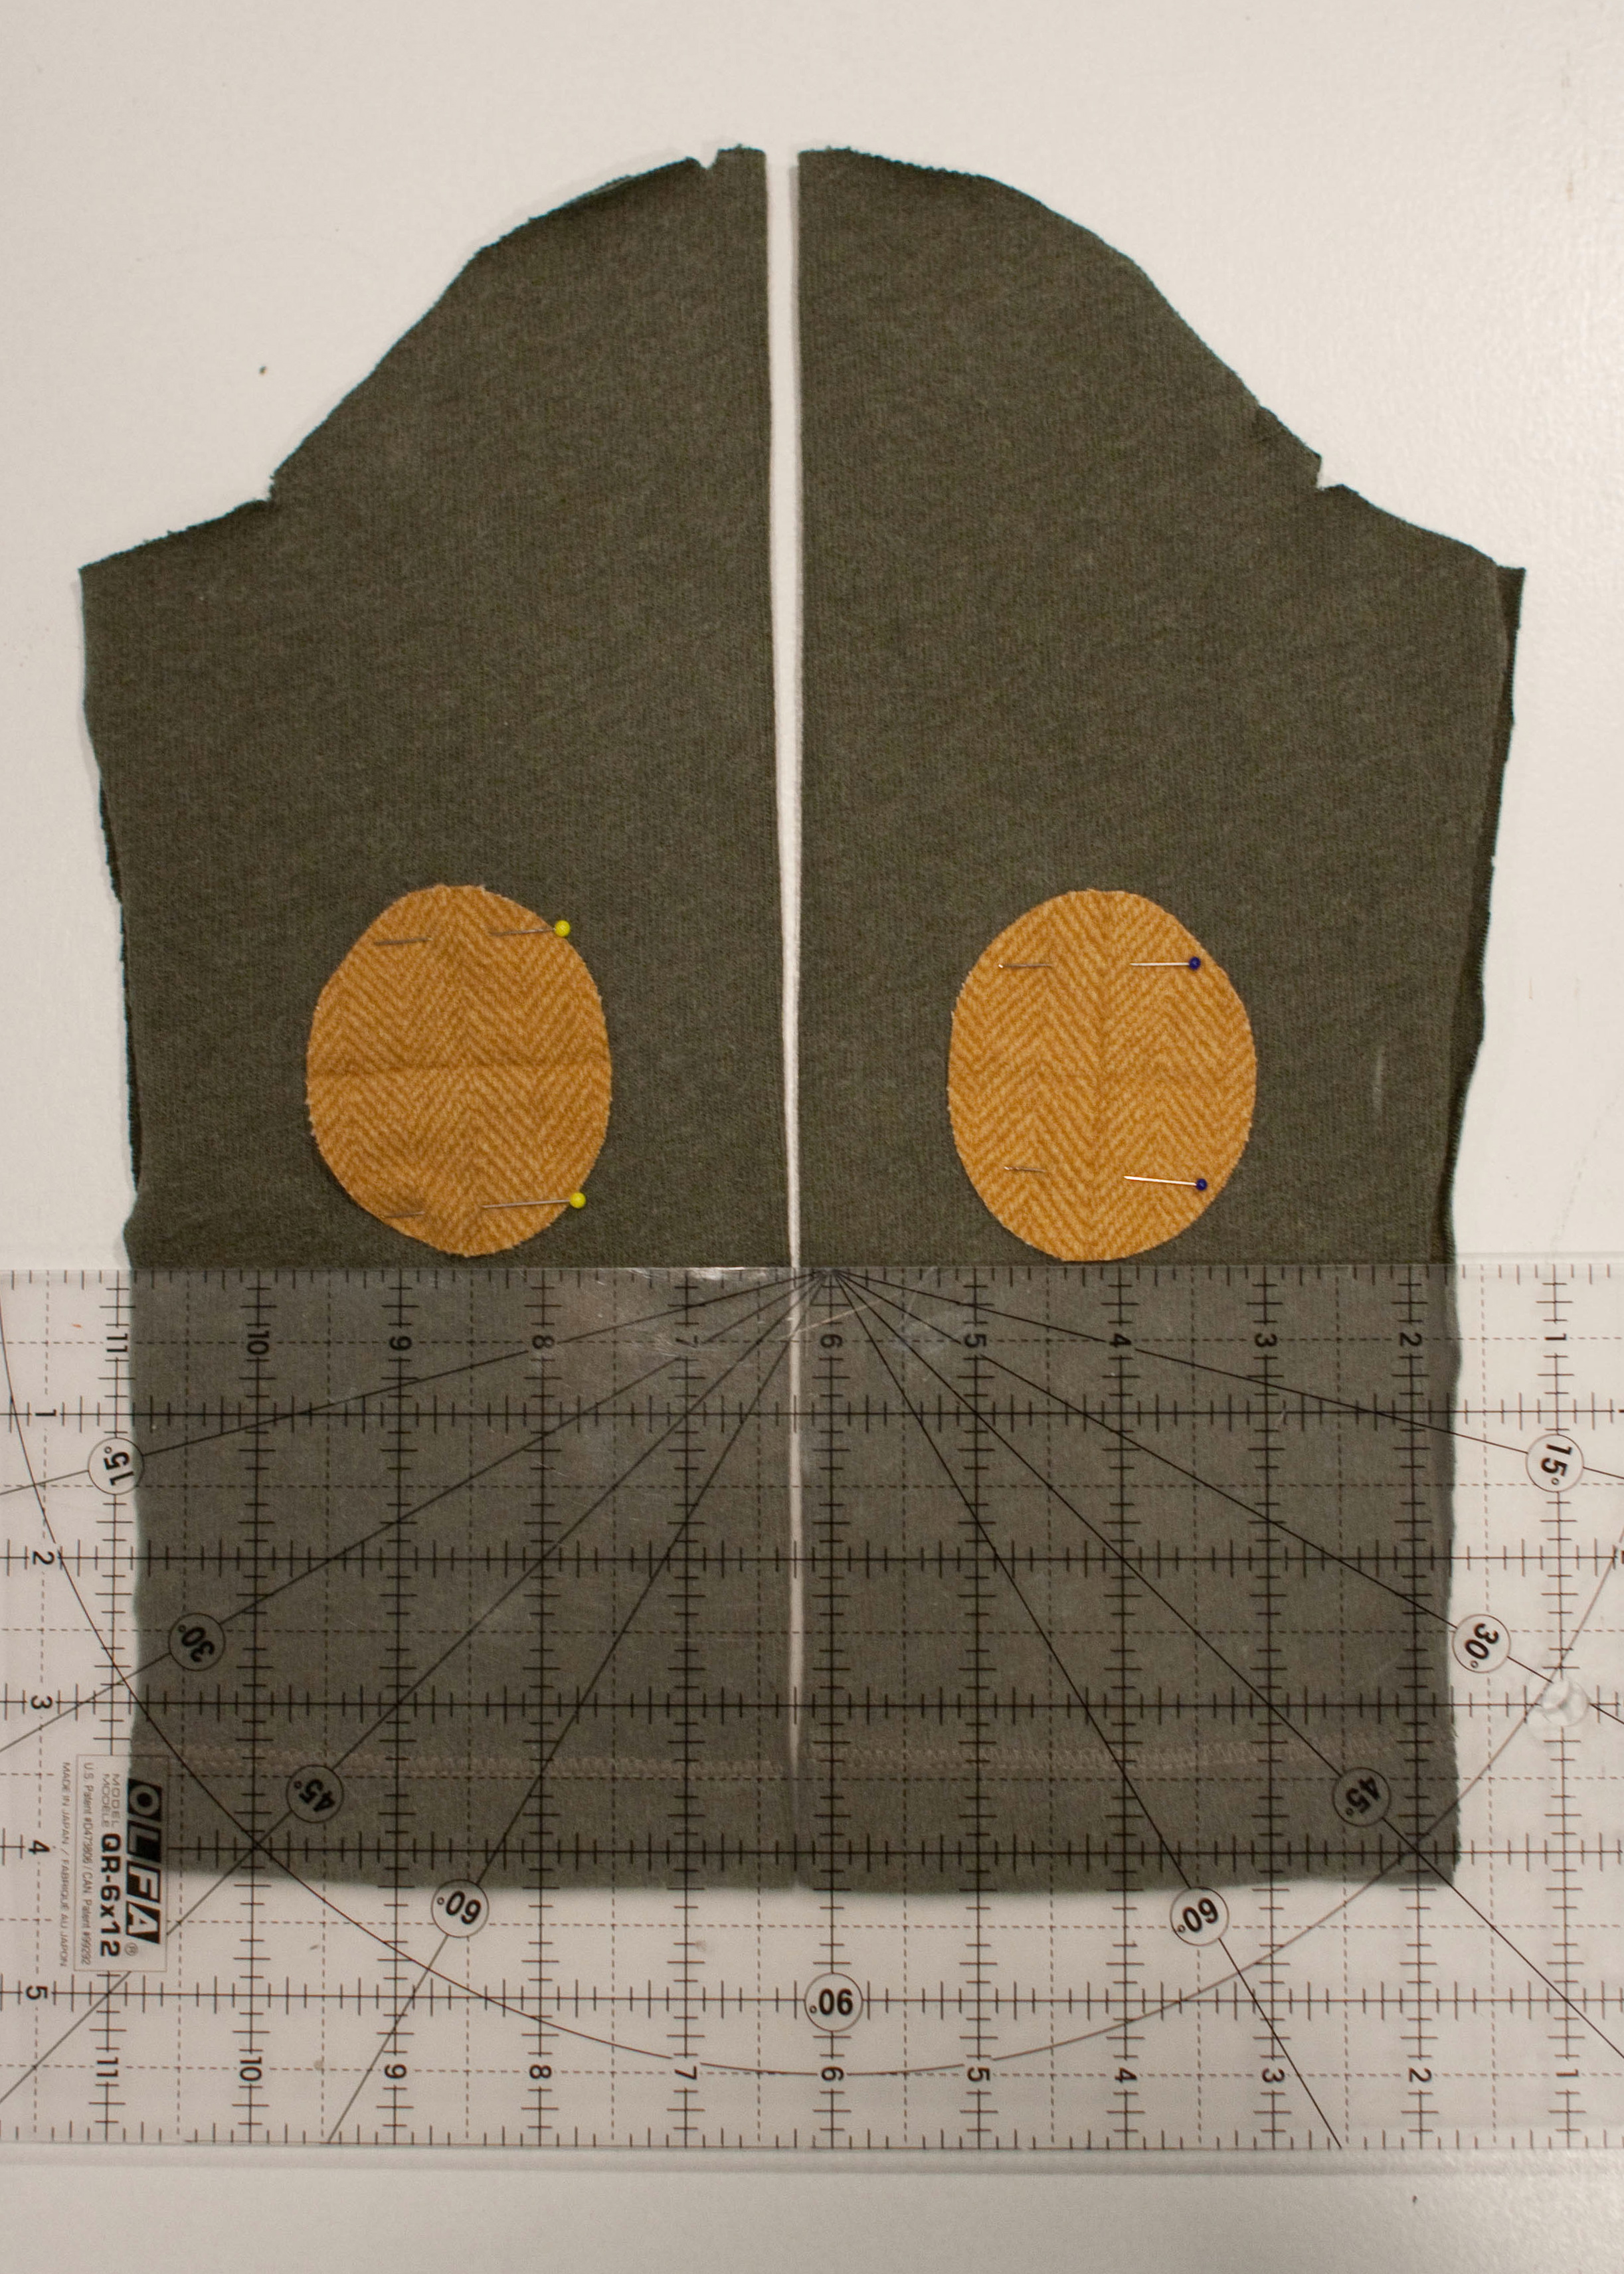
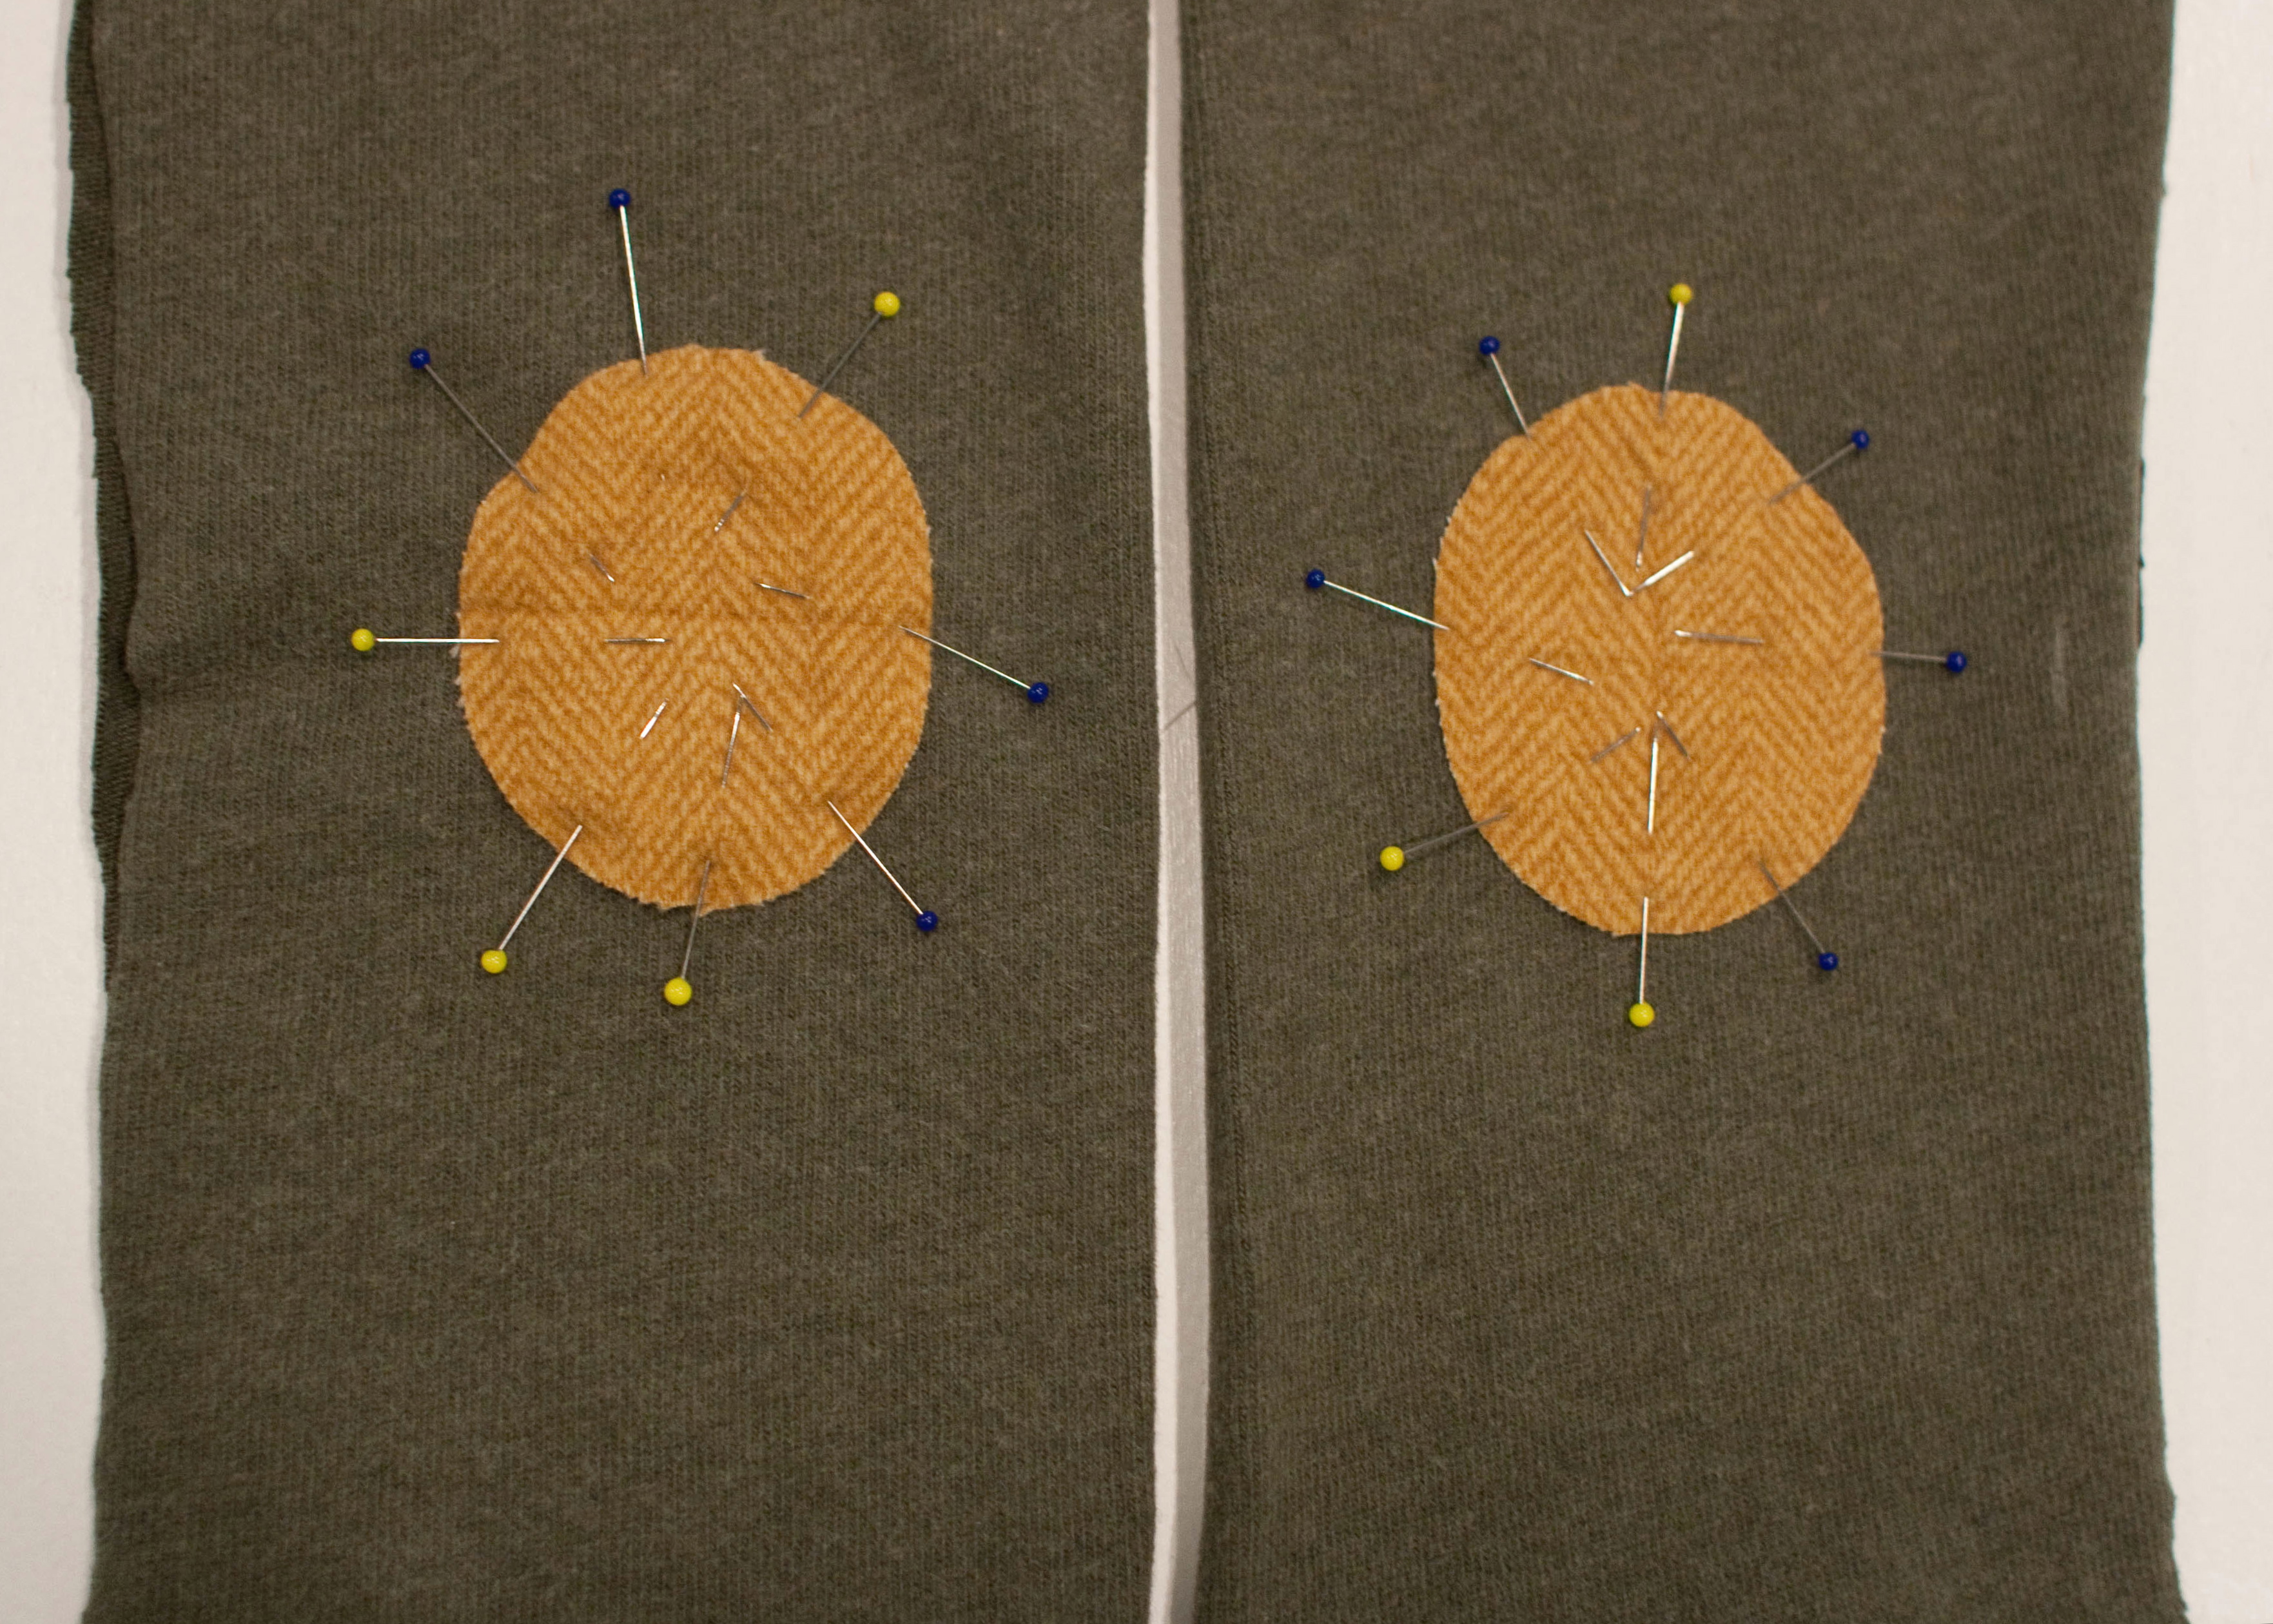
5.  Trace the patch pattern onto your patch fabric, cut them out, and find the center of each patch by folding it into quarters and pressing slightly.  Apply fusible web if desired (the patch is essentially an appliqué).  Match the center of the folds on one patch with the + marking on your sleeve and pin into place.
6.  Lay your second sleeve piece down so the sleeves are side by side with the edges aligned.  Using your clear ruler as a guide, place the second patch on its sleeve to mirror the one you already pinned on.  Measure in from the side edges to center it, as well.  Make sure your sleeves are mirror images so you don’t apply the patch to the front of a sleeve!  Pin the second patch into place.  Be generous with pinning if you didn’t use fusible web.
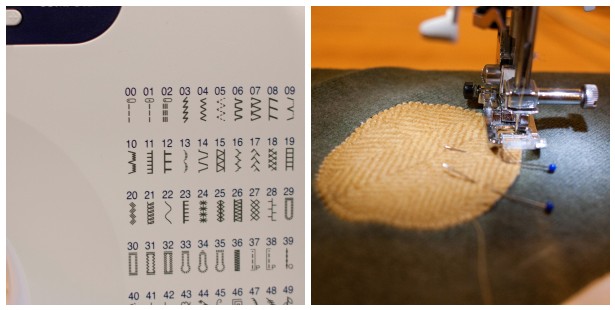
7.  Sew around the edge of each patch using a straight, zig zag, or blanket stitch.  I used a blanket stitch here (number 11 on my machine).
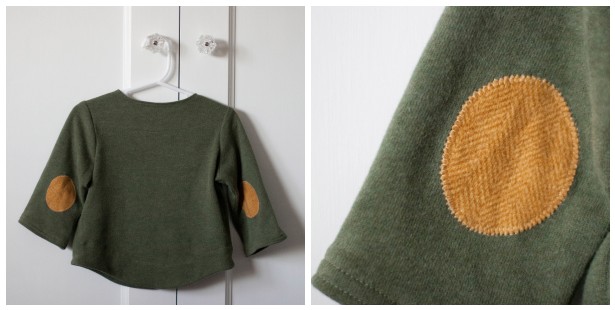
8.  Repeat for the other sleeve.  Your elbow patches are on!  Press each patch to set the stitches (unless you’re using leather), then finish your garment per the pattern instructions.
I hope this helps you add a little extra punch to your little one’s long sleeved shirts and cozy fall sweaters.  Thanks so much for having me, Meg, and happy KCWC sewing, everybody!