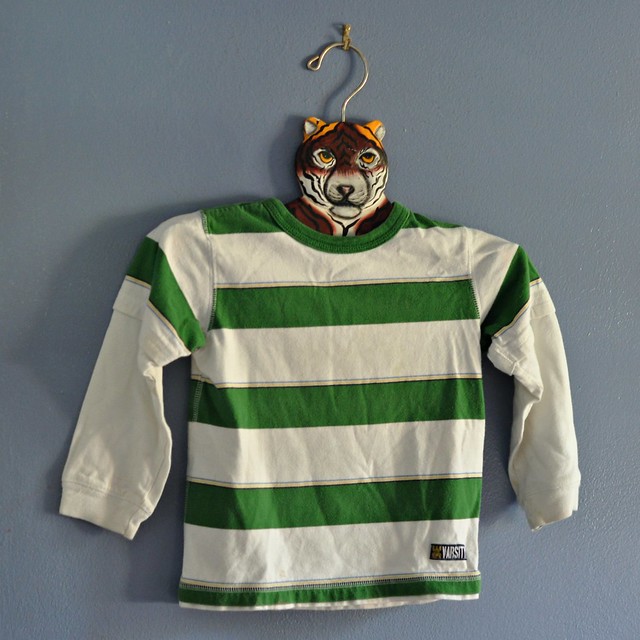
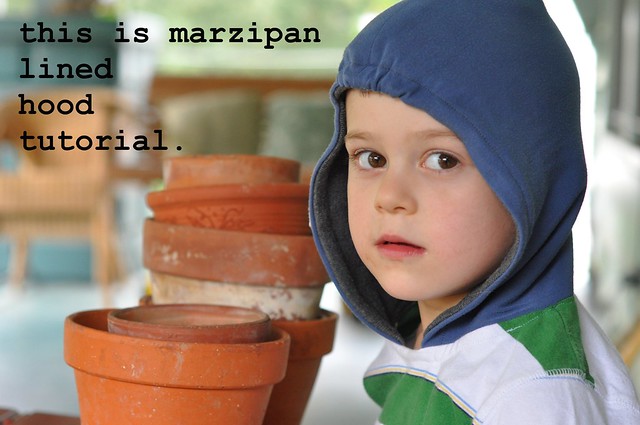
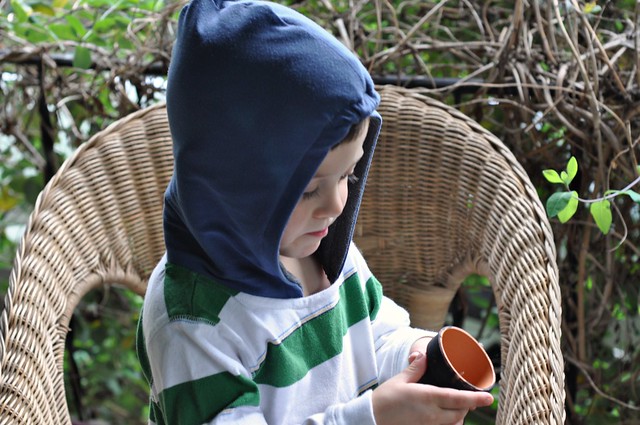
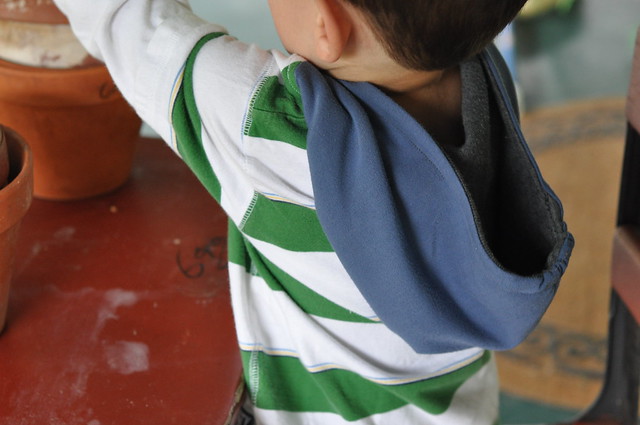
I discovered Mary Frances work during one of the first KCWCs. She spent the week making outfits inspired by illustrations in children’s books–the frog and toad trousers were so stylish I wanted some for myself! For this pre-kcwc party week, Mary Frances has written a fantastic tutorial for hoods. You can add a hood to an existing shirt or a pattern you are working on, she has directions for both.  Plus she’s put a bit of elastic in the hood to help it stay on which I think is absolutely genius! 

DSC_0399

Hello elsie marley readers!  I was so excited when Meg asked me to guest post about clothing details that I quickly signed up for pants closures… then spent half that night lying awake, gripped by visions of HOODS and the finer points of their construction.  Luckily Meg is one who understands late night visits from the (pushy, pushy) sewing muses and she tolerated–nay, encouraged!–my change of heart.

DSC_0347

But really, who could blame me?  Hoods are a fun and easy detail to add to any shirt or jacket.  They provide the functionality of convenient warmth (no more losing track of hats) and the fashion bonus of being particularly cute on kids.  They are great for boys’ or girls’ clothes, evoking the fly-behind feeling of a superhero’s cape as easily as the fairytale mood of Little Red or a princess-in-the-woods.

Hoods provide a surprising number of opportunities for personalization and creativity.  The tutorial below is for a pretty basic lined hood, but you could use the same techniques to come up with many different variations:

–Experiment with shape–this pointy one (via Meg’s pins) makes me swoon.
–Add cat/dog/bear ears or dinosaur fins for a Halloween (or any day!) costume.
–Play with different kinds of gaps and overlaps at the neck, like these from Trula.
–Use the liner to showcase a special or wild fabric that might be a little much for a full garment: I like this one by Heidi of mypapercrane.
–Add embellishments like decorative topstitching, edge lace, fancy drawstrings, or piping.
–Once you have mastered the two-panel hood, experiment with three-panel construction–these are more common on heavy garments like rain jackets and offer yet another fabric “zone” to play with; the jacket in Anna Maria Horner’s Handmade Beginnings is a great example.

Ready to add a hood?  Here’s the higly official

DSC_0390

Gather Your Materials
DSC_0319

You will need:
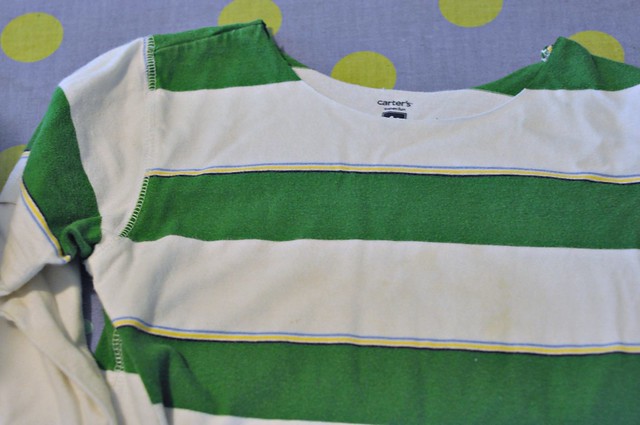
–The shirt you’ll put the hood onto. I used a hand-me-down storebought shirt, but you could also modify a pattern to include a hood. Just make the shirt/jacket/cardigan up to the point of attaching the collar, and make and attach a hood instead.
–1/3 yard outer fabric
–1/3 lining fabric
(I used an old knit shirt for the outer and an old sweater for the lining.  You can use any fabrics that you think will complement and sew nicely onto the base shirt.)
–3 inches of 1/4″ elastic (optional)
–paper and pencil for tracing the pattern
–pins, scissors, thread, measuring tape and whatever other sewing gadgets you like to use

Make Your Pattern
DSC_0313


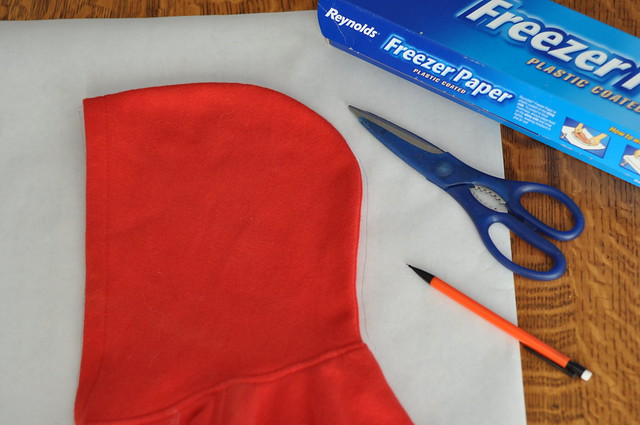
1.  You can use a hoodie you already have to get the general shape.  Fold your hoodie in half longwise, lay it on your pattern paper (I use freezer paper so I can iron the pattern on at the cutting stage) and then trace the hood with a pencil.
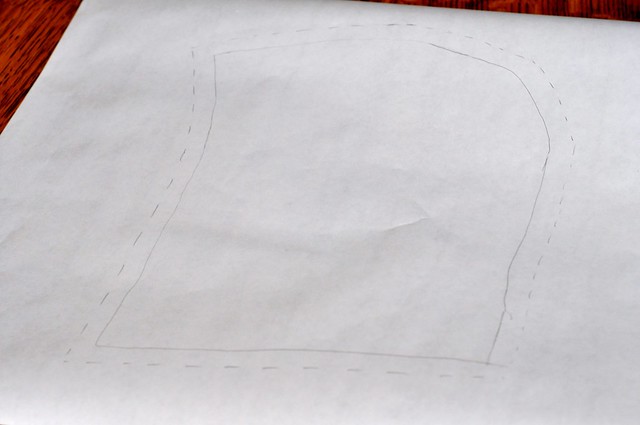
2.  After you trace the hood (or maybe you just winged it and drew a hood-like shape; that’s OK too), you’ll need to check your dimensions and adjust slightly:
–With a flexible measuring tape, first measure from the top of your child’s head down to the base of their neck.  Add 1 to 2 inches to this number (1″ will be a more closely fitting hood, 2″ will be looser; err on the long side if you are planning to cut an exisiting collar away from a shirt) and adjust the height of your hood pattern to match.
–Now measure the circumference of the collar of the shirt you’ve chosen.  If you’re going to cut off a pre-existing collar (see below), be sure to measure below it at the cutting point (the measurement will be slightly larger than the top-of-collar circumference).  Take half of that measurement and adjust the width of your hood pattern: a larger width will mean your hood overlaps at the front, a smaller width will leave a gap at the neck.
DSC_0315
3. Add 1/2″ seam allowance all the way around the new pattern.
4. Cut your pattern out!

Cut Out Your Hood Pieces
DSC_0324

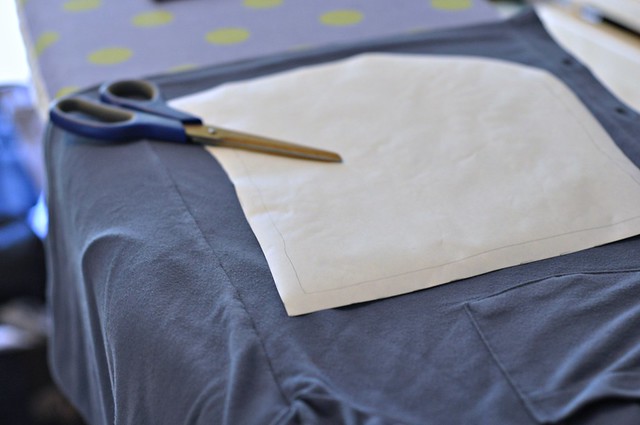
1.  Fold your outer fabric in half such that the hood pattern will fit onto it.
2.  Lay the hood pattern on top (not directly along a fold), pin or iron in place, and cut through both layers of fabric (cutting the two sides at once helps keep you from making the unfortunate mistake of forgetting to reverse the pattern piece on one-sided fabrics).
3.  Repeat for lining fabric.
4.  You will have 4 identically-shaped hood pieces: 2 outer and 2 liner.

Sew the Hood
DSC_0328

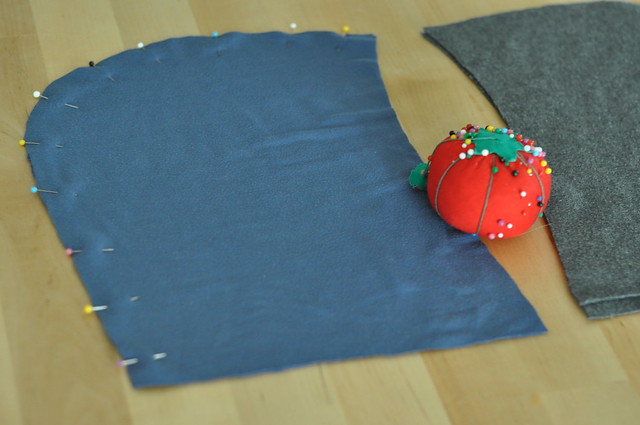
1. Take your two outer pieces and, with right sides together, pin along the curved side of the hood (you are making the main seam that goes from the top of the head all the way down the back).
2.  Stitch a 1/2″ seam, backstitching at beginning and end and removing pins as you go.
3.  Repeat steps 1-2 for liner fabric.

DSC_0331

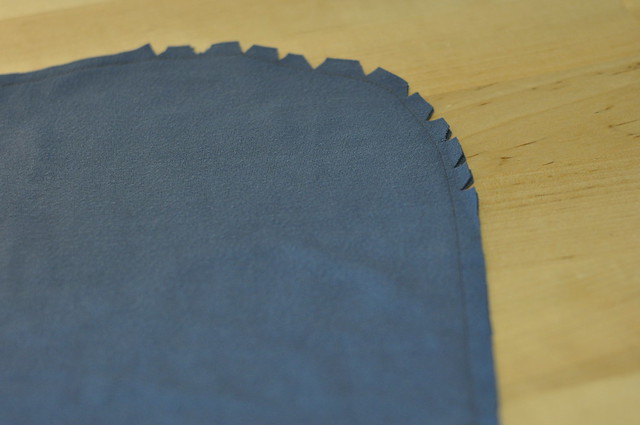
4.  For outer and liner, trim seam to 1/4″ and clip notches along the curve.
5.  Press seams open.

DSC_0332

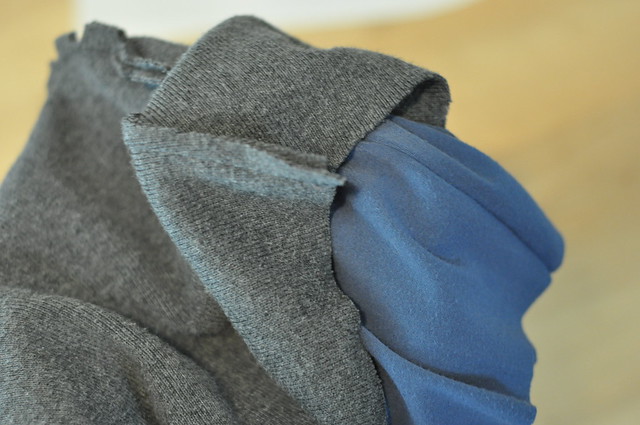
6.  With right sides together, slide outer hood into hood liner; match center seams and pin together along “face edge” of hood.

DSC_0334

7.  Stitch a 1/2″ seam along the edge you have just pinned, backstitching at beginning and end and removing pins as you go.

(**Steps 8-10 are optional and a little fussy, but I think they really help the hood stay on the head!**)
8.  Take your 3″ piece of elastic and mark the center.

DSC_0336

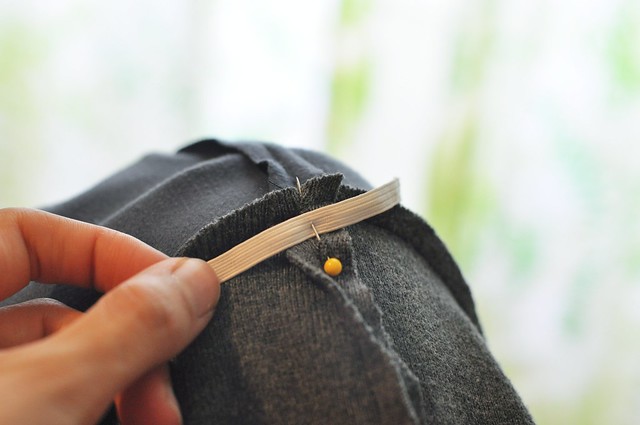
9.  Spread the outer and liner of the hood open (I found this easiest to do over my knee) and pin the center of the elastic to the center seam of the liner fabric only.  You want to position the elastic as close to the edge seam as possible (without crossing into the seam allowance)–you are going to enclose it within the topstitching.

DSC_0337

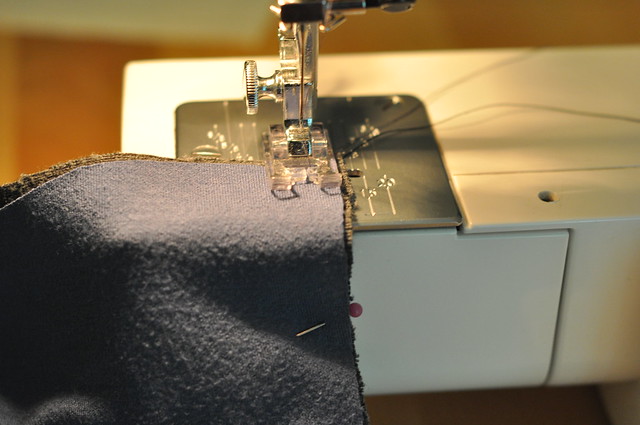
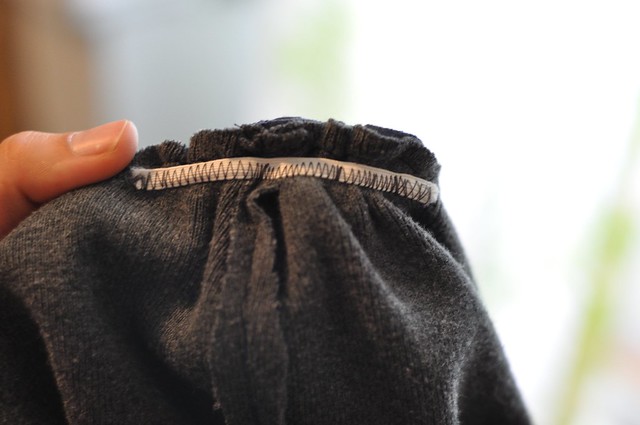
10.  Using a zigzag stitch, stretch and attach the elastic to the hood liner.  I pull the first part of the elastic out about 2″ extra (or as far as it will go) and use my presser foot to catch it, then use my hands to stretch the elastic as I stitch.  Make sure you are only stretching the elastic, not the fabric itself.

11. Turn the hood right side out and press.
12.  Pin along the face edge again, making sure to match center seams.  This is so the two layers won’t slip around while you are topstitching.

DSC_0338

13.  Topstitch along the face edge about 1/2 to 5/8″ in. from the edge.  If you used elastic, sew carefully along that area, using your hands to keep the liner flat as you go (don’t stretch the hood fabric itself).

Attach the Hood to the Shirt
DSC_0340

DSC_0341

1.  If you are using a premade shirt, you will probably want to remove the existing collar.  Cut it away from the shirt closely and carefully.
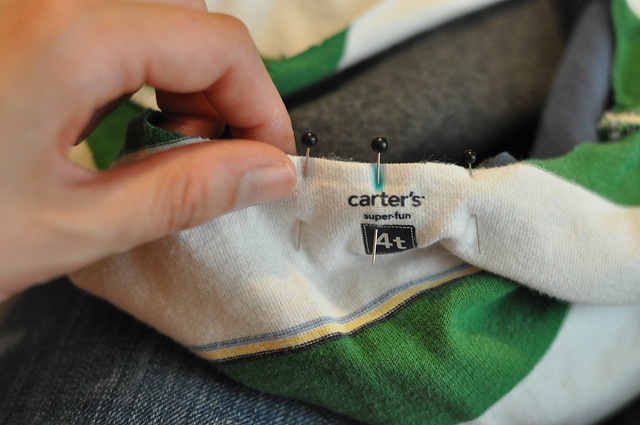
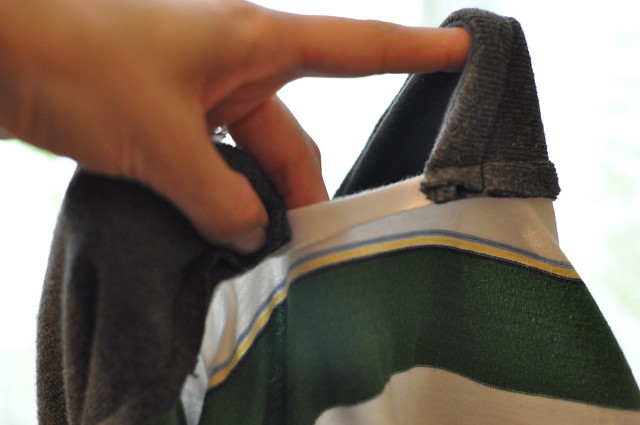
2.  Fold your shirt in half longways and mark the center front and back of the raw collar.  Use these points to guide you as you pin the hood to the shirt, right sides and raw edges together. Make sure the overlap or gap at the front lines up the way you want it to.  (I pinned with the shirt inside out, so the hood is inside the shirt in this picture.  It would have been easier, however, to turn the shirt right side out.  I ended up doing that anyway before I sewed.)

DSC_0342

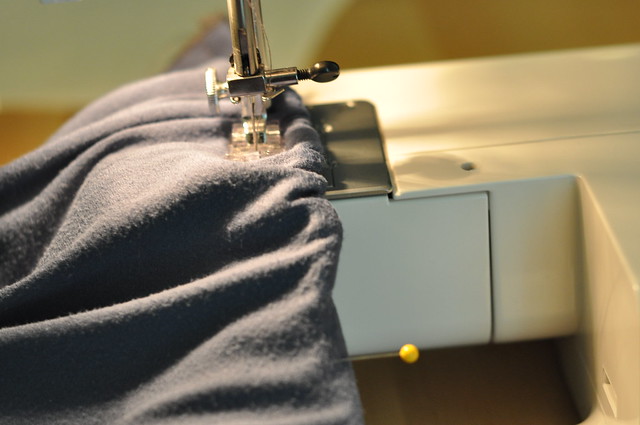
3.  Stich all the way around the hood to attach it to the collar.
4.  Turn the shirt right side out and check to make sure the hood looks ok!  Then turn it inside out again.
5.  To finish the inside, trim seam neatly and press toward bottom of shirt.  Topstitch all the way around the collar within the seam allowance, catching the gap fabric (if you have a gap) to hem it as you go.  (If you are the fancy type, you could also use twill tape or a serger to finish the seam.)
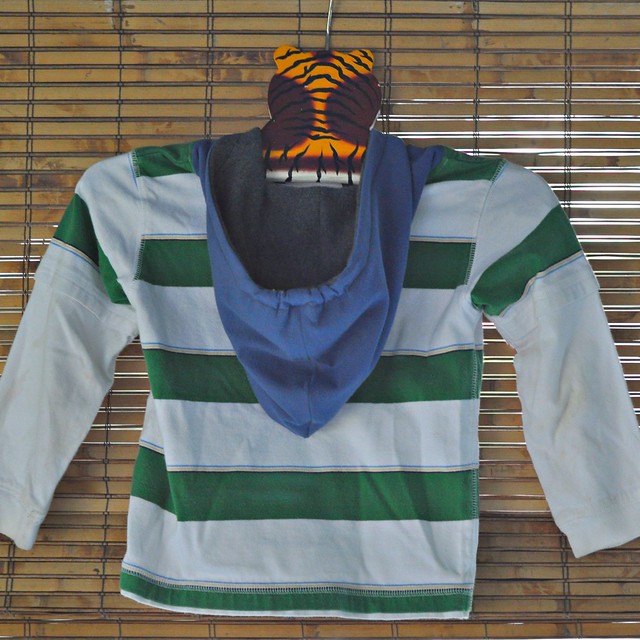
6.  Admire your new hooded garment!  I mean, your kid’s.  Unless you cheated on kcwc and used this tutorial to make a hoodie for yourself, which would work, but would be highly, highly unethical.  So don’t even think about it.

DSC_0418

DSC_0348

DSC_0383

DSC_0392

Mary Frances blogs bits of craft and life at this is marzipan.  Come say hello!

I want to welcome Sophie from Roubidou as our first guest poster this week! I have been watching her sew tiny, beautiful clothes all through her pregnancy: quilted jackets and fuzzy vests and amazing ensembles! Even though she was very, very pregnant, she agreed to write up a tutorial for us. And wow, what a tutorial it is! A cuff is a lovely detail and now you can put it on a shirt, a jacket, a pair of pants, or all three. After you’ve finished reading the tutorial she made, go have a look at the lovely baby she just made! Congratulations Sophie!
* * * * * * * * * * * * * * * * * * * * * * * * * * * * * * * * * * * * * *

Hello dear Elsie Marley readers,

When Meg asked me to do a little tutorial for KCWC I was pleased as punch not only for an opportunity to be a guest on one of my favourite blogs but also to be part of this autumn’s sewing frolic after all (our daughter is supposed to arrive on the 10th). I sewed the outfit to introduce three slightly different types of cuffs and hope you can follow the instructions without too much effort. I’m a self-trained dilettante so the tutorial below is merely what worked for me.

Happy KCWC,

Sophie

* * * * * * * * * * * * * * * * * * * * * * * * * * * * * * * * * * * * * * *

Shirt:

1. Sew the shirt as indicated by your pattern ignoring the instructions for the sleeve finish. Look at the given seam allowance and the sleeve finish method of the pattern, calculate the length of your cuff plus seam allowance to determine how much you’ll shorten the sleeve before adding the cuff and placket. To save fabric you could do this before cutting the fabric. If you have your little client ready and willing have her/him put on the garment to tailor the sleeves according to his/her measurement.

2. Make a pattern for you placket and cut out the placket twice (you’ll want mirroring plackets unlike the ones in the photo).

3. Place the placket with its ride side onto the wrong side of the sleeve and sew a little rectangle. Slash through the placket and sleeve down centre right between the stitches and carefully clip to the corners of the rectangle.

4. Turn the placket to the right side of the fabric and press. Now it’s likely to become a bit finicky. I very much prefer sewing for kids since it is so much quicker, pieces are easier to handle and you need less fabric. But sewing this placket, especially for a size 2 shirt, I wished I was sewing an adult sized shirt. To help you through this fabric origami it might be good idea to have a ‘real’ shirt with a placket lying next to you for visual guidance.

5. Fold back the long edge of the shorter side of the placket and pin in place. Then sew the folded edge in place stopping at the top of the gap. Tie the thread ends securely on the wrong side.

6. Next, fold the other side of the placket across the shorter side and press under the long edge. Fold back so that the pressed-under edge is on the sewing line and pin in place. Now, fold under the top pointed end,and press. Sew the long folded edge and make sure the underside of the placket is not caught in the stitching. Stitch an X at the end of the placket. Finish by tying the thread ends on the wrong side.

7. Now, gather the sleeve, stitching along the sleeve line with the longest stitch available on your sewing machine. Pull on the threads to manipulate the sleeve.

8. Cut out the cuff in the desired size. I used a one-piece cuff cut from the fabric in one piece and applied fusible interfacing to the half of the cuff that will be the upper cuff. Fold the seam of the non-interfaced side and press. Next sew the cuff onto the sleeve, right side to right side and trim the seam allowance. It’s important that you have an overlap as large as your seam allowance on both sides.

9. Fold and press the cuff to itself, right side to right side, so the folded side of the cuff comes to the sleeve-to-cuff seamline. Sew the ends in line with the two openings, cut the seam allowance, and press the seams open.

10. Trim, turn and press the cuff to the right side. I sewed the folded under cuff in place by machine, but if you want an invisible finish for your could,  hand stitch the folded edge on the inside with a blind-stitch or a slip-stitch.

11. Make a buttonhole on the upper side of the cuff and sew a button on the underside of the cuff. Repeat for the other sleeve.

Jacket:

1. Sew your jacket bearing the same alterations in mind as with the shirt.

2. Now on to the band cuff. Cut the cuff in the desired size, you’ll have two pieces of different fabric per cuff. Since the outside fabric is already thick I didn’t use fusible interfacing, depending on your fabric you might want to apply interfacing to the upper cuff. Pin the two pieces together, right sides facing, and turn under a seam allowance on the under cuff and press. Stitch the lower edge together. Trim and press open the cuff. 


3. Then sew the short side ends together, trim and press again. 

4. If you want to gather the sleeve before sewing on the cuff, do so now. Then sew the sleeve to the upper cuff, right sides facing. Trim and grade the seam. 

5. Press the seam allowance towards the cuff. Turn the cuff inside along the foldline, wrong sides facing. On the inside of the sleeve sew the under cuff in place either by machine or handstitch.

6. Repeat for the other sleeve and that’s it. 

Pants:

1. This cuff is sewn very similar to the shirt cuff. The main construction difference is that this is a lapped cuff which is used for bound or faced openings. I didn’t use any of these openings since I lined the pants and had my raw seams of the opening sandwiched between the lining and the main fabric. With a lapped cuff you’ll have to sew the cuff onto the knee sleeve with an overlap where the button will be. Sew your pants bearing the same alterations in mind as with the shirt

2. Now to the cuff. Start by sewing a line of piping (with your zipper foot) long enough for two sleeve cuffs. Then cut the cuffs in the desired size (i simply used a cereal bowl to trace the round edges). You’ll need four pieces altogether, I used the same fabric inside as outside in order not to distract from the piping. Pin the piping to the right side of one sleeve cuff. Stitch close to the stitching line on the piping, sewing with your zipper foot.

3. Turn under a seam allowance on the under cuff and press. Place the under cuff over the piping, right sides facing an sew the outer line of the cuff close to the previous stitch and the piping again with your zipper foot. Trim, turn and press the cuff.

4. Now attach the cuff to the knee sleeve as you did with the shirt but leave a seam allowance on one side and an overlap (long enough for your button) on the other side. Sew the cuff to the knee sleeve as you did with the shirt. Fold and press the cuff to itself, right side to right side, so the folded side of the cuff comes to the knee-sleeve-to-cuff seamline. Sew the shirt end in line with the opening and trim. Sew the overlap end along from the knee-sleeve to-cuff-seamline and then down to the cuff. Clip the corners and press the seams open. Push to the right side and finish the edge of the under cuff either by hand or machine.

5. Make a buttonhole on the upper side of the cuff and sew a button on the underside of the cuff. Repeat for the other knee sleeve.

And ready is a cuffy outfit.

bunting tag tutorial

October 2nd, 2011

Next week is the kids clothes week challenge! Have you signed up? Do you have a plan? Are you making piles of fabric? My list consists mostly of pants, coats, and some shirts. Not particularly exciting, but it’s what my kids need.

This week I wanted to have a slew of tutorials to get everyone excited to sew next week. There are so many good tutorials out there for simple pants and shirts already. Like these–

tutorials for basic kids clothes

  1. simple pants pattern
  2. basic coat pattern
  3. ringer shirt tutorial
  4. hoodie to pullover refashion
  5. kimono pattern
  6. raglan shirt pattern

So instead of patterns and tutorials for pants or tops, I’ve asked some super fantastic children’s clothes makers (and bloggers) to come up with tutorials for details you can add to basic pieces: patches, hoods, pintucks.  Sounds awesome, right? This week will be like the pre-game party for kcwc!

bunting tag tutorial

I’m going to kick it off with a little detail tutorial of my own: the bunting tag tutorial. I try to remember to put tags in all the clothes I make, because if I don’t my son will inevitably wear his pants backwards. The elsie marley tag I have is gray–nice and subtle, but not very noticeable to a four year old. So I’ve had to come up with other, more visible tags to use. Bunting, banners, triangles on strings, whatever you call them they are everywhere, so I figured why not put them in your pants?

the bunting tag tutorial

bunting tag materials

Materials

  • bias tape–double fold, single fold, it doesn’t matter just use what you have
  • pins
  • scissors
  • iron
  • an article of clothing to put your tags in

bunting tag tutorial steps 1 and 2

Directions

1.  Cut five 2 inch pieces of bias tape. You can use all the same color or different colors, whatever you like. Oh yeah, that is some metallic gold bias tape up there!

2.  Open up one side of the bias tape and iron it flat. Then fold up the folded side to make a triangle–see above photo. 

bunting tag tutorial steps 3,4,5

3.  Turn the triangle over so the fold is in the back. Line them up in the order you like.

4.  Check to see if the triangles are evenly spaced by placing a piece of paper over the raw edges (the bit of cardboard that comes with bias tape works well for this).  This also lets you see what the tag will look like when it’s sewn into your clothes–the triangles overlapping no longer shows and it looks more like a proper bunting.

5.  Pin the triangles and sew or bast them together.  Trim the raw edges to about 1/4 inch.

bunting tags!

6. Insert the bunting where you would normally put a tag (the back, duh) and sew that sucker in. Ta Da! A bunting in your pants!  Now your kids won’t put their clothes on backwards and while you are folding the laundry you’ll smile a little when you see these little tags .


rainbow afghan

September 30th, 2011

rainbow afghan

I have been dreaming about crocheting the kids some afghans for a while now (like this one and this one or this one). I knew I should have started in the summertime, but the thought of a big pile of yarn on my lap when it was 100 degrees out just made me gag. It’s cold and of course they need a warm blanket and now I want to make one, but at this point it will be done for next fall. Dammit. Old lady thrift store to the rescue!

Seriously, those old ladies are the bomb. It’s the only thrift store in town that hasn’t been hipsterfied. Things are a little smelly and odd, but they all are priced like second hand goods, not like it’s oooo vintage. This super amazing rainbow afghan was three bucks! But (big but) none of the end were woven in. Do you see all those color changes?!

afghan and map in the kids room

How could I pass it up? I had been looking at this exact pattern to use for an afghan, because of this beautiful specimen. So last night, I happily sat on the couch with the afghan warm from the dryer and wove those 200 ends in. It’s like the satisfaction of finishing a huge project without having to actually do the huge project.  Thank you whoever made this gorgeous afghan and abandoned it almost done!

p.s. see that little bit of a map up there? the room is (still) slowly coming together–might even get done.

felt masks

September 26th, 2011

handmade owl, elephant, and cat masks

A little friend of ours turned 3 last week. I had the damnest time coming up with something to make for him. He’s got a super crafty mama, so that lucky boy is kitted out with capes and bags and awesome appliqued shirts. And all the other things you would make for little boys.

handmade felt cat mask

I figured the dress up box could always use a few more things, so I sewed up these felt masks. I started with a mask template I made from a paper plate and then went crazy with a bag of felt scraps.  There was a lot of white, gray, and orange felt in the bag, so out came a cat, an elephant, and an owl.

handmade felt elephant mask

I had the best time making the elephant. His ears are extra wonky and homemade, but I’m so in love with his pompom headpiece I don’t care. It was sort of a last minute addition too. If I had thought of it earlier I would have dressed him up more!

handmade felt owl mask

Mostly I made up the patterns as I went along except I did steal the owl mask idea from Martha (she’s got so many ideas, she won’t notice). These were so fun to make and halloween is coming up so fast, I might have to make some more.  I might even go crazy and write up a tutorial. But which one? Or should I make something else?