Go!

The first day of the challenge is here! I did sneak down last night to start my first project and it looks like a lot of people have already finished some fantastic projects. But for the most part everything is just in piles. My hour to sew doesn’t come until evening, so until then I can just click around the over 200 blogs that are participating and see what you are making. Here is my list for the week.

for the girl

  • 2 shorts
  • 2 dresses (1 done, 1 started)
  • 1 tank top
  • leggings
  • peasant top

for the boy

  • 1 pair of shorts
  • 1 pair of pants
  • 1 short sleeve shirt
  • 1 muscle shirt

for the baby

  • 1 romper (started)
  • 2 long sleeve shirts
  • 2 pairs of pants

There is so much more I want to make, which is just ridiculous, but these are the things they actually need for summer. I don’t know if I can pull it off, but the point is just to start, right? What is on your list?

Making patterns sounds like it should be hard, but making patterns for children is super easy. Up to a certain age, kids are basically little rectangles and as long as you have some straps or elastic to keep the clothes up you are good to go.   I think the pattern everyone starts with is pants: turn a pair they have inside out (oops forgot that part), fold it in half, trace it and add some seam allowances. For babies and toddlers you can get away with same pattern for the front and the back. I like the way pants fit my kids a little better when I make an actual front and back pattern, but even then it’s not difficult at all. There is a very helpful guide on sewmamasew for altering the pants pattern you may already have for your growing kids. And if you haven’t made pants yet there are about a 1000 tutorials out there. If you have a favorite please leave a link in the comments.

I like to use freezer paper for all my kids’ clothes patterns: a big roll is pretty cheap, it’s wide enough to accommodate kid patterns, you can write on it, you can see through it (for tracing patterns), and you can iron right on your fabric so you don’t have to use any pins.  I use knit fabric for most of my kids’ clothes and I find it hard to pin. The only problem with using freezer paper is directionality. You can’t flip it over, well technically you can, but then you’d have to pin it, defeating the purpose. But honestly, I don’t run into this problem very often.

The challenge starts next week on Monday! Remember the challenge is to sew (or make patterns!) for an hour a day, but Tim Gunn isn’t going to tell you to stop when the hour is up. Mostly the challenge is about momentum–just start sewing and see where you end up. My list of clothes I want to make is ridiculously long and I know I won’t get everything done. There are over 200 of you participating! I don’t think lack of motivation should be a problem when 200 people are cheering you on! Be sure to add your photos of finished or half finished garments to the elsiemarley flickr pool as the week goes on and I’ll showcase some here on the old blog.  And if you plan on sewing for your kids after they are asleep be sure to measure them before they fall asleep because I’ve tried to get their measurements while they are sleeping and it doesn’t work too well.

Inspiring handmade baby clothes:


1. modernbebe reversible bonnet, 2. For our little one on the way, 3. Robots, 4. Goodbye Drool Reversible Handkerchief, 5. denim rompers, 6. Bloomers, 7. baby top, 8. roze pruge, 9. finally something new for baby boy

I don’t think I have to say much about baby clothes to get you to make some. They are super tiny and super quick. And it’s even a little silly that we make bonnets and bloomers and booties because they grow out of them so fast.  But we do and even long after we’ve had our last baby we do.  Who could blame us?  They are so stinking cute.

fantastic tutorials for baby things:

1. baby bonnet from vintage hankie 2. kimono booties 3.  sweat pea pilot cap 4. baby boy onesie tutorial 5. fourth of july baby sun hat 6. baby jumper tutorial 8. heirloom bloomers 8. hanging sloth bib 9. sleep sack tutorial

inspiring girly details:


1. doily detail, 2. patchwork pocket, 3. Bunny Love Reversible Jumper, 4. all season skirt [ pocket detail ], 5. Reversible Kindergarten Pinafore, 6. cherry jumper, 7. The Reversible Teacup Shift Dress, 8. Ruffle Sleeve Top Detail, 9. Vintage Curtain Cami

My next little montage was going to be about baby clothes, but there were a couple comments about how boy’s clothes are kind of boring to sew and no clothes there for boys are any fun. I think this is a ridiculous stereotype about sewing for boys that needs to be dispelled. Most pants and skirts are just two pieces of fabric sewn together. So see, sewing for girls can be just as lame as sewing for boys can be. It’s the fabric you choose–a fine linen or a super tacky polyester, a bright print or a subdued solid–and the elements you choose to include in the design–a secret pocket, some piping, an embroidered design–that make the clothes interesting and fun to sew whether it’s for a boy or a girl. Just because I can slap a ruffle on it, doesn’t make it better.

inspiring boyish details:


1. Sailor shorts in the shop!, 2. Monkey Birthday Shirt, 3. Yoga pant for my son, 4. boy’s pants, 5. knee pads, 6. cuff and trim detail, 7. Detail of G’s Easter pants, 8. tigertophalf, 9. Kaarna pants, back pockets & topstitching

At first when I was learning to sew, it was just about making a pair of pants or a skirt and have them turn out, but now I try to think about the aesthetic of the clothes I want to make and the details that would work and the ones my kids would like.  One problem a lot of us have with store bought clothes is that they insist on putting monsters or princesses or licenced characters on flipping everything which then my kids see and of course want.  I tend to favor simpler clothing, but I don’t want it to be plain plain and I want my kids to like it. So if I add some rainbow piping (I love piping) or big red buttons or embroider a picture they drew then I’ve made something I like, and that I enjoyed making, and my kids like the clothes and wear them!

tutorials for garment details:

1. pleated pocket tutorial 2. knee pad pants 3. freehand embroidered T-shirts 4. flowered collar tutorial 5. how to insert piping 6. in seam pockets 7. how to make a pleated collar 8. how to sew even topstitching 9. add a ruffled shoulder strap

Okay, I will stop blathering on. I think it’s enough to say it’s the details that make the clothes (even if the clothes don’t make the man, or kid).  These are just a few tutorials out there for some elements you can add to any clothes you make. I think kids love pockets on their clothes and there are a million ways to do a pocket. If you know of any good tutorials for clothing details be sure to link to them in the comments! thanks!

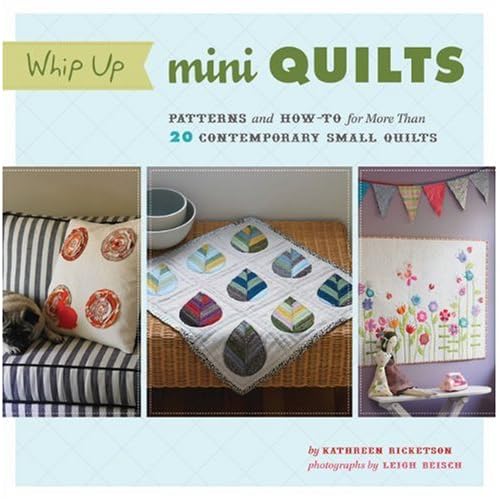
whip up mini quilts

April 29th, 2010

I have to take a break from the kids clothes week programming to show you these quilts. I made these a loooong time back when Kathreen from whip up asked me if I’d contribute to an art quilt book she was putting together.  Of course I said yes, even though the last quilt I made was almost 3 years go. Well, now the book is out and April has been quilt month over at whip up to celebrate.  I haven’t actually seen the real book yet, but I’ve seen all the projects inside and not only are they beautiful, they are made by some of my favorite people too.

I think I heard “art” more than “quilt” when she first asked me and so I made a quilt specifically to hang on the wall (I was thinking more in a frame than with tape at the time, but whatever). I wanted a modern landscape and thought powerlines crisscrossing the sky would make a nice patchwork. I could have made (and you can, if you make it!) the fabrics look like the actual horizon, but I went all arty and actually really like how it came out. The piecing of the little quilt does take some time and I didn’t want people to be put off by that, so I made another quilt with the same design only without any patchwork–a whole cloth quilt.

My favorite part of these quilts is the piped binding. I like how it frames the quilt and is just barely there. I know it’s a little hokey, but I also like how the binding is a little like a wire. These quilts have been gone for a long time and it’s nice to have them home again.  I was just sitting back that whole time while Kathreen was working her patootie off.  She did an amazing amount of work to put this beautiful book together and now I should get my butt to a book store to see it for real.