boy belt tutorial
My middle son is jumpy and crazy and skinny and tall–all of which make his pants fall down quite often (if he is wearing pants that is), so I thought I’d make a belt for him. In honor of Celebrate the Boy month at Made and Made by Rae I drew up a pattern to share with all of you.
The finished belt is 1 1/2 inches wide and adjusts to fit waist sizes of about 20 inches to 24 inches. To make a different size take the waist measurement you want to use then add 8 inches: the main fabric will be (waist size + 8)inches by 3 1/2 inches and the lining fabric will be one inch shorter.
Materials:

- one piece of fabric cut 30 inches long and 4 inches wide, preferablly cut parallel to the selvege, but as long as it’s not cut on the bias it will work out just fine.
- one strip of canvas or denim (or something that is a similar weight) 29 inches long and just shy of 1 1/2 inches wide.
- three snaps and snap setting tool
- one 1 1/4 inch D-ring
- scissors, pins, iron, sewing machine
Steps:
- Fold your strip of fabric in half the long way (wrong sides together) and press.
- Open the fabric back up and with the right side down, fold the top edge down 1/2 inch and iron, then fold the bottom edge up 1/2 inch and iron.
- Set your strip of canvas or denim on the bottom half and fold both short ends over it and press
- Miter your corners: fold the corner diagonally, so it makes a right triangle where the middle of the longest side (the hypotenuse if you paid attention in geometry) of the triangle lies on the point where the folds of the short end and the long side meet. This makes much more sense if you just look at the picture. And this is just how I do mitered corners, of course you can do it any way you know how.

- Sew all around the belt anywhere from 1/8 inch to a 1/4 inch from the edge–whatever looks best to you.
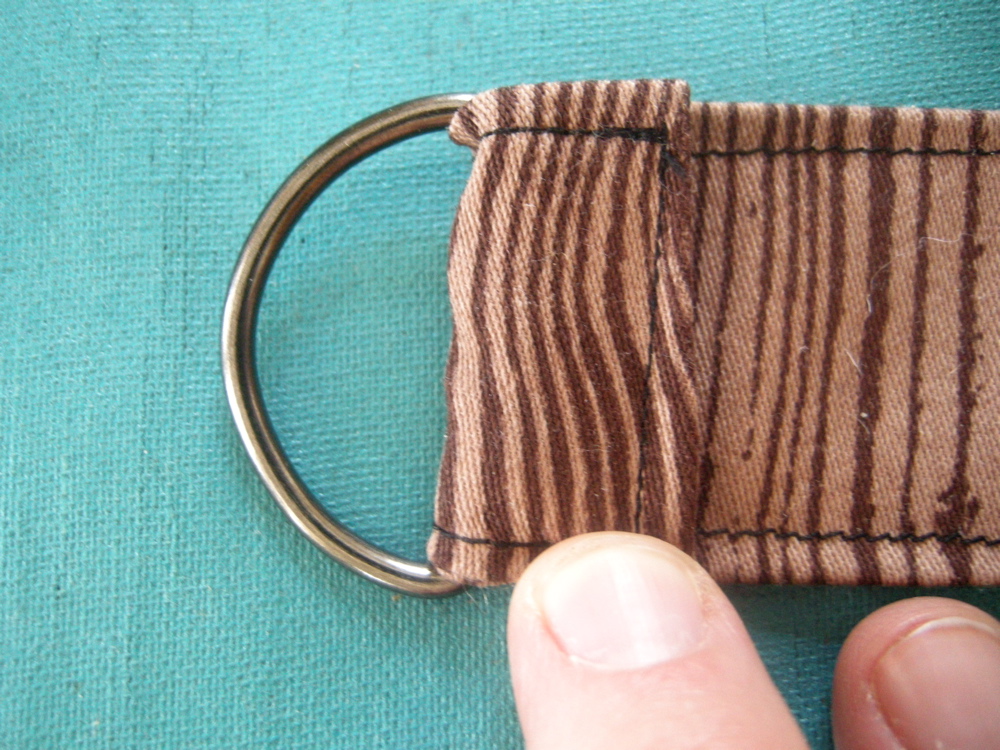
- Pick one side of the belt to be the right side (the one that will face out) and put that side down. Slide the D-ring onto the left end of the belt, fold the end over it one inch and sew down. Sew back and forth a few times to make sure it’s secure.

- Now for the snaps (I used heavy duty snaps for the wood grain belt, but there are a lot of options out there). With the right side down again and the D-ring to the left, attach the top part of three snaps: the decorative part on top and the male part (for lack of a better term) of the snap on the right side of the belt. The snaps should start about 1/2 from the end and be about an inch or so apart.

- 6 inches to the left of the last snap attach the bottom part of the snap: the female part of the snap should go on the right side of the belt and the very bottom piece of the snap should go on the wrong side (the side that will face in). This seems wrong, but it’s not. The belt will go through the D-ring and then fold back on itself and snap.

- Find some pants with belt loops and try that sucker out! Look at you, you just made a belt!
Variations:
- To make a skinnier belt, your fabric strip should measure 30 x 2 1/2 inches and the lining should be 29 x 3/4 of an inch. Then just follow the directions for the wider belt.
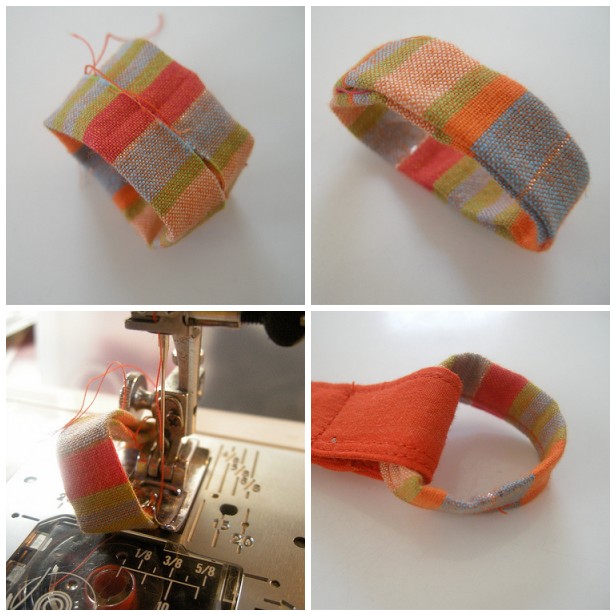
- I thought it would be nice to have a fabric buckle for baby belts (yes, it’s ridiculous I know, but so are baby sneakers and I bet you have some of those) so the metal doesn’t jab their pudgy tummies, or if you don’t have a d-ring around, or if you’d just like to make a cool fabric buckle, whatever, this is how you do it:
Cut a piece of fabric that is 6 x 2 inches (for the skinnier belt, cut 4 x 2). With right sides facing sew the ends together, so you have a small fabric ring, then fold both the edges in (wrong sides together) to meet each other in the middle. Fold in half again and sew. It’s easiest to sew with the loop going up over your presser foot than the other way around. Attach the fabric buckle just like you would the D-ring, making sure the seam is hidden under the fold and the nice side is facing out.

- Buttons! Sew button holes where the snaps would go and then sew some buttons on.
There are so many other things that can be done with this belt: topstitching, grommets, snaps all around, a matching mama belt! If you make one from this tutorial (or any other tutorial of mine) remember to add it to the elsie marley flickr group. And please add a photo or two to the Celebrate the Boy group on flickr too!
Go Boys!


