Posts Tagged ‘easy’

lamb burgers with tzatziki

lamb burgers

Usually, I hold off posting recipes here until I have the exact measurements and directions for making it, which means I never get around to sharing any recipes with you. Dinnertime is always crazy and often straight up chaos. My cooking style has become a few glugs rather than tablespoons, half a palm full rather than teaspoons, and whatever cup-like thing is in reach rather than a cup, because the actual measuring cups are in the sandbox. But I still want to share some recipes with you. If you keep in mind that my ingredient measurement are estimates and the directions are guidelines, then I think we’ll be okay.


Lamb and Feta Burgers with Tzatiki

lamb burger ingredients

for the burgers:

  • 1 1/2 – 2 lb ground lamb (I like to make a lot to insure I can have some for lunch the next day)
  • 4 or so oz feta
  • 1/4 cup (handful) chopped cilantro or parsley (a little mint thrown in there is nice too)
  • 1 clove garlic, finely chopped
  • zest of one lemon
  • salt and pepper

for the tzatziki:

  • about 6 inches of a cucumber, peeled
  • 1 cup good yogurt
  • 1 clove garlic (optional, my children think it’s too spicy, silly children)
  • salt and pepper

frying the lamb burgers

directions for the burgers:

1. Put the lamb in a big bowl with the garlic, herbs, and lemon zest. Crumble the feta into the bowl as best you can, smallish is better but really if there are big chunks it doesn’t matter. Mix everything up with your hands. Salt and pepper the mixture liberally.

2. Shape the patties. I usually make them on the smaller size: 3 inches, I’d say. Obviously any size is going to work.

3. Fry or grill those suckers until they are done to your liking.  If you end up frying them, use only a bit of oil in the pan because lamb gives off a lot of fat.

for the tzatziki:

unsqueezed, squeezed cucumber

1. Grate your cucumber into a bowl

2. Put all of it in your hands and working over the sink squeeze out the excess water–there is a lot. See unsqueezed, squeezed cucumber photo above.

super natural whole milk yogurt

3. Add your yogurt. As a side note, I really love this whole milk yogurt. We used to get the Stoneyfield yogurt, but then they very abruptly stopped making the cream on top kind and now their yogurt just tastes like gelatin to me. Obviously I’m picky and should probably make my own, but until I stop being lazy this Super Natural yogurt is totally delicious.

4. Add chopped garlic, and salt and pepper to taste. That’s it. I’m going to show you this picture because when it’s all mixed up it looks rather boring.

tzatziki

Tzatziki is delicious slathered all over the burgers. The kids use it as a dip. I try to get away with not even putting the damn ketchup on the table for the kids, but one of them usually remembers (the picky one).  We don’t use buns, but you of course could. To round out the meal, I use the rest of the cucumber for a salad and then make some other vegetable. That night it was peas (because I was so freaking busy taking pictures), but sweet potato fries are perfect with this meal.

lamb and feta burgers, tzatziki, cucumber salad, and peas

There you are. This is dinner for two adults, one first grader, one garbage gut of a 5 year old boy, and one very picky toddler. Adjust to the size (and size of appetite) of your family.


a wall of flowers

a wall of [fake] flowers

I took all the homemade, wonky, gluey hearts down from the wall in my kids’ room and it looked so sad and bare. The room needed some cheering up! First I was thinking I would let the kids go crazy with washi tape, then I thought maybe we could make some paper flowers and tape them up, but then I saw this amazing wall.

flower wall detail

My daughter and I headed to the craft store to buy some [faux] flowers. I’m usually not down with fake flowers–or even buying that much plastic at once–but I have to admit some of these flowers are very,very pretty. The weedy looking ones are my favorite. I do believe I’m the only woman in the world buying plastic weeds.

rose closed and open

Luckily all the fake flowers were half off, so we went a little crazy picking them out. My daughter fell hard for the bubblegum pink roses covered in fake water droplets. I was not so smitten, but she was so in love. When we got home I was messing with the flowers to see if I could get them to look a bit more natural and when I pulled back the petals on the rose, it turned into this absolutely gorgeous bloom. You can see how the rose looks closed and open above.

making the flower wall [gif]

To hang all the flowers on the wall, I cut the bunches apart with a wire cutter and trimmed most of the leaves off as well. Then marked five rows on the wall. Working from the top down I simply taped each flower up so it was in line with the one above it. My rows aren’t perfectly spaced or perfectly straight, but the it’s the contrast of orderliness and nature I was going for–that’s what drew me to the first photo of flowers on the wall. Also, it’s just plain awesome to have a field of flowers on your bedroom wall.

beroom wall of flowers

For 20 dollars and an hour of our time, we managed to get spring to come a bit earlier in Wisconsin. Not bad, not bad at all.


a rainbow birthday party: part one

Almost every party we’ve been to recently has had a pinata, so of course my daughter asked (and asked and asked) to have one at her birthday party. But those pinatas are impenetrable! After about 10 rounds of the kids taking turns whacking the thing (and after one burly dad tries, and fails) someone has to get the scissors or and ax or some sharp object and pry the damn thing open, by which time the kids have lost their minds waiting for the candy. So I thought I’d make my own, which took a lot more time than I bargained for, but a lot less tissue paper than I imagined. And after everyone got three turns, one kid smacked it to pieces.

With all the leftover tissue paper I made some martha poofs for above the picnic table. I forgot how easy these are and how pretty. My daughter gasped when I she saw them!

Inside, we hung rainbows and clouds from the ceiling. We were going to make raindrops too, but somehow forgot. Both projects were very simple and clever and the kids helped with both. The rainbows are made by cutting paper into progressively shorter strips and then stapling them together at the ends. I found the directions for the paper rainbows via the crafty crow.

The clouds are so awesome I can’t get over it. They are made by winding a piece of wire into a corkscrew shape and then twisting into a floof of polyfil. Ingenious. You can find the directions to make your own clouds on ohdeeoh.  These will definitely stick around for a while, maybe even become the long overdue mobile above the baby’s bed.

Enough for now, I’ll be back tomorrow with rainbow food and rainbow favors!

rainbow birthday party: part two


tin foil noodles

The other day we wrapped some tin foil in noodles. I thought they made for a pretty stylish necklace.

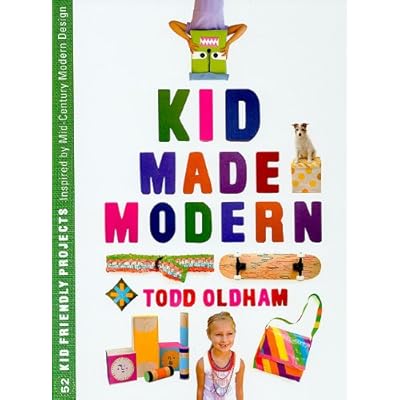
The project came from Todd Oldham’s awesome book Kid Made Modern. His first book, Handmade Made Modern, was decent, but this one is super fantstic. I think it’s aimed at kids around the ages 7-12, but there are some projects little ones can do and I would have loved it as a teenager–really even if you don’t have kids there are some super styish ideas you can steal.

In the book, Oldham takes mid century designers–Isamu Noguchi, Marimekko, Alexander Calder, Paul Rand, Charles and Rae Eames and so many more–tells you a little about them and their art and then presents a couple projects inspired by their work. The projects are organized by material–many of them recycled–or technique.   The printing, cardboard, tape and dye sections are some of my favorites, but I was taken by most of the projects.

I  didn’t mean for this to become a full on book review (I was just going to tell you about the noodles) but I think this is a fantastic craft book that is well put together and well thought out. And definitely not only for kids. If you feel like wrapping noodles in tin foil–you really don’t need the book for this project– but I would dab a little bit of glue on the noodle before you roll it up. We didn’t and I kept finding bits of tin foil around the house for the rest of the week.

Oh and look there is a kid made modern website with some extra projects and little videos, check it out!

happy thanksgiving

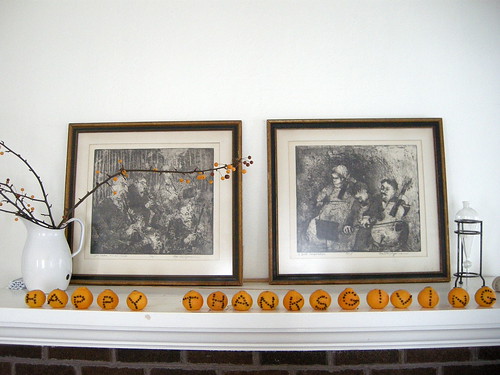
I have zero thanksgiving decorations, so I came up with this little project. It doesn’t really need any explanation, just push some cloves into some clementines and spell a word.  You could get all fancy with fonts and it might be good to sketch the letters on first. I just did it freehand (and I’m sure you can tell). Clementines have a thinner skin than oranges so it makes pushing the cloves in much easier. This is a great project for kids and a good spelling lesson to boot. My daughter is really into letters right now and  it went over big. I didn’t dry them so they won’t keep, but they still smell pretty. Now we just have to make some hand turkeys and we’re set!