guest post: ways to use pintucks
I’m very happy to have Sascha from Piccoli Piselli (it means little peas!) here today to tell us a bit about pintucks. Sascha is a very talented sewer who cranks out fantastic clothes for all three of her kids. She is a wiz with knits and totally hilarious to boot!
* * * * * * * * * * * * * * * * * * * * * * * * * * * * * * *
A few years ago I made this top with freestyle pintucks on the bottom of the sleeves.
ever since then I’ve been meaning to experiment a little more with pintucks. Generally pintucks are sewn with a special pintuck presser foot and a double needle.
I’ve never gotten around to buying one that fits my machine and then I’d be limited to the fine, evenly spaced pintucks (which are beautiful and can be used in children’s wear in so many ways, especially heirloom garments).
So here’s some ideas for adding pintucks and pleats to your sewing:
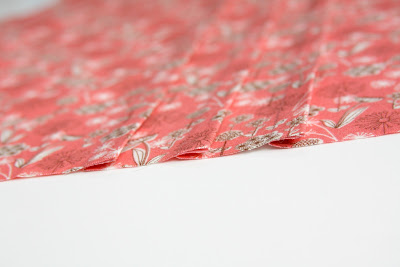
I know it’s difficult to see from this photo, but I added pleats to the A-line dress as well as the pocket. For the dress I decided that re-drafting the front to accommodate the pleats would require too much math, so I stitched pleats to a piece of fabric that would roughly cover the size of the front panel of the dress.
Here’s a better picture of the pleats. What you do to create the pintucks or pleats is really pretty simple:
- First you press down the length of the fabric where your first fold will be (wrong sides together).
- Then choose the size you want you pintuck/pleat to be. On the dress above I made them about 3/8″ wide.
- Stitch down the length of your fabric.
- After stitching one row, take the fabric over to your iron and press fabric open.
- Next you want to determine how far apart each pleat will be. Again, I’m no fan of math so I kind of just picked where it looked nice.
- Fold your fabric again (wrong sides together) and press.
- Continue with the stitches until you’ve created the amount of tucks you need.
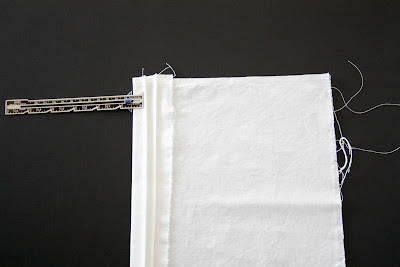
Here is a photo of some smaller pintucks I made for the pocket on the dress (I ended up making another set for the pocket with wider pleats to match the dress). I used this little measuring tool during pressing which really helped. I have no idea what it’s called, but I use it a lot in sewing.
When making small pintucks it can be a little difficult to keep the fine lines parallel. I guess the smaller pintucks would be better off sewn with a pintuck presser foot, but honestly the set I made above turned out pretty nice and I didn’t end up pulling out too much of my hair.
Here’s what I call “freestyle pintucks”. I wanted to go for a more wavy look (better luck next time) but I like the different widths I created here. I stitched the tucks across the grain of the corduroy. I think this is a great way to embellish boys clothing. Kristin from Skirt As Top did a great tutorial for how to make elbow patches yesterday. Just use her tute to add the patches to the knees of the pants.
Here is another pleat variation. Again, I made the pleats on fabric and then laid my pattern piece on the fabric and cut as usual. Can you see something odd in the left photo? Yup, I forgot that corduroy has a nap like velvet. It’s not too bad in person and as you can see by the photo on the far right, Vinny is happily wearing the pants. This is the best only photo I could take of him wearing any of the clothes I created for this post. He’s gotten very camera shy these days.
I saved my favorite for last…
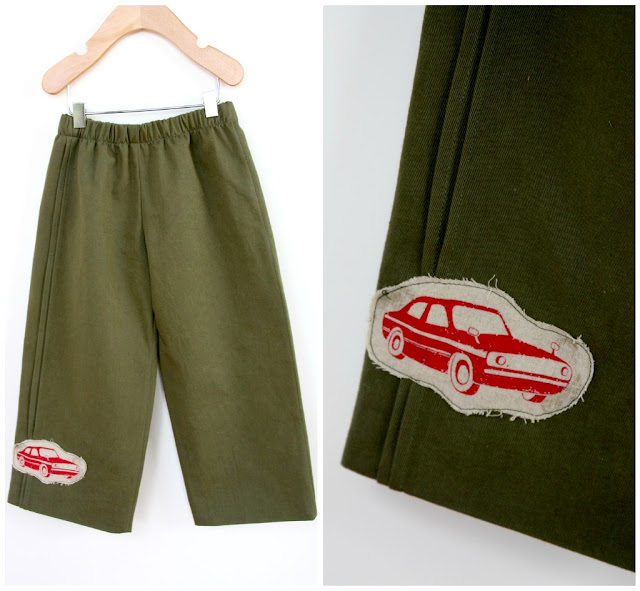
For this pair of pants I actually did not stitch the tucks before laying/cutting the pattern piece. What I did was add the amount I guestimated I would use in the tucks onto the side seam of one of the pant front legs. This doesn’t always work because of the way patterns are drafted. Most of the time the subtle curves of a pattern will be compromised by adding width nilly willy like I did. This definitely would not have worked for the A line dress above. Especially when you have a pattern with facings that need to fit perfectly. I’ve worked with these pants so much I was comfortable making the changes. Before stitching my pant leg closed I attached the car patch. I was too lazy to get out my fusible web so I used fabric glue instead. Mistake. It bled through and now shows permanently on the finished patch. Lesson learned. Hey, that’s what I’m here for. At least you learned today that fusible web is better than fabric glue for applique and corduroy has nap. Yourwelcomeverymuch.
Thanks for having me Meg!


