Posts Tagged ‘project’

tin foil noodles

The other day we wrapped some tin foil in noodles. I thought they made for a pretty stylish necklace.

The project came from Todd Oldham’s awesome book Kid Made Modern. His first book, Handmade Made Modern, was decent, but this one is super fantstic. I think it’s aimed at kids around the ages 7-12, but there are some projects little ones can do and I would have loved it as a teenager–really even if you don’t have kids there are some super styish ideas you can steal.

In the book, Oldham takes mid century designers–Isamu Noguchi, Marimekko, Alexander Calder, Paul Rand, Charles and Rae Eames and so many more–tells you a little about them and their art and then presents a couple projects inspired by their work. The projects are organized by material–many of them recycled–or technique.   The printing, cardboard, tape and dye sections are some of my favorites, but I was taken by most of the projects.
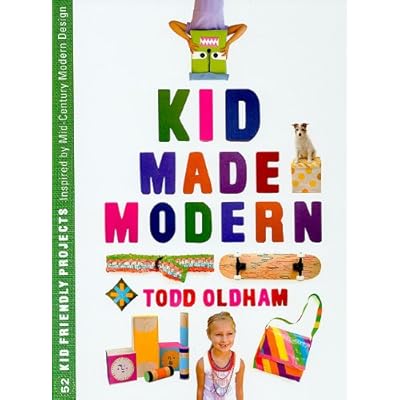
I  didn’t mean for this to become a full on book review (I was just going to tell you about the noodles) but I think this is a fantastic craft book that is well put together and well thought out. And definitely not only for kids. If you feel like wrapping noodles in tin foil–you really don’t need the book for this project– but I would dab a little bit of glue on the noodle before you roll it up. We didn’t and I kept finding bits of tin foil around the house for the rest of the week.

Oh and look there is a kid made modern website with some extra projects and little videos, check it out!

rain painting

A while back when it was raining nonstop we made these very sweet rain paintings, but now that it’s extra hot I was thinking I’d turn on the sprinkler and make sprinkler paintings instead. I found the project at the crafty crow— where you can find every kid’s art project ever thought up–and you can find the original post about it here.  To make rain paintings  you crush up watercolor paints (we put them in plastic bags and banged on them with a rolling pin), sprinkle them on some paper and put it out in the rain.

It’s such a simple and quick project, but every part of it was exciting for the kids (and me): whacking the paints with the rolling pin, using the paints we “made” and standing out in the rain waiting to see what would happen.

After you decide the picture is done and pick it up, all the paint will run (and your sidewalk will turn bright blue). I was kind of disappointed when this happened, but my kids squealed with joy.  We hung them up in the window to dry and they were so beautiful with the sun shining through them. The whole porch was bright and glowing even though it was still raining outside.

The pictures do fade when they dry, but then you can take a pen and turn your rain painting into a beautiful rain garden.

I had grand plans to do project after project with my kids this summer, but there has been more lazing around than anything else. This project, though, is right up my alley: simple, quick, bright, and all about the process. Anyone got any good preschool age art projects to recommend that have been a success? I’m thinking marble painting is next.

advent calendar coloring book!

I am super excited to tell you about this project. After much help from my computer genius of a husband, you can now buy (for the super cheap price of $2.50) and download my Advent Calendar Coloring Book.  Then check “make advent calendar” off your list.  Done and done. All the pictures were drawn by yours truly and I had a fine time doing it. We all should draw more often. And color more often too! Because of course after making a coloring book, I had to break out the crayons and pencils and color!

My daughter, who is my little tester, has colored three whole books already and advent hasn’t even begun. And really, you could print out a coloring book a day for advent, instead of coloring one picture a day.  My kids are coloring fiends, so that much coloring wouldn’t be unheard of. And of course you don’t have to use it as an advent calendar, but just color all the christmasiness to get in a happy holiday mood.

And as a special treat, I am going to have a page to print out and color everyday for advent on my blog. So be sure to stop by tomorrow for the first one!

snowmen

Yesterday we were buried under almost a foot of snow, so we made meringue snowmen.  I had this little project stored somewhere in the back of my brain for a while and it was the perfect day for it. I whipped up some meringue, piped them onto a sheet pan, and the kids decorated them.  We didn’t have much (and there was no going to the store) so I cut raisins up for the eyes and we used the 10 red hots that were left. I didn’t want to use chocolate chips because I thought they would melt. But now I’m realizing I should have cut up some dried apricots for noses! oh well. I also forgot the peppermint extract, so they don’t really taste like much, but the kids don’t care at all. The meringue is sticky as all get out, so it’s a good idea to wet your fingers a little before you start decorating.

snowman meringues adapted from martha stewart

  • 3 large egg whites
  • 3/4 cup sugar
  • 1/2 teaspoon peppermint extract (or vanilla if you don’t have peppermint)
  • raisins, currants, dried fruit, red hots, or whatever else you have on hand for decorating

directions

  1. Put egg whites and sugar in the bowl of an electric mixer. Set bowl over a pan of simmering water, and stir until sugar has dissolved and mixture is warm to the touch, 2 to 3 minutes.
  2. Transfer bowl to an electric mixer fitted with the whisk attachment. Mix on medium-high speed until stiff peaks form.
  3. Mix in peppermint extract (don’t forget)
  4. Put the meringue into a piping bag with a large tip (or a ziploc bag with a clipped corner, or just use two spoons). If you have a silpat, use it. If not put some parchment paper on a cookie sheet and “glue” the corners down with a dab of meringue. Then pipe three adjoining circles–a snowman, silly.
  5. Decorate and pop in a 175 degree (Fahrenheit) oven for two hours. They will look exactly the same when you take them as they did when you put them in.

This is turning into a tutorial week! Tomorrow I’ll have the directions for the string of lights advent calendar and who knows maybe I can rustle up another tutorial for Friday (but don’t hold your breath). Also, a couple people have emailed me asking whether or not the mobile swap is happening again this year. And yes! it is. Sign up will start in January. Last year it was a big success! And I’ve even got an idea for my mobile already.

happy thanksgiving

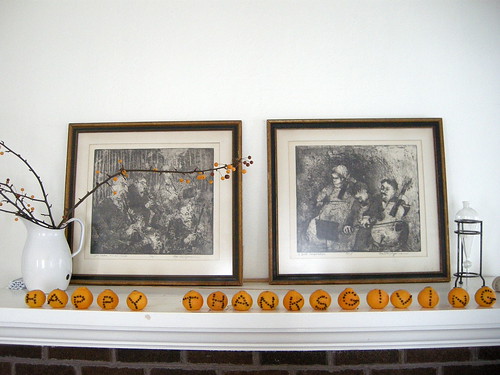
I have zero thanksgiving decorations, so I came up with this little project. It doesn’t really need any explanation, just push some cloves into some clementines and spell a word.  You could get all fancy with fonts and it might be good to sketch the letters on first. I just did it freehand (and I’m sure you can tell). Clementines have a thinner skin than oranges so it makes pushing the cloves in much easier. This is a great project for kids and a good spelling lesson to boot. My daughter is really into letters right now and  it went over big. I didn’t dry them so they won’t keep, but they still smell pretty. Now we just have to make some hand turkeys and we’re set!