Posts Tagged ‘sewing’

the quick little bunny tutorial

quickbunny

I really wanted to make the sock bunny that Heidi (from My Paper Crane) created, but I didn’t have any of those fantastic red and brown monkey socks. What I do have is baby socks: tons of cute, mismatched, totally useless, never stay on baby socks. Now that my littlest is very much not an infant and too soon will be a toddler it seems kind of silly to keep all those teeny tiny socks. So I made a bunny out of them. And a tutorial too.

DSCN1529 DSCN1537

This is indeed a quick little bunny. After I figured out the pattern, start to finish each bunny took me just 15 minutes.  So if you are anything like me and never get around to the easter baskets until the night before, you can whip up this little softie and still have time to run to the drugstore to score the last bag of jelly beans.

The quick little bunny tutorial

DSCN1486

Materials:

  • baby sock
  • a handful of stuffing
  • heavy duty thread
  • scissors

Make that bunny:

Before you start sewing take second to look at the sock you have. Most of the foot part will be the body and the heel area will be the head. Yours might be a little different, depending on your sock. If you look at the picture below you can almost see the bunny already.

DSCN1495

the body:

Take some stuffing and stuff the foot part of the sock–not too tight! this is just a little, squishy baby bunny. Where the foot part ends and the heal begins sew a running stitch around the sock and pull to gather it. I like to wrap my thread around where I’ve stitched a few times just so it’s secure. Knot your thread and snip.

the tail:

DSCN1498

On the top of the bunny’s back,  sew a circle about an inch in diameter with a simple running stitch. Then pull to gather. You may have to mush the stuffing around so you can pull it tight  to make a tail shape. When you have a little bunny tail, wrap your thread around a few times and knot off (do people say “knot off?” does it sound too much like I’m yelling at you to go “knot off!”).

the head:

DSCN1504

To make the head, put a little stuffing inside the sock and sew a running stitch around the top of the heel. Before you pull it taut make sure all the stuffing is pushed down under your stitches. Then wrap the thread around and knot off!

the ears:

DSCN1508

Cut a big V shape out of the top of the sock. Now trim the top part of each ear to a point.  Then fold the two sides of the bottom part of one ear in to meet and sew together. This is a little easier to understand when you look at a picture:

DSCN1509 DSCN1511

When you sew that seam down the middle of the ear, it’s good to catch some of the back of the ear with your stitches, so the ears are a little thinner.

The attitude:

Okay, that is a dorky title, but this is the fun part. Now you can play around with the ears and the head, moving them to where you want and putting a stitch here and a stitch there so they will stay.

DSCN1515

You don’t have to give your bunny an attitude, but you should stitch the back of the head to the body a little, so it looks more bunny like and less like a cinched up sock. There! you did it! Now go dig around in the sock drawer and see what else you can make into a bunny.

DSCN1538

things on the internet that are awesome

I am, admittedly, one to judge a book by it’s cover.  I mean if it’s crap inside, I’m not reading it, but I’m still happy to look it at (luckily I have discovered the inter library loan system and now am not broke with a house full of poorly written, pretty books). This is the picture of a cover of the book called Book Quilts 1700-2010. Kathreen wrote about it on whipup and I’ve been itching to get my hands on it ever since (it hasn’t been released quite yet). I mean just look at that quilt on the cover!

Magda at bohemian girl made some monotype butterflies with her son, painting a design on one side then folding it in half to print on the other. We followed suit with some butterflies of our own a few weeks ago, but now that spring has stalled a bit we may need to make them again.  The mask she made in the same manner for carnival and I just can get over how eerie and beautiful it is. (Magda also has quite a nice etsy shop, if you didn’t know)

I loved the double wedding ring design the first time I saw it, but always thought it was a little too old fashioned for me to make for my home. Denyse Schmidt, of course, made a super fantastic modern version called the single girl quilt, but it’s been a long time since I’ve been a single girl. So when Molly posted this photo of her friend’s quilt I was in love all over again. They took this very traditional quilt pattern and made it super modern. It might even be a little too modern, but a few prints thrown in the mix could even it out for me. Go check out the post, because Molly has some nice thoughts on this modern/traditional juxtaposition in design.

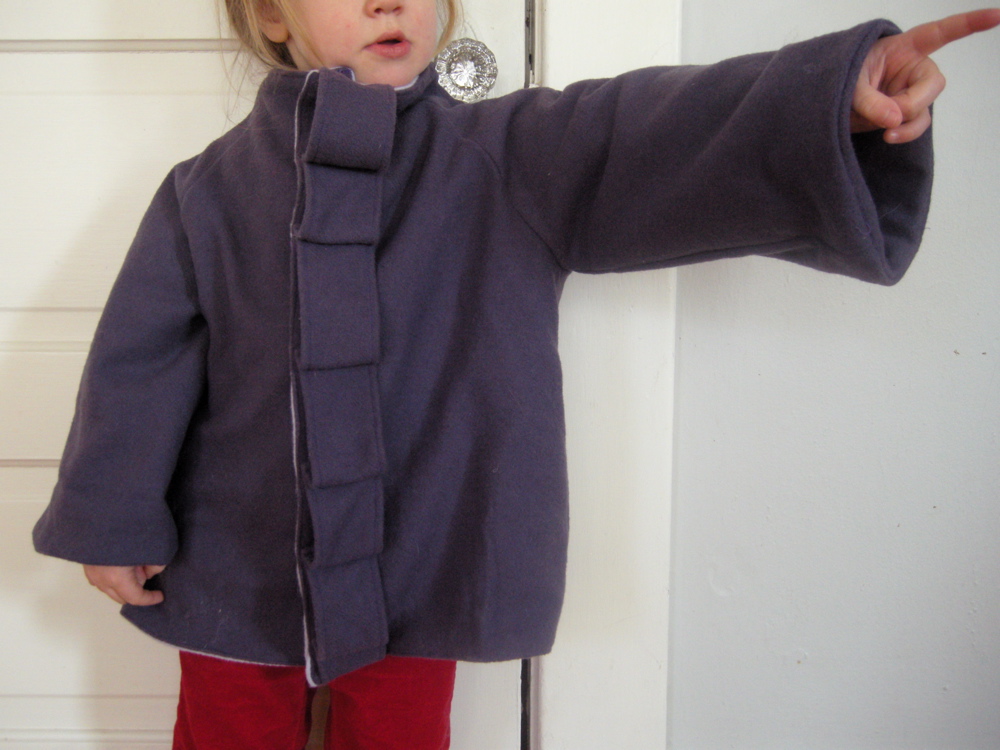
And one little awesome baby coat rounds out this week’s things on the internet that are awesome.  It’s a poncho! It’s a jacket! It’s two! two! two mints in one! It’s the crabby baby jacket, designed and skillfully executed by Lisa from Mama Uses Needles. I’ve always said that baby clothes should have no arms and finally someone heard me. This poncho pops over the little one’s head and then you just zip it up the sides. genius! and cute to boot.

technical difficulties

hey everyone, I wanted to post today, but my computer is having some issues. Sorry! too bad mr. muscles up there can’t fix it. I’ll try to be back tomorrow with some awesome things on the internet.

braided shirt

It seems that all anthropology and jcrew are doing these days is slapping things on t-shirts and calling it couture, then charging 60 bucks for it (see here and here if you don’t know what I’m taking about). I mean come on people, we can make this stuff.  Look!  I just turned into my mother before your very eyes! Shopping with her was awful (sorry mom) because no matter what I picked out she would say, “oh, you could make that.” Not necessarily me, I was 12 years old, but “one” could make it.  No “one” ever did, of course. Until 20 years later.

DSCN0770

So anyway, a while back a friend invited me over to slap some things on t-shirts and call it couture. I came up with this braided number.  I think it actually was inspired by an anthropology shirt, but I can’t remember which one. I bought two 5 dollar shirts from Target and washed them both, one shrunk up really weird (only on one side–that’s what 5 bucks will get you) so I cut that one up. I started at the bottom and cut spiraling up to the armpits. The strip was super long and was about an inch wide. Then I cut it into three equal pieces and braided it.

DSCN0763

Then I pinned it on, starting from the bottom and going up around the neckline, then back down the front and then I hand sewed that sucker on. I was watching a movie while I did it, so it’s a little uneven, but you can’t really tell when I wear it. I’ve got more anthrocopies (awesome word coined by the angry chicken!) planned, but that baby up there? he is just all over the place these days. So maybe you look to these people for inspiration while I go chase him down:

stripey shirts and pants

This year I am determined to cut into the ridiculous amount of fabric I have amassed in my basement. It’s not there just to look at, right? It’s there so I can make the clothes and quilts and toys that my family needs instead of buying all that crap. So this is probably going to be the first of many matching family ensembles.

DSCN1344

I don’t know how all those bloggers out there take beautiful pictures of their kids while showing off the beautiful clothes they have on at the same time. This is the best photo I got and it was the last of about a hundred, and really it’s not that great. But you get the drift: one long sleeve shirt, one short sleeve, and one pair of leggings.

DSCN1392

all made out of this geek chic fabric I found at the thrift store a loooong while back. It is so perfectly seventies: the stripes are brown and this sort of rainbow confetti, meshy stuff (my daughter calls them her sprinkles pants). It’s a knit that has sat on the shelves waiting for me to learn how to use my serger. And guess what? I learned how to use my serger! A gracious friend taught me how while we made the 90 minute shirt together.

DSCN1358

She made the long sleeve version and I made the short sleeve, but hers was so cute I ran home and made the long sleeve one. Of course I didn’t read the directions, screwed it up and the sleeves are too long, but that drooly baby really couldn’t care less.

DSCN1349

Now my daughter wants to know where daddy and mama’s matching shirts are. Sound of music here we come!