Posts Tagged ‘sewing’

kcwc guest post: meg from sew liberated

meg from sew liberated

I started following Meg’s blog, Sew Liberated, back when she was a Montessori teacher in Mexico. She’s moved back to the states and had a few boys since then, but her loving, teacherly voice is always present. Meg’s patient, creative Montessori spirit shows through not only in her parenting, but in her home and sewing too. If you haven’t seen her latest book, Growing Up Sew Liberated, do yourself a favor and pick up a copy!

matchy matchy skinny tee + basic pocket pants

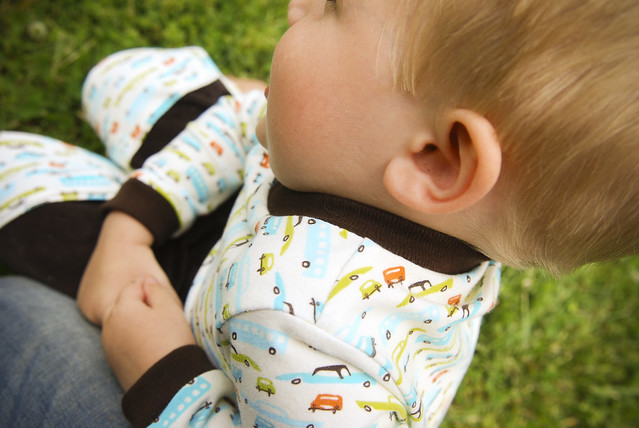
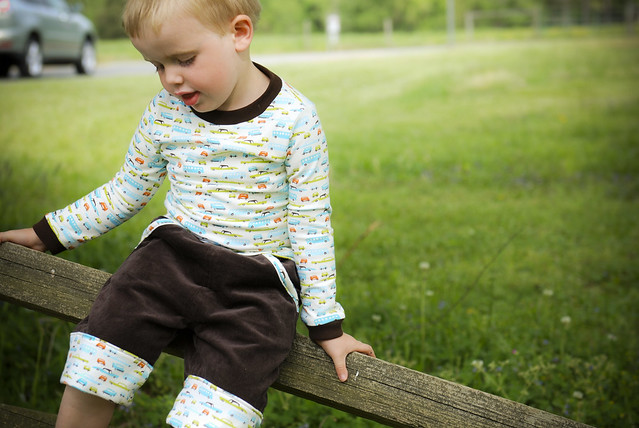
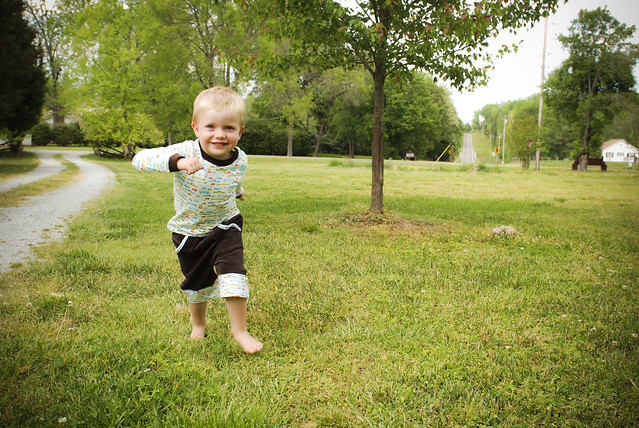
At first, I had visions of using one of his dad’s old tee shirts to make him an indie-chic Flashback Skinny Tee. But then Finn entered the sewing studio. And, as we all know, almost-three-year-olds have very strong opinions about certain things. (Well, I’ll be honest – at first, he just wanted to cut the car fabric. Cutting, his all-time favorite activity, was just what I was about to do (with another fabric) so we went ahead and cut the car fabric together for his shirt.) In the end, I can most certainly say that this was our first creative collaboration.

matchy matchy skinny tee + basic pocket pants

He handed me pins, pulled out pins, and trimmed threads. Thanks to Rae and her super straightforward pattern, the boy and I had a lovely time together. I now have a sewing assistant.

matchy matchy skinny tee + basic pocket pants

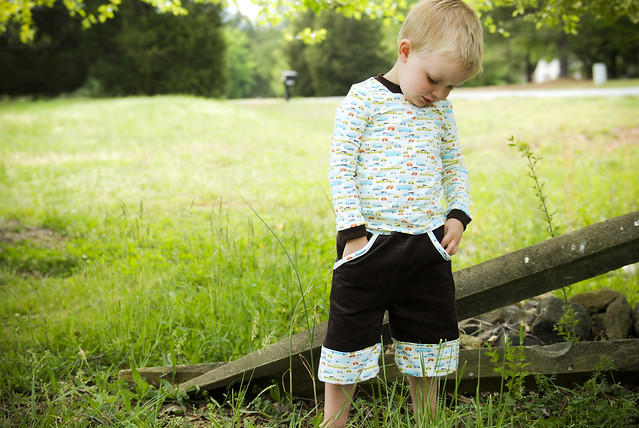
Why stop at the tee, though, when the tee came together in less than an hour? Finn needed a pair of shorts, so I shortened the Basic Pocket Pants pattern from my book Growing Up Sew Liberated and altered the waistband so that I could use the knit fabric instead of the conventional woven-with-elastic method. I attached the stretchy knit waistband in the same way that you attach the collar to the Skinny Tee.

matchy matchy skinny tee + basic pocket pants

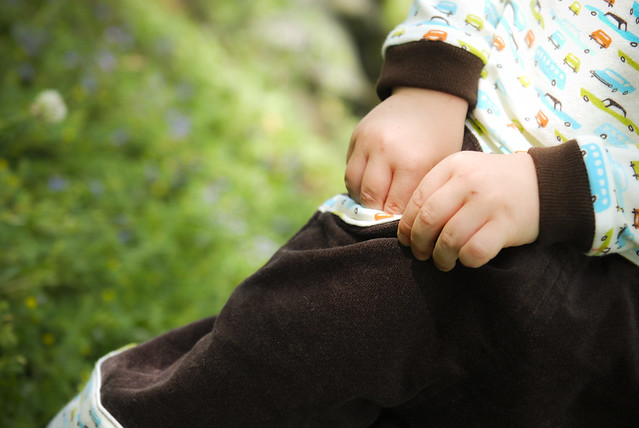
The boy and his pockets, which are always filled with sticks and weeds.

matchy matchy skinny tee + basic pocket pants

For Finn’s Skinny Tee, I opted for the 1 inch cuff finish, and used my all-time favorite lazy person’s finish for the shirt’s hem: Lite Steam-a-Seam2. Just apply the strip close to the raw edge on the wrong side of the fabric, remove the paper, fold up the hem, finger press, then make the bond permanent by pressing with an iron.

matchy matchy skinny tee + basic pocket pants

Happy sewing, everyone!

kcwc guest post: heather from well crafted

It’s hard to really get a sense of someone over the interwebs, but I think if Heather lived anywhere near me I would be on her doorstep quite often. She does so much, so well: mothering, cooking, sewing, knitting, dying, and a good deal more. All of it is done with a simple, “hey what if I did this” attitude.  Then whatever she ends up making is perfectly stunning. You can see all of her work on her blog, well-crafted.

heather from well-crafted

Hey there! I’m honored to be included as a guest here on elsiemarley and am really looking forward to KCWC next week. My plan is to stick with making things my girl will really need and wear this summer. Since she pretty much only lives in knit tops and leggings, it was perfect that I got to give the Flashback Skinny Tee pattern a whirl! Because the pattern only goes to size 5, I had originally thought I’d give away the finished tee but it ended up fitting L perfectly and so we are both happy about that!

FBSTforKCWC.03

This pattern is an excellent basic. I stuck with a fairly straightforward version of it, with the only changes being the band at the bottom (really into that right now) and short sleeves. Oh the things you could do with this: asymmetrical hems, boat-neck, flared out and turned into a dress with elastic at the waist, shorten it and add a dirndle skirt (maybe using a woven). The possibilities are endless.

My big box of knits got dragged out from under the cutting table and despite it’s being full of beautiful col0rs, we went with this white one for two reasons: 1. It was the softest. 2. I had white thread in my serger. Three cheers for laziness!! To spice things up we did a little freezer paper stencil design on the front. I cut out tiny triangles in a grid pattern and we took turns painting each row to create a rainbow effect. We used this fabric ink instead of paints which turned out really nice.

FBSTforKCWC.02

FBSKforKCWC

It was good to sew with a knit fabric again—it’s been a while for me.  Although I am still doing battle with the “ripple effect” around the sleeve holes, I refuse to let that get in my way of creating a summer wardrobe full of knits for my comfort-loving girl! Maybe I’ll even use this pattern as the basis for all the clothes I make next week. That might be cool…

Don’t forget to check back each day this week for more KCWC inspiration.

Thanks again for having me Meg!

color block pillow tutorial

color block pillow

Here is a little project to spring up your home.  I made this pillow in springy greens, but any colors would of course work. Ticking would look very nice, with the stripes going opposite ways. The pillow is based on a simple quilt square (does it have a name?) and comes together super fast.  Happy Spring!

color block pillow

color block pillow materials

materials:

  • two squares of fabric slightly larger than your pillow
  • square pillow form
  • zipper slightly smaller than your pillow


directions:

1.  Cut your fabric 2 inches larger than your pillow. For example: my pillow was 13in square, so I cut my fabric into 15in squares.

color block pillow step one and two

2. Put the squares together, right sides facing. Using a straight edge, draw a line diagonally across the fabric. No one will see the line, so you can use a regular pencil or pen.

3. Sew 1/4in from the line. First sew on one side of the line, and then on the other. You will have two seams, one on each side of the line. This is shown more clearly in the photo below.

color block pillow step three

4. Cut directly on the line you drew.

color block pillow step four

5. Ta Da! You now have two squares. Open them up and press the seam to one side–the side with the darker colored fabric.

color block pillow step five

6. Now you have a choice. You can line the squares up, right sides facing, with the seams also alined like I did in the photo above. Or you can arrange it so the triangles are oriented differently on each side–the seams will not line up, but will make an X. Play around with it and see what you like. But unless you have a clear fiberglass couch no one is going to see both sides at once.

7. I am not going to explain how to do the zipper, because there is a good tutorial that does it already–Sewing 101: Zippered Throw Pillows. This is the method I use for putting zippers in pillows and it is dead easy. There are other ways that look a bit nicer, but this one is super fast and hard to screw up. I encourage you to try it if you haven’t used zippers before–you will succeed, I know it!

color block pillow done!

8. Try the pillow on your pillow form. It might need some taking in. I had to take mine off and sew it a bit smaller to make it fit. Hey look, you’re done! And you made a super chic, color block, geometric, trendy as all get out pillow. Your couch will thank you.

zakka style

zakka style

Rashida (of I heart Linen fame) contacted me a long while back to see if I would contribute to her new book, Zakka Style. Of course I said yes! I remade this project, so I could fix the pattern and change the colors a bit. I never did get around to making and selling these pocket pillowcases, but yay for my laziness because now you can make them!

little pocket pillowcase project

The pattern really is quite easy and makes for a lovely gift. The diamonds are fiddly, I won’t lie, but you could skip them and sew any sort of patchwork your heart desires.  The whole book is filled with simple and clever little things to make. And they are designed by some of my favorite people: Holly, Amanda, Leslie, and a good deal more.

continuous towel with patchwork edging

I actually made two projects for the book, but the second one didn’t make the cut. Remember this towel I made? Well, I reworked that project as well: a little bigger, nicer patchwork, and in linen. This continuous towel doesn’t fit in my bathroom and though it does look kind of nice in my kitchen, I think it would look better in yours.

zakka style giveaway

That’s right, a little giveaway for this Tuesday: Zakka Style and a zakka stylish linen towel. To enter yourselves in this giveaway, I would like it if you’d answer a question for me. How do you read blogs? Do you use google reader, links from facebook, twitter, flickr, pinterest, old fashioned bookmarks, something else entirely? I want elsie marley to be easily accessible to all of you, which is easier if I know how you are all accessing it :)

psst: if the answer is facebook, well wouldn’t you know elsie marley’s got a facebook page.

Ok so leave your answer before Thursday Feb. 23 at 9am and I’ll let the robots do the picking. This giveaway is open to all my lovely readers, no matter where you live. Good luck!

 The giveaway is closed! 

christmas robes

christmas robes

I wasn’t going to make my kids anything for christmas (what a horrible mother!) but then dammit, all my friends were making these beautiful robes for their kids. Basically I am 33 and was peer pressured into this sewing project.

christmas robes

Of course I’m glad I did sew them, because my kids look pretty adorable in their cozy flannel robes. The robe pattern came from Sewing For Boys, which I reviewed here.  The pattern comes together very quickly. Leave off the pockets and you could have one finished in a few hours. Make your own fiddly pocket pattern with contrast piping and it will take you a lot longer.

christmas robes

There is one mistake in the book. You must connect the two front pattern pieces before you cut your fabric, but that important step is missing from the directions .  I only realized this after I cut out all my pieces from the PLAID FABRIC! Oh, what’s that, you can’t tell? That is because I’m the master-plaid-matcher!

christmas robes

The fit of the robe is straight up old man robe. So sizes don’t matter all that much. I made the size 6/7 both for my 6 year old daughter and almost 5 year old son.  The fit is great on both. For their 2 1/2 year old brother I made the 2/3 size, but I should have gone a size up. His robe did get a little shorter because of the plaid matching I had to do, but a bigger robe would have fit him better and for longer too.

littlest robe

A few other things I would do to the pattern if I make it again:

  • shorten the sleeves a bit.  They are meant to roll up, which is why they are so long, but they roll up a little too much for my taste.
  • make the ties a least a foot longer. Makes it easier for little hands to tie (around those big bellies).
  • lengthen the pattern a bit–especially for the smaller sizes.

A couple things I did right the first time:

  • I made a hang-y up-y loop that I sewed inside each robe. It makes clean up time a tiny bit better.
  • I skipped the belt loops and just sewed the tie to the back of the robe in one spot. That way the belt cannot be used as a leash or a jump rope or weapon.
  • I read the fabric requirements. Each robe, each one, takes about 4 yards of fabric!