Posts Tagged ‘toddler’

snowmen

Yesterday we were buried under almost a foot of snow, so we made meringue snowmen.  I had this little project stored somewhere in the back of my brain for a while and it was the perfect day for it. I whipped up some meringue, piped them onto a sheet pan, and the kids decorated them.  We didn’t have much (and there was no going to the store) so I cut raisins up for the eyes and we used the 10 red hots that were left. I didn’t want to use chocolate chips because I thought they would melt. But now I’m realizing I should have cut up some dried apricots for noses! oh well. I also forgot the peppermint extract, so they don’t really taste like much, but the kids don’t care at all. The meringue is sticky as all get out, so it’s a good idea to wet your fingers a little before you start decorating.

snowman meringues adapted from martha stewart

  • 3 large egg whites
  • 3/4 cup sugar
  • 1/2 teaspoon peppermint extract (or vanilla if you don’t have peppermint)
  • raisins, currants, dried fruit, red hots, or whatever else you have on hand for decorating

directions

  1. Put egg whites and sugar in the bowl of an electric mixer. Set bowl over a pan of simmering water, and stir until sugar has dissolved and mixture is warm to the touch, 2 to 3 minutes.
  2. Transfer bowl to an electric mixer fitted with the whisk attachment. Mix on medium-high speed until stiff peaks form.
  3. Mix in peppermint extract (don’t forget)
  4. Put the meringue into a piping bag with a large tip (or a ziploc bag with a clipped corner, or just use two spoons). If you have a silpat, use it. If not put some parchment paper on a cookie sheet and “glue” the corners down with a dab of meringue. Then pipe three adjoining circles–a snowman, silly.
  5. Decorate and pop in a 175 degree (Fahrenheit) oven for two hours. They will look exactly the same when you take them as they did when you put them in.

This is turning into a tutorial week! Tomorrow I’ll have the directions for the string of lights advent calendar and who knows maybe I can rustle up another tutorial for Friday (but don’t hold your breath). Also, a couple people have emailed me asking whether or not the mobile swap is happening again this year. And yes! it is. Sign up will start in January. Last year it was a big success! And I’ve even got an idea for my mobile already.

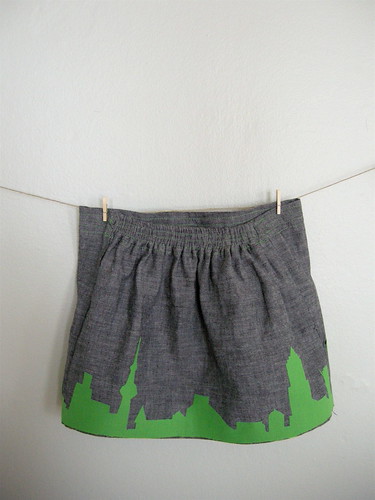
kid clothes week part three

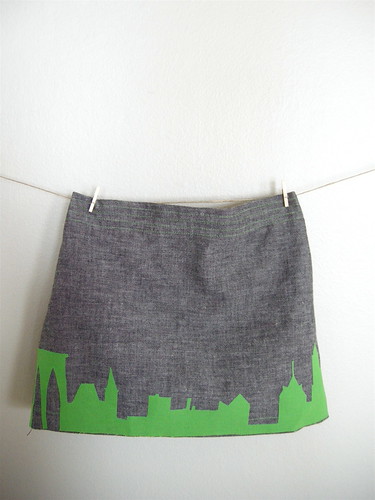
just one more and then kid clothes week is over for reals. I think the skirt was actually the first thing I finished, but I ran out of double sided fusible interfacing and it took me a few weeks to get my butt to the fabric store for more.  First I drew a skyline without any reference and it was pretty sad, so I looked up skyline on flickr and ta da! There’s a little New York, a little Shanghai, and a little Cleveland on this skirt and maybe some Chicago on the back.

I’m thinking about selling a few of these in my shop, maybe doing a county version too.  I still have no idea how to size a pattern (anyone? anyone?) but I’m confident I can wing it. Next week is making stuff for the shop week, so we’ll see. I put a few things up (have a look!) but there are many diggers to make, so I don’t know if I’ll even get to the skirts. Hope everyone had a good weekend. I’m off to have cocktails and listen to some french gypsy music with my best pal.

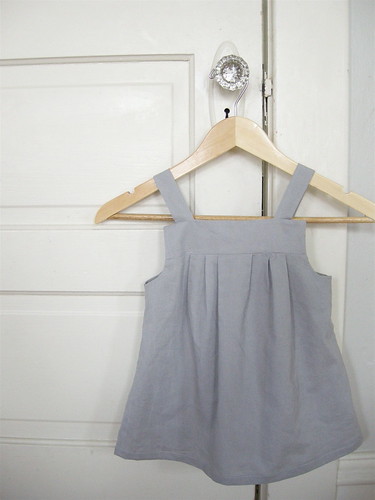
patchwork jumper

This is the first dress I’ve made for my daughter, even though I’ve bought yards (and yards) of different pretty prints since she was born (2 and a half years ago!) intending to make many dresses and skirts. I was nervous about using a pattern and nervous about trying to fit a garment on a toddlers, but they are straight little noodles, so really it’s not hard at all.  When Martha from Uniform Studio started making a garment a day for the month of may, I thought if she could whip out 30, then I could probably make one.   So now that May is 2/3rds over it’s done. Granted it took me most of the month to find the pattern, but last weekend at the thrift store there it was and for 10 cents!

I had the idea for a little dress with a big pleat in the front and a strip of patchwork going down the middle and it turned out exactly the way I wanted, thanks mostly to the pattern.  The back and the front are the same in the original, I just combined all the little pleats into one big pleat in the front and kept the back the same.

There is a lot going in these parts over the next month, so things might be quiet here.  I’ll try to pop in once and a while, but I don’t think I’ll have much time for making.  In the meantime, I’ve updated some of my links (especially the clothing section) so you can jump over there for your craft blog fix.

have a great weekend!

making leaves

Today is Monday, so my daughter and I had a little crafty time together.  I wanted to try making a collage with contact paper for a while now.  She’s only just 2 and she hasn’t quite mastered the glue stick yet. We gathered our supplies: contact paper, tissue paper, leaves and twigs we picked up on a walk, and fabric scraps.  We slapped everything down –well, I arranged mine–on the sticky side and then put another piece of contact paper (sticky side down) on top of it all. It looked like this:

Then I cut out leaves and taped them to the window.  I think this is a good craft for the toddler set.  Tearing paper and sticky things are pretty exciting to my daughter so this project actually held her interest for a while.  Contact paper isn’t all that sticky, so the tissue paper worked best.  But if you are crazy like me and save the tiniest scrap, well they work too and I think thread would look nice.  Leaves work if they’re pressed (ours weren’t) and you get leaves in leaves at the end, which is exciting only to me.  You could, of course, cut any shape out: turkeys, christmas trees, vacuum cleaners, whatever.  When it came time for cutting, my daughter was already on to other things, but 10 quiet minutes is pretty huge.