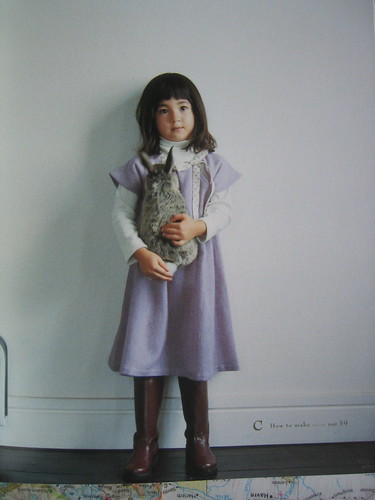
I bought the Liberty of London cookie jar from target for my mom’s birthday. I also picked up a kid’s sundress while I was there solely for the fabric, but now a little bird tells me they will be selling cotton curtain panels (aka straight up yardage) sometime soon!

Now you can’t just give someone a cookie jar and not put cookies in it, so I made some chocolate cherry oatmeal cookies and damn if they weren’t pretty good.  Dried cherries are dear, but they are so, so good. Raisins would work, but then they would just be oatmeal raisin cookies and that’s no fun.

Chocolate Cherry Oatmeal Cookies

Ingredients

  • 2 sticks unsalted butter, room temperature
  • 1/2 cup packed light-brown sugar
  • 1/2 cup granulated sugar
  • 1 large egg
  • 1 teaspoon vanilla
  • 1 1/2 cups all-purpose flour
  • 1 teaspoon baking soda
  • 1/4 tea salt
  • 1 1/2 cups oats
  • 1 cup dried cherries
  • 3.5  ounces good dark chocolate, coarsely chopped

Directions

  1. Preheat oven to 350 degrees.
  2. Cream the butter and both sugars on medium speed until light and fluffy, 2 to 3 minutes. Add the egg and mix on high speed to combine. Then add the vanilla.
  3. Sift together flour, baking soda and salt. Add the flour mixture to the mixer (make sure it’s on low) and mix just until combined. Add the oats, cherries, and chocolate and mix by hand.
  4. Spoon heaping tablespoons full of dough, a couple inches apart, onto a lined baking sheet.
  5. Bake cookies until golden brown, about 15 minutes. Cool and give away or keep them all for yourself.

easter dress

April 2nd, 2010

DSCN1468

This is the first year that I’ve made my daughter an easter dress. I think it was just too hectic the past few years for me to get one done, much less done on time. But this one was done with a week to spare! Can you believe it? Well the hem is pretty wonky, but I don’t really care because she loves it.


source

The pattern is from the japanese book Girly Style Wardrobe. The dress is incredibly simple, but in japanese it’s a little harder. I could not for the life of me figure out how they wanted me to cut pattern pieces for the tie, so I just made it up as I went along and they are shorter than I would have liked, but whatever. I did actually make a muslin (because the floral fabric she chose for the dress is vintage and so, so lovely) and I should have learned about the tie with the muslin, but I screwed it up totally on that one and didn’t fix it, even though that ‘s what muslins are for silly (I’m sure it will show up on ye ol blog sometime).

I would like to make my son a tie to match, because how adorable would that be, but easter is two days away and there are eggs to dye!

DSCN1422

The reverse applique swing skirt from Alabama Stitch Book by Natalie Chanin has been on my to do list for so long now, so long that she has written and published a new book in the mean time. I thought I might be able to make this skirt in time for easter, but it is far from finished. I’m not quite sure if it will work anyway. I went to Joann’s to get the cotton jersey called for and of course they don’t carry cotton jersey.  Poopy Joann’s, almost without fail they will be out of or not stock exactly what I what I go there for.   So instead of cotton jersey I got two different fabrics: the blue is a knit interlock and the purple is a rayon jersey. I don’t know if the blue is stretchy enough. I thought maybe the super stretch rayon jersey would make up for it, but then the fabric paint I got at poopy Michaels is hard and scratchy and it might keep the fabric from stretching even more.  Michaels used to carry the nice jacard fabric paint, but they stopped and switched to the cheapy kind. I need to plan ahead so I won’t have to go to these damn stores.

DSCN1426

So we’ll see if it works. I might have to make it all again, but it’s actually been kind of fun so far. And I love me some freezer paper stencils. Printing this pattern over and over really makes me want to print my own fabric (for what, meg? more projects, really you need more projects?).  It wouldn’t actually be that hard now that I’ve discovered the lazy man’s way to use stencils.

DSCN1464

and now for the lazy man’s freezer paper tip:

When I was making this skirt I didn’t want to cut 20 or 30 leaf stencils, so I cut 3 and used them over and over again.  I couldn’t wait for the stencils to dry between uses (time is precious! the baby is napping!) so I put another piece of freezer paper over the stencil, plasticy side down, and ironed over both. Then I gently peeled the top freezer paper off and voila! the stencil was ready to use again. The paint was still wet on the stencil, but as long as there are not glops of it, it won’t come of or bleed onto your fabric. The stencil might come loose a little in places when you peel off the top sheet, but this is the lazy man’s way after all, if you want perfect, well then do it your way miss perfect.

quickbunny

I really wanted to make the sock bunny that Heidi (from My Paper Crane) created, but I didn’t have any of those fantastic red and brown monkey socks. What I do have is baby socks: tons of cute, mismatched, totally useless, never stay on baby socks. Now that my littlest is very much not an infant and too soon will be a toddler it seems kind of silly to keep all those teeny tiny socks. So I made a bunny out of them. And a tutorial too.

DSCN1529 DSCN1537

This is indeed a quick little bunny. After I figured out the pattern, start to finish each bunny took me just 15 minutes.  So if you are anything like me and never get around to the easter baskets until the night before, you can whip up this little softie and still have time to run to the drugstore to score the last bag of jelly beans.

The quick little bunny tutorial

DSCN1486

Materials:

  • baby sock
  • a handful of stuffing
  • heavy duty thread
  • scissors

Make that bunny:

Before you start sewing take second to look at the sock you have. Most of the foot part will be the body and the heel area will be the head. Yours might be a little different, depending on your sock. If you look at the picture below you can almost see the bunny already.

DSCN1495

the body:

Take some stuffing and stuff the foot part of the sock–not too tight! this is just a little, squishy baby bunny. Where the foot part ends and the heal begins sew a running stitch around the sock and pull to gather it. I like to wrap my thread around where I’ve stitched a few times just so it’s secure. Knot your thread and snip.

the tail:

DSCN1498

On the top of the bunny’s back,  sew a circle about an inch in diameter with a simple running stitch. Then pull to gather. You may have to mush the stuffing around so you can pull it tight  to make a tail shape. When you have a little bunny tail, wrap your thread around a few times and knot off (do people say “knot off?” does it sound too much like I’m yelling at you to go “knot off!”).

the head:

DSCN1504

To make the head, put a little stuffing inside the sock and sew a running stitch around the top of the heel. Before you pull it taut make sure all the stuffing is pushed down under your stitches. Then wrap the thread around and knot off!

the ears:

DSCN1508

Cut a big V shape out of the top of the sock. Now trim the top part of each ear to a point.  Then fold the two sides of the bottom part of one ear in to meet and sew together. This is a little easier to understand when you look at a picture:

DSCN1509 DSCN1511

When you sew that seam down the middle of the ear, it’s good to catch some of the back of the ear with your stitches, so the ears are a little thinner.

The attitude:

Okay, that is a dorky title, but this is the fun part. Now you can play around with the ears and the head, moving them to where you want and putting a stitch here and a stitch there so they will stay.

DSCN1515

You don’t have to give your bunny an attitude, but you should stitch the back of the head to the body a little, so it looks more bunny like and less like a cinched up sock. There! you did it! Now go dig around in the sock drawer and see what else you can make into a bunny.

DSCN1538

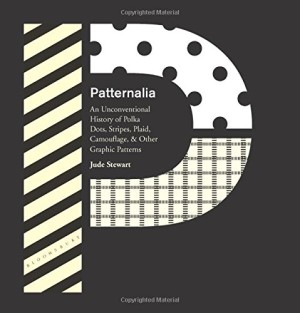
I am, admittedly, one to judge a book by it’s cover.  I mean if it’s crap inside, I’m not reading it, but I’m still happy to look it at (luckily I have discovered the inter library loan system and now am not broke with a house full of poorly written, pretty books). This is the picture of a cover of the book called Book Quilts 1700-2010. Kathreen wrote about it on whipup and I’ve been itching to get my hands on it ever since (it hasn’t been released quite yet). I mean just look at that quilt on the cover!

Magda at bohemian girl made some monotype butterflies with her son, painting a design on one side then folding it in half to print on the other. We followed suit with some butterflies of our own a few weeks ago, but now that spring has stalled a bit we may need to make them again.  The mask she made in the same manner for carnival and I just can get over how eerie and beautiful it is. (Magda also has quite a nice etsy shop, if you didn’t know)

I loved the double wedding ring design the first time I saw it, but always thought it was a little too old fashioned for me to make for my home. Denyse Schmidt, of course, made a super fantastic modern version called the single girl quilt, but it’s been a long time since I’ve been a single girl. So when Molly posted this photo of her friend’s quilt I was in love all over again. They took this very traditional quilt pattern and made it super modern. It might even be a little too modern, but a few prints thrown in the mix could even it out for me. Go check out the post, because Molly has some nice thoughts on this modern/traditional juxtaposition in design.

And one little awesome baby coat rounds out this week’s things on the internet that are awesome.  It’s a poncho! It’s a jacket! It’s two! two! two mints in one! It’s the crabby baby jacket, designed and skillfully executed by Lisa from Mama Uses Needles. I’ve always said that baby clothes should have no arms and finally someone heard me. This poncho pops over the little one’s head and then you just zip it up the sides. genius! and cute to boot.