My middle son is jumpy and crazy and skinny and tall–all of which make his pants fall down quite often (if he is wearing pants that is), so I thought I’d make a belt for him. In honor of Celebrate the Boy month at Made and Made by Rae I drew up a pattern to share with all of you.

The finished belt is 1 1/2 inches wide and adjusts to fit waist sizes of about 20 inches to 24 inches. To make a different size take the waist measurement you want to use then add 8 inches: the main fabric will be (waist size + 8)inches by 3 1/2 inches and the lining fabric will be one inch shorter.
Materials:

- one piece of fabric cut 30 inches long and 4 inches wide, preferablly cut parallel to the selvege, but as long as it’s not cut on the bias it will work out just fine.
- one strip of canvas or denim (or something that is a similar weight) 29 inches long and just shy of 1 1/2 inches wide.
- three snaps and snap setting tool
- one 1 1/4 inch D-ring
- scissors, pins, iron, sewing machine
Steps:
- Fold your strip of fabric in half the long way (wrong sides together) and press.
- Open the fabric back up and with the right side down, fold the top edge down 1/2 inch and iron, then fold the bottom edge up 1/2 inch and iron.
- Set your strip of canvas or denim on the bottom half and fold both short ends over it and press
- Miter your corners: fold the corner diagonally, so it makes a right triangle where the middle of the longest side (the hypotenuse if you paid attention in geometry) of the triangle lies on the point where the folds of the short end and the long side meet. This makes much more sense if you just look at the picture. And this is just how I do mitered corners, of course you can do it any way you know how.

- Sew all around the belt anywhere from 1/8 inch to a 1/4 inch from the edge–whatever looks best to you.
- Pick one side of the belt to be the right side (the one that will face out) and put that side down. Slide the D-ring onto the left end of the belt, fold the end over it one inch and sew down. Sew back and forth a few times to make sure it’s secure.
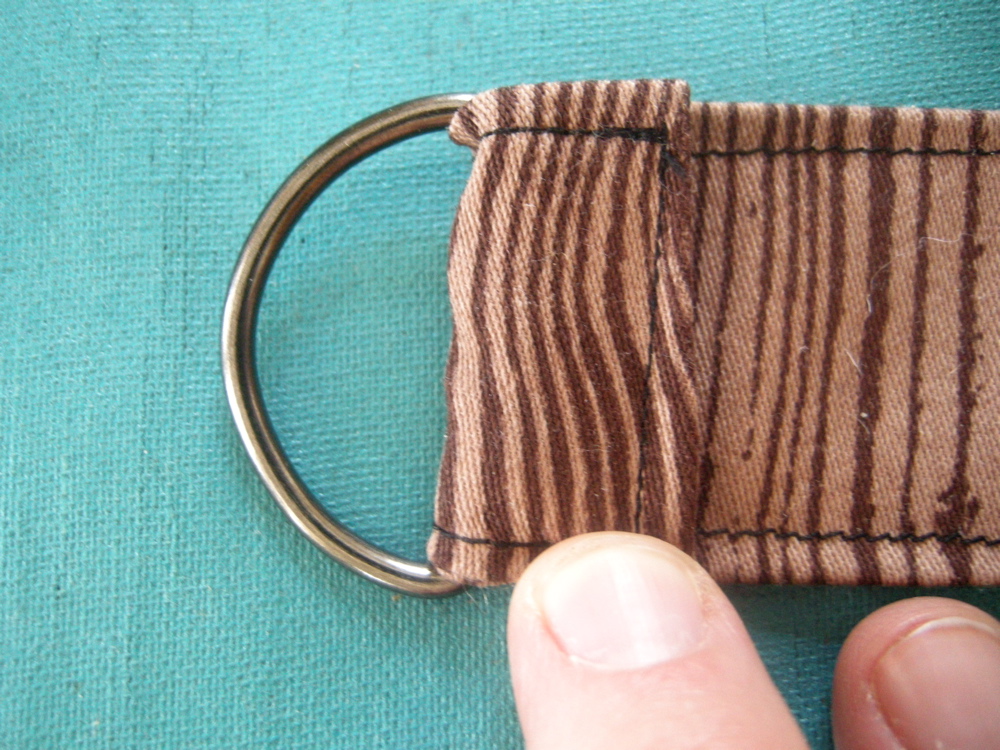
- Now for the snaps (I used heavy duty snaps for the wood grain belt, but there are a lot of options out there). With the right side down again and the D-ring to the left, attach the top part of three snaps: the decorative part on top and the male part (for lack of a better term) of the snap on the right side of the belt. The snaps should start about 1/2 from the end and be about an inch or so apart.

- 6 inches to the left of the last snap attach the bottom part of the snap: the female part of the snap should go on the right side of the belt and the very bottom piece of the snap should go on the wrong side (the side that will face in). This seems wrong, but it’s not. The belt will go through the D-ring and then fold back on itself and snap.

- Find some pants with belt loops and try that sucker out! Look at you, you just made a belt!
Variations:
- To make a skinnier belt, your fabric strip should measure 30 x 2 1/2 inches and the lining should be 29 x 3/4 of an inch. Then just follow the directions for the wider belt.
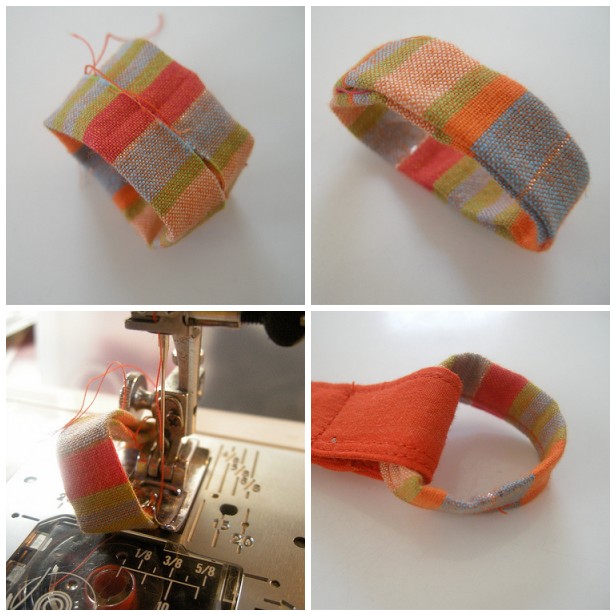
- I thought it would be nice to have a fabric buckle for baby belts (yes, it’s ridiculous I know, but so are baby sneakers and I bet you have some of those) so the metal doesn’t jab their pudgy tummies, or if you don’t have a d-ring around, or if you’d just like to make a cool fabric buckle, whatever, this is how you do it:
Cut a piece of fabric that is 6 x 2 inches (for the skinnier belt, cut 4 x 2). With right sides facing sew the ends together, so you have a small fabric ring, then fold both the edges in (wrong sides together) to meet each other in the middle. Fold in half again and sew. It’s easiest to sew with the loop going up over your presser foot than the other way around. Attach the fabric buckle just like you would the D-ring, making sure the seam is hidden under the fold and the nice side is facing out.
-
Buttons! Sew button holes where the snaps would go and then sew some buttons on.
There are so many other things that can be done with this belt: topstitching, grommets, snaps all around, a matching mama belt! If you make one from this tutorial (or any other tutorial of mine) remember to add it to the elsie marley flickr group. And please add a photo or two to the Celebrate the Boy group on flickr too!
Go Boys!
Posted in tutorials. 44 Comments »
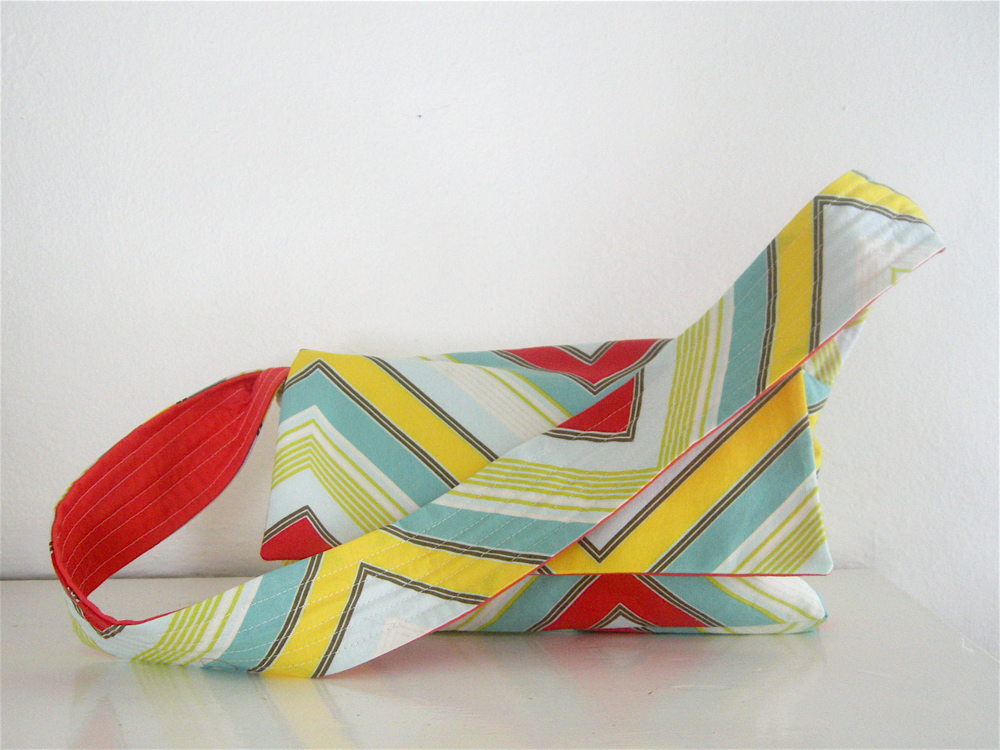
I put some new kiddy messenger bags in my etsy shop today. I am working on a pattern for this bag, but since this third baby came a long things seem to be taking three times as long, so you’ll just have to be patient. My daughter started insisting none of her drawings be folded, which they have to be in order to fit in her bag, so she’s asked (demanded really) a new, bigger back pack. I might just have to draw up another pattern while I’m in the pattern making mood.
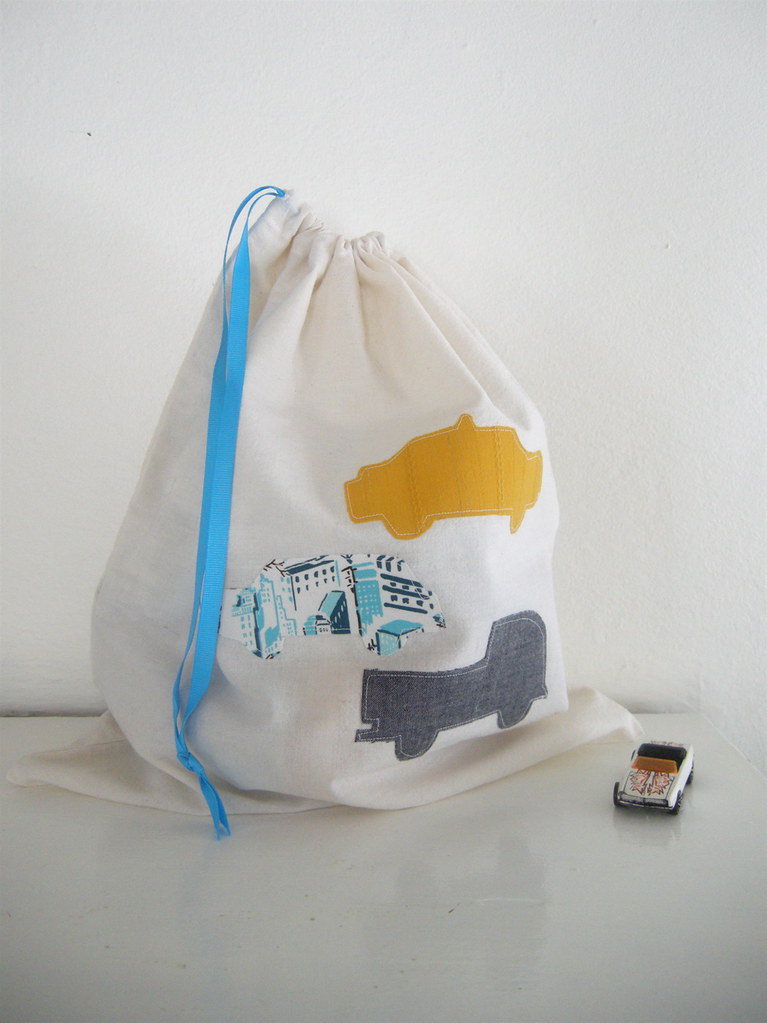
I also put a couple new toy bags in the shop: one little people bag and one with a new car design. And while I was working in my studio I found a lonely little bear in a pile of fabric waiting to be loved. Her name is Lucy and she’s made from a vintage sheet and cashmere and stuffed with wool, so she’s soft and super huggable.
If you are here from design*sponge, welcome! Take some time and have a look around. I hope you all have a good valentine’s day weekend! See you next week.
Posted in sewing. 6 Comments »
I feel a little funny calling a post “my bathroom” so we’ll just stick with before and after, because that’s what this is.

My bathroom is 8×6: a sink, a toilet, a bathtub, and an obtrusive radiator all fit in the tiny space and accommodate this family of 5. The photo above shows how it looked three years ago when we moved in. It wasn’t great, but it came with the house so we had to work with it. The pedestal sink was nice and skinny and all, but we own things and they need to go somewhere. There wasn’t anything wrong with the sink so there wasn’t any need to replace it, though I did hate it. The toilet topper, or whatever the hell those things are called, went out right away which made the bathroom feel much bigger. A year later, my brother was installing a light in the ceiling and dropped his hammer on the sink. Suddenly we had to replace the sink and super fast because my brother was leaving and he knows something about installing sinks, whereas we know nothing. The sink and faucet came from our local hardware store and the cabinet was a lucky, lucky find at an antique shop. It was 100 bucks, which I thought was crazy expensive, but all that storage space has been worth it.

This is a during shot. It’s hard to tell from the picture but the people who owned the house before us ripped off the tile that was on the wall and then just painted, just painted over the glue that was underneath. The tile was a peach colored plastic tile, but still, you can work with that a little better than painted glue. Why this didn’t tip us off to their halfassedness I don’t know–you are just blind when buying a house for the first time (or at least we were). You think you’ll just fix everything up lickity split. Yeah, that doesn’t happen because the water heater breaks or the basement floods or you build a fence in the backyard or go and have more kids (or all of the above plus some). So I am embarrassed to tell you how long ago I took this during picture. But it doesn’t matter now because it’s done!
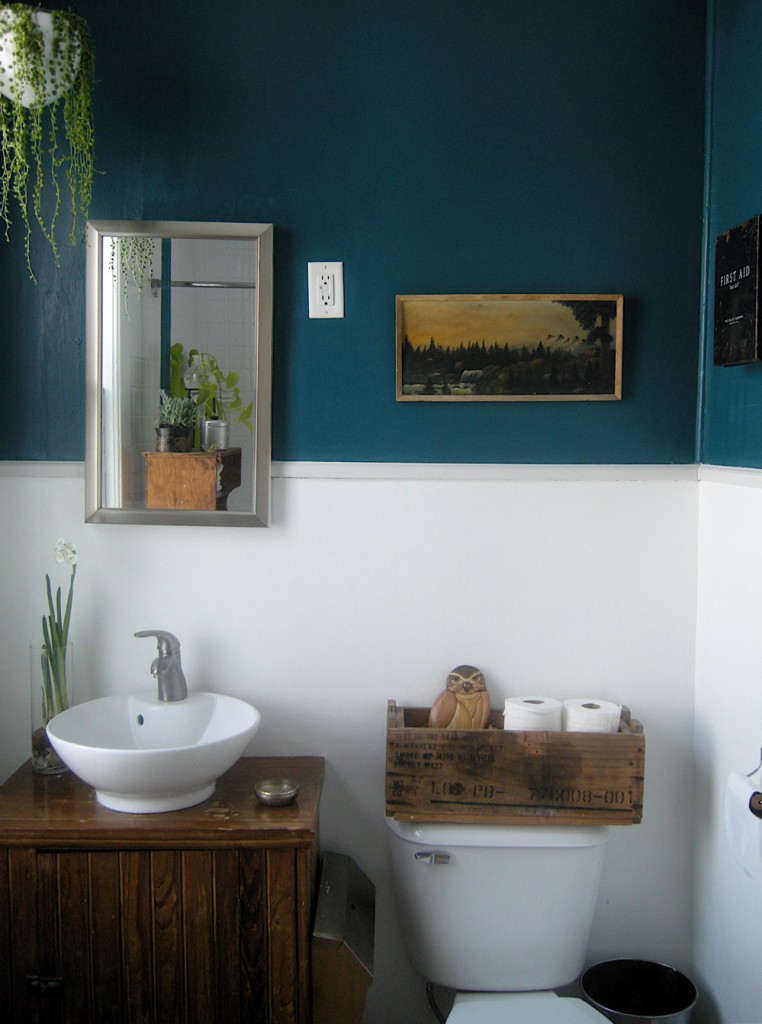
I had to plaster and sand and plaster and sand and plaster and sand over the glue, but that 6 dollar bucket of plaster made a huge difference. I painted it white and painted the top bit peacock blue, which is my new favorite color. The shiny thing attached to the cabinet is a mailbox! I trash picked it a few years ago (why? I don’t know. We didn’t need a mailbox, but I can’t resist good trash). It holds books and magazines and has an added bonus of protecting them from all the sink splashing my kids do. The toilet paper holder is an old warhead box–really it is–that I stole from my high school boyfriend. The owl we got as a wedding present and the picture above it was a thrift store spurge. I got the metal first aid kit off ebay and we keep all the medicine locked up in it, so the kids don’t get into it. The paper whites bloomed just for the picture and the hanging plant is called string of pearls, which is a pretty succulent. All in all I think we spent a little over 300 bucks (and three years) to get it all done. So there, now you more about my bathroom than you ever thought you wanted to. There are more pictures on flickr if you want to see more!
*edited to add: the paint is called Realm and it’s made by Behr!
Posted in my home. 40 Comments »
I’ve had yet another crochet fail, so I’m going to drown my sorrows in the fantastically creative work of others:

These despondent little leaves are an example of the beautiful work by Lola Goldstein. I never thought I’d be in love with leaves that suffer from ennui. Her soft boiled egg set with a little egg shaped salt shaker is pretty cute too.

I’m not much for resolutions mostly because my birthday comes up pretty fast after new years (this friday!) and it’s depressing to take stock and realize you so quickly fell short of all those goals you set just four weeks ago. But this creativity chart by Eerika from rag pets is simple and beautiful and is more about keeping track then MUST SUCCEED! She simply colors in the block if she has been creative that day. You could color code the squares or just go crazy with your box of 64 crayons. Someone in the comments even suggested making a quilt based on the chart when the year is done, which is fantastic and reminds me of Lea Redmond’s idea of knitting a scarf where the color of the row depends on the color of the sky that day (she also does the world’s smallest valentine, which is super awesome and seasonally appropriate).

I have wanted a set of letter cookie cutters for a while, but I am now totally holding out for these helvetica shaped cutters by Beverly Hsu.

and last, but far from least, on the list of things that are awesome on the internet this week is this curiosity cabinet by Suzanne Norris. I think the octopus is my favorite. It’s sold in this amazing shop called the Otherist–in Amsterdam– that I discovered via Kasa at the paperama blog. It looks like a beautiful shop to visit, but their online shop ain’t too shabby either.
Posted in inspiration. 11 Comments »
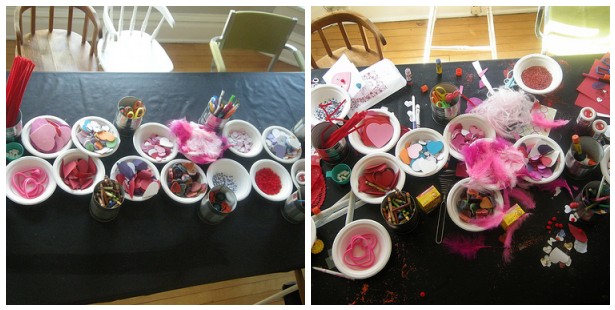
On Friday all my kids’ friends came over for a valentines making party–yes all! have you ever had a party where every person you invited could come and then think holy crap! everyone is coming? At the last minute a few kids couldn’t make it, so it wasn’t quite as chaotic as I thought it would be, but we are still picking glitter out of our hair (four days later). The kids are still pretty young, so there weren’t any projects proper, it was a how many different things can you glue to one card sort of deal. My son’s inner glitter lover came out and he used up most of what we had. Actually after the party was over my kids worked on their valentines almost until dinner time. They would get up from the table every once and a while and help themselves to the leftovers at the buffet. It was a rare day in motherhood where I was aloud to sit back, cuddle with the baby, and crochet as I please.
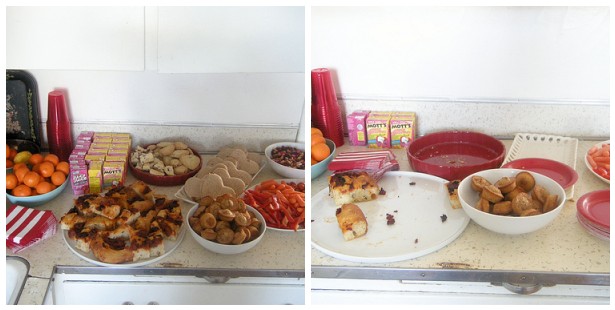
I got kinda themey with the food. It was supposed to be all heart shaped and red, but ended up rather brown and carby. I made tomato focaccia from my bakery days and it was pretty good, at least the two dogs who finished it off thought so. These financiers were a total bust: they didn’t taste very good–and financiers are usually super delicious–and the heart effect was fussy as hell and didn’t work in the end. Everything else was pretty run of the mill: heart shaped pb&js, red vegetables, trail mix. Martha’s raisin heart pockets were my favorite and I squirreled a few away to have with tea later. I know valentines day is all about chocolateness, but these were nice and wintery, not too sweet and perfect with tea. I used golden raisins in the filling, but I think dried apricots with a little cardamom would be even better. So go set up a little buffet for your kiddo’s lunch and open the glitter and savor some quiet time, or make some valentines yourself. Next year we might skip the christmas cards all together and just send out valentines.
Posted in craft, holidays, valentine's day. 10 Comments »


